DO NOT LEAVE THE GAUGE ON YOUR PRINTER WHILE PRINTING! YOU WILL DAMAGE YOUR PRINTER.
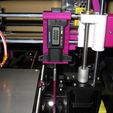
In addition to this accessory, you will need the gauge and my gauge mount. The gauge mount as shown in the first image is located here: https://www.thingiverse.com/thing:2991835.
The purpose of this thing is to allow the user to square their printer's bed to their printer's frame.
Auto leveling is helpful. I have it. But an auto bed leveler can only square the X-axis gantry to the bed. It cannot square the bed with the frame. A bed that is not square with the frame prints parallelograms in the Z-axis vertical plane (like the Leaning Tower of Pizza), not rectangles with 90 degree corners.
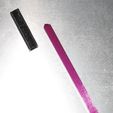
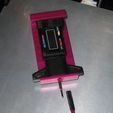
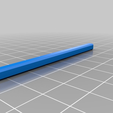
The gauge extension gets slipped into the square hole in the TPU coupler. A tiny hole in the coupler gets slid onto the gauge probe so that the probe extension can reach the tabletop. Both the coupler and extension are held in place by friction. I went through many versions to get the friction fit just right. There should be no need to drill the tiny hole or sand the extension.
Step 1. Squaring your gantry to your frame:
* Put your extruder in the Home position with the extruder in the middle of the bed.
* Mount the gauge with the extension on the left side of the X-axis gantry so the extension is touching your tabletop.
* Zero the gauge.
* Now move the gauge to the right side and take a reading.
* Adjusting your right Z-motor until it reads zero, too.
* Move the gauge back to the left side and check the reading.
* Repeat the previous 4 steps until your gantry reads zero on both sides. Tip: Overcorrecting slightly will get you to zeroes on both sides faster. You will see what I mean when you do these steps.
* Now your gantry is perfectly square with your A8 frame.
Step 2. Squaring your bed to your frame:
* Unmount the gauge and remove the coupler and extension assembly.
* Do not adjust the Z-motors.
* Remount the gauge.
* Imagine an imaginary line that intersects the two rear bed screws. Position the probe on that line 5mm from the rear left screw. This line becomes the pivot axis when leveling the front screws.
* Zero the gauge. Do not zero again unless your are starting over.
* Slide the gauge until the probe is 5mm from the right rear bed screw. Check its reading.
* Adjust the rear right bed screw until it also reads zero.
* Slide the bed so the probe is 5mm from the front right screw and is positioned on the imaginary line between the two front screws.
* Adjust the front right bed screw until it also reads zero.
* Slide the gauge so the probe is 5mm from the front left screw and is positioned on the imaginary line between the two front screws.
* Adjust the front left bed screw until it also reads zero.
* Repeat the previous 6 steps until all four corners consistently read zero.
Congratulations! Your bed is now perfectly square and level with your frame. It should stay this way and only require occasional checking. I have found that bed leveling thumb wheels that use Nyloc nuts will keep my bed level for months.
Your z-motors will settle to different heights every time a print is completed. For this reason I like to check them with the gauge before each print. If adjustment is needed, I readjust the right z-motor until both sides are equal. It only takes 15-20 seconds. I generally make this adjustment with the extruder in the middle of the bed.
The coupler must be printed in TPU or similar flexible material in order to achieve the correct amount of friction fit with the gauge probe and the extension. A brim is recommended. The extension should be printed in PLA or similar material. No brim or raft. Both at 20% infill. 0.1mm layer height.
The extension is 70mm long and is designed to be used when the gantry is in the Home position. If you require a different length, scale the extension in the X-axis only.
-VegasGuy

/https://fbi.cults3d.com/uploaders/30142993/illustration-file/3799f528-ab68-4cfb-b50f-42c3f61331e1/IMG_3933.jpg)
