Skip to content

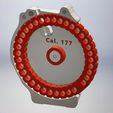
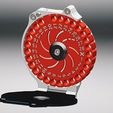
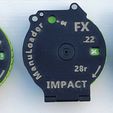
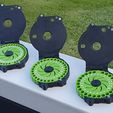
FX IMPACT .25 MANULOADER MAGAZINE. MULTI - SINGLE LOADER

🔫 3D models of guns or weapons are dummy objects or prop toys and have no real functionality as weapons. They are intended for entertainment or decorative purposes only. For any design violating our T&Cs, please report them.

Advertising
Advertising
?
Creation quality: 0.0/5 (0 votes)
Evaluation of members on the printability, utility, level of detail, etc.

  • 672 views
  • 1 like
  • 1 download

License
3D design format
3MF and STL Folder details Close
  • FX Impact ManuLoader - All - Center washer.3MF
  • FX Impact ManuLoader - All - Center washer.STL
  • FX Impact ManuLoader .25 - Body.3MF
  • FX Impact ManuLoader .25 - Body.STL
  • FX Impact ManuLoader .25 - Flip cover.3MF
  • FX Impact ManuLoader .25 - Flip cover.STL
  • FX Impact ManuLoader .25 - Rotor.3MF
  • FX Impact ManuLoader .25 - Rotor.STL

Learn more about the formats

Publication date 2023-09-08 at 22:14
Design number 1438298

PCPOlsen

3D printer file info

3D model description

This magazine works as a single loader!
With the Rotor in position X = empty You fill the magazine with pellets, slugs, close the magnetic fixed cover and Insert the magazine in your FX Impact rifle. Now with your hand manually turn the rotor to the first pellet or slug and close the handle to finish and be ready to shoot.
Between each shot you have to manually turn the rotor to the next pellet position. if you shoot you cannot feel there is a magazine inserted, each pellet hole is positioned and fixed via a small spring loaded steel ball placed internally in the magazine.

You get a full magazine capacity - you can fill the magazine from home with sorted competition pellets, and enjoy the maximum accuracy like when using a single loader.

I find it so easy and does not understand why this kind of magazine is not available from the manufactures.

I use ManuLoaders myself for all pellet shooting - Pellet Care Magazines for Slug shooting. in all my rifles.

Link to a general instruction video, how to finishing a magazine after printing: https://youtu.be/wunxeoAX39A

Shopping list:
3 nos. M3x8 Flat head counter sinked hex. socket screws (Black steel or electro galvanized. (Must be magnetic).
1 nos. ø6x2.5 Neodymium disc magnet
1 no. Steel or GFK pin ø4x8 mm
1 x Stainless steel ball plunger ø4 x 5 mm (YXP04 4MM X 5)
https://www.aliexpress.com/item/32959001335.html

THIS IS THE .25 version see my other designs for .177 and .22

3D printing settings

I use a glossy glass bed for all my prints:
I use Loreal Hairspray Extra Hold @75 degrees C for PetG
I use DimaFix bed adhesion spray at 100 degrees C. for ABS

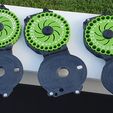
For the rotor I use ABS filament.
For the body, washer, and cover I use Petg.
The rotor In ABS is coming out of the printer with superior quality – specially numbers are easier to print with ABS. When I print with ABS scale the parts in X and Y 100.4% not in Z.

I print all with 0.16mm layer height. Be sure to calibrate your printer and optimize your slicer settings. Everything is designed to 0 tolerance so use your slicers XY horizontal compensation.
Print the rotor with the top face / numbers towards the print bed.
I prefer quality over speed so i print at 50 mm/s.

After print use a ø12 mm drill through the center hole of the rotor.
Cut m3 threads in the holes for the m3 x8 countersink steel screws.
The rotors pellet holes are drilled up to following depending of calibers:
.177 = ø4.8 mm
.22 = ø5.8 mm
.25 = ø6.8
Use a ø4 mm drill to clean out the hole for the Ball plounger. Be sure to hold the drill direction towards the center of the magazine.

Use a ø1 mm or 1.2 mm steel or carbon rod for the hinges. Drill free with a 1.0 mm or a 1.2 mm drill first while the cover is fixed in place. (You can fix the cover temporary by the center washer and for the ø 3mm guide pin

Infill 30%
Supports when printing:
Body: only touching bed.
Cover: no supports
Washer: no supports
Rotor: no supports

I recommend using the .3mf files over the .stl files - The .3mf files will give smoother roundness.

Advertising


Issue with this design? Report a problem.

Would you like to support Cults?

You like Cults and you want to help us continue the adventure independently? Please note that we are a small team of 3 people, therefore it is very simple to support us to maintain the activity and create future developments. Here are 4 solutions accessible to all:

  • ADVERTISING: Disable your banner blocker (AdBlock, …) and click on our banner ads.

  • AFFILIATION: Make your purchases online by clicking on our affiliate links here Amazon.

  • DONATE: If you want, you can make a donation via Ko-Fi 💜.

  • WORD OF MOUTH: Invite your friends to come, discover the platform and the magnificent 3D files shared by the community!


Sharing and downloading on Cults3D guarantees that designs remain in makers community hands! And not in the hands of the 3D printing or software giants who own the competing platforms and exploit the designs for their own commercial interests.

Cults3D is an independent, self-financed site that is not accountable to any investor or brand. Almost all of the site's revenues are paid back to the platform's makers. The content published on the site serves only the interests of its authors and not those of 3D printer brands who also wish to control the 3D modeling market.

100% secure payment by credit card, PayPal, Apple Pay, Google Pay, etc.
View all payment options.