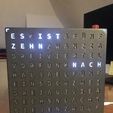
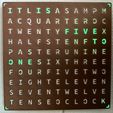
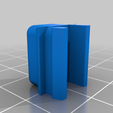
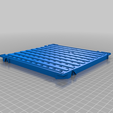
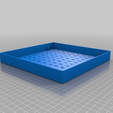
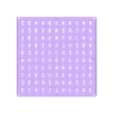
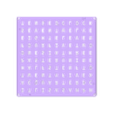
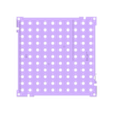
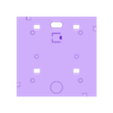
This is just another word clock which is especially designed to be printable with a 21x21 cm printbed. I Initially created this project in german, but by now also uploaded an english version of the frontcover. AWSW was so friendly to contribute a lot of software features to the project and further also developed an english version of the code. Don't hesitate to message me, if u need any help or translation into german!
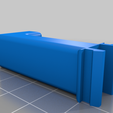
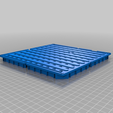
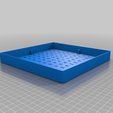
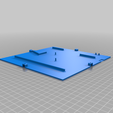
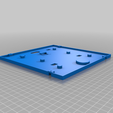
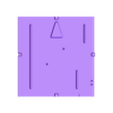
The clock consists mainly of three printed parts, the front cover, the middle part and the back plate. The front cover and the back plate are printed without support structures. You should use a dark filament for the front cover to prevent light from the LEDs to shine through the front cover material (solution for that coming soon). For the middle part, you should use support structures. In my experience, it is easiest to print this part with the side on which the LEDs will later be attached on is facing upwards and thus the light matrix printed first. Then you can press out supports through the LED holes with a screw driver.
Besides the printed stuff you will also need:
- some parchment paper (white baking paper or similar) as a diffuser layer (20x20cm)
- Four M3x10 screws to close the case
- Some scotch tape, double-sided tape and preferably some hot glue
- 1x microcontroller (preferably ESP8266), as the chip should be WLAN compatible.
- A time module, preferably the small DS3231, as there is no room for the big ones.
https://www.amazon.de/DollaTek-Precision-Speichermodul-Arduino-Raspberry/dp/B07MB8YGCR/ref=sr_1_6?__mk_de_DE=%C3%85M%C3%85%C5%BD%C3%95%C3%91&dchild=1&keywords=ds3231&qid=1608584039&sr=8-6
- Cables for wiring and of course a soldering iron.
- Micro USB DIP adapter: https://www.amazon.de/WayinTop-Breakout-Konverter-Netzteil-Steckbrett/dp/B07W13X3TD/ref=sr_1_3?__mk_de_DE=%C3%85M%C3%85%C5%BD%C3%95%C3%91&dchild=1&keywords=micro+usb+dip&qid=1608584148&sr=8-3
- And of course 114 LEDs. The clock is designed to be built with 10 strips of 11 LEDs each from a WS2812b tape (https://www.amazon.de/BTF-LIGHTING-WS2812B-300LEDs-Streifen-NichtWasserdicht/dp/B01CDTEJBG/ref=mp_s_a_1_1_sspa?dchild=1&keywords=ws2812b&qid=1613080045&sr=8-1-spons&psc=1&spLa=ZW5jcnlwdGVkUXVhbGlmaWVyPUExVkxKS0RPTzVHUFBYJmVuY3J5cHRlZElkPUEwMDk5MzE0UEtKOFdERFgwVkhWJmVuY3J5cHRlZEFkSWQ9QTAyNTIzMDQyVkVDWFVFSTRBWVU5JndpZGdldE5hbWU9c3BfcGhvbmVfc2VhcmNoX2F0ZiZhY3Rpb249Y2xpY2tSZWRpcmVjdCZkb05vdExvZ0NsaWNrPXRydWU&th=1) with 60LEDs per meter.
-In addition, you need four single LEDs for the minute display, which you can also cut off from the WS2812 strip and bend the ends with the contacts.
During the assembly, the correct wiring of the LEDs is very important. It is best to solder the LED strips with the cables together first and then place them on the printed middle part from behind. When soldering the LEDs together, take care that all of the arrows on the LED PCS show in the dame direction along the data cable.
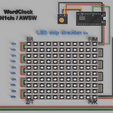
The following IMPORTANT section is about the laying of the data cable (white in my pictures), so that the LEDs are correctly addressed for the program. From the rear view (looking at the middle part from behind), the top left LED is the first in the sequence (i.e. the later letter F) and the bottom left LED is the last (i.e. the later letter R) in the letter matrix. From this last LED of the letter matrix, you go with the data line to the minute LED at the top left (at the F) and lead it once clockwise to the three other minute LEDs. Thus, the 110 letter LEDs are the first and the 4 minute LEDs the last in the series connection.
You can solder the cables for the power supply as you like, as the same potential (5V) must be applied to each of them.
The DS3231 is powered by 3.3V and the D of the DS3231 goes to pin D2 of the Nodemcu ESP8266, as well as the C pin of the DS3231 to the D1 pin of the microcontroller.
If you want to sacrifice a Micro USB cable you can cut it open and solder it to the DIP adapter in the clock and plug the connector into the socket of the controller. You can also plug a USB cable directly into the ESP8266 controller. This depends mostly on how you would like to setup the final Wordclock in your home. The DIP adapter can be arranged in two different ways in the Wordclock, either in that the power supply cable is plugged into the clock from the back, or from the side. To plug in the cable from the side you have to cut out the oval spot from the side wall of the front cover. I recommend to take a cutter knife.
To install the software onto the ESP8266 go to GitHub (https://github.com/N1cls/Wordclock) and download the latest software. At this point great thanks to @AWSW for contributing a lot of effort to this project and writing a heck of a program with a lot of very nice features. You can either flash the .bin file onto the chip with a flashing tool (e.g. https://github.com/marcelstoer/nodemcu-pyflasher/releases), or you can download the .ino file and compile yourself.
Once the code is on your ESP, the clock should open an access point which you have to connect to. A page should open in which you can enter your WiFi credentials and then you are ready to go. During the startup, the Wordclock shows its network IP with a running numbers. Enter this into the browser of your choice on a device connected to the same network to enter the setup menu of the clock.
To switch between German or English for the respective front cover, you have to choose the language in the Wordlock setup menu which you can enter via its IP.
I would be very happy about posts of your builds! If you have any questions (also about the original CAD files), just ask me ;) Make also sure to check out the Printables blog entry from AWSW about this Wordclock (https://www.printables.com/model/311949-wordclock)!
Cheers Niclas

/https://fbi.cults3d.com/uploaders/22742331/illustration-file/04663c6e-680a-4c71-b036-503c5a673ccb/Wordclock_NEU.jpeg)
