Skip to content

Makerbot Replicator Enclosure (No Laser Needed)

Advertising
?
Creation quality: 0.0/5 (0 votes)
Evaluation of members on the printability, utility, level of detail, etc.

  • 397 views
  • 1 like
  • 4 downloads

License
3D design format
Folder details Close
  • HOUSING_GLASS_FRONT_LOWER.pdf
  • HOUSING_GLASS_FRONT_UPPER.pdf
  • HOUSING_GLASS_REAR.pdf
  • HOUSING_GLASS_SIDE.pdf
  • HOUSING_GLASS_TOP.pdf
  • bracket_front_lower_left.stl
  • bracket_front_lower_right.stl
  • bracket_front_upper_left.stl
  • bracket_front_upper_right.stl
  • bracket_rear_left.stl
  • clip_front_window_lower.stl
  • clip_front_window_upper.stl
  • front_window.pdf
  • makerbot_front_window.pdf
  • makerbot_side_window.pdf
  • top_front_left_mount_1.stl
  • top_front_left_mount_2.stl
  • top_front_right_mount_1.stl
  • top_front_right_mount_2.stl
  • top_rear_left_mount_1.stl
  • top_rear_left_mount_2.stl
  • top_rear_right_mount_1.stl
  • top_rear_right_mount_2.stl

Learn more about the formats

Publication date 2023-09-16 at 19:34
?
Published to Thingiverse on: 2012-07-01 at 18:30
Design number 1454812

3D printer file info

3D model description

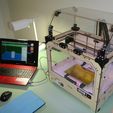
This is my newly designed and built Makerbot Replicator Enclosure that does not require a laser cutter to make. It can be built using your Makerbot Replicator, a band saw, drill press, and one screw driver for assembly. It uses 1/4 inch thick acrylic plastic for all the clear parts so that it will not sag because it is to light weight for the sizes that are needed. It cost less than half of what it would be to have the parts laser cut for you. The top hood and front window opening are easily removed in seconds without tools so it is simple to access the Makerbot when you want to make adjustments, print a part or remove finished parts.

3D printing settings

The first step in creating the enclosure is to cut out all of the clear acrylic plastic parts using a band saw and a drill press. The only part that is a little complicated to make is the front window. In the top center of the part is a 1/4 inch radius shown on the drawing for the part. To make this radius first drill a 1/2 inch hole and then mark the rest of the profile per the drawing provided. Do not remove any of the plastic film that is normally on acrylic plastic panels. This protects the part while you are cutting, drilling or sanding edges. It also makes it easier to mark the part as a Sharpie pen works best and the marks will not remain on the part once it is completed when the plastic film is removed just before final assembly.
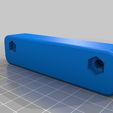
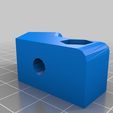
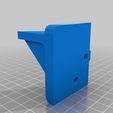
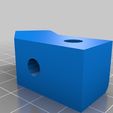
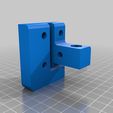
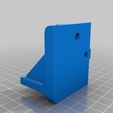
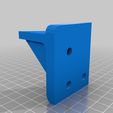
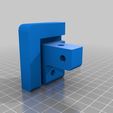
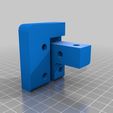
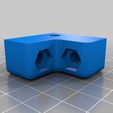
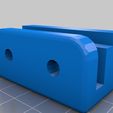
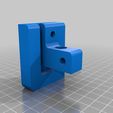
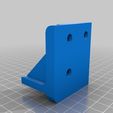
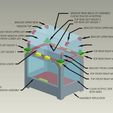
The complete assembly is put together using a variety of brackets printed on the Makerbot and held together using 10-32 x 1 inch machine bolts and nuts. Forty-two bolts and nuts are required for the assembly. All Makerbot parts have recessed areas for the nuts so no wrench is needed to put the assembly together. Just a screw driver is all you will need. Refer to the parts illustration as to the correct location of each part. The corner mounts #1 and #2 are bolted together first for each corner. The recessed nuts will sit just below the surface of the assembly so it will mount easily onto to the Makerbot Replicator
Take your time with the cutting and drilling as all holes are 1/4 inch which will allow tolerance to be built into the design to allow for correct fit when assembly is underway. All hood panels should sit flush with the top inner surface of the Makerbot so that holes will line up for the bolts to be installed. If the bottom edge of a panel does not sit flush then recut the notches that are in the panels on both ends to clear the mated printed Makerbot corner pieces. This will allow for better alignment of mounting holes in the assembly.
After all acrylic parts have been cut, sand edges smooth using sand paper being careful not to scuff the facing surfaces. The side windows for the Makerbot Replicator are drilled and cut to make the slots for assembly into the Makerbot. To hold these parts in place you will need to print out "Side Panel Clips" by Etrohn found here on Thingiverse. These are quick and easy to print on the Makerbot and easy to install in the assembly. If you should need more information and photos of this build please check out my blog site for more help. Thetinkersworkshop.blogspot.com

Advertising


Issue with this design? Report a problem.

Would you like to support Cults?

You like Cults and you want to help us continue the adventure independently? Please note that we are a small team of 3 people, therefore it is very simple to support us to maintain the activity and create future developments. Here are 4 solutions accessible to all:

  • ADVERTISING: Disable your banner blocker (AdBlock, …) and click on our banner ads.

  • AFFILIATION: Make your purchases online by clicking on our affiliate links here Amazon.

  • DONATE: If you want, you can make a donation via Ko-Fi πŸ’œ.

  • WORD OF MOUTH: Invite your friends to come, discover the platform and the magnificent 3D files shared by the community!


Sharing and downloading on Cults3D guarantees that designs remain in makers community hands! And not in the hands of the 3D printing or software giants who own the competing platforms and exploit the designs for their own commercial interests.

Cults3D is an independent, self-financed site that is not accountable to any investor or brand. Almost all of the site's revenues are paid back to the platform's makers. The content published on the site serves only the interests of its authors and not those of 3D printer brands who also wish to control the 3D modeling market.

100% secure payment by credit card, PayPal, Apple Pay, Google Pay, etc.
View all payment options.