Any suggestion is welcomed! Feel free to join my Facebook group to let me know what you want: https://www.facebook.com/groups/1115757609295068
Custom display base are also available from $5! Contact me to discuss what you want!
You can also support me through Patreon if you like my work too: https://www.patreon.com/gigapenguin3dprints/posts
Description
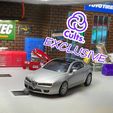
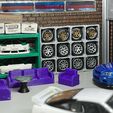
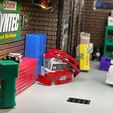
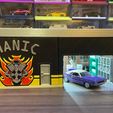
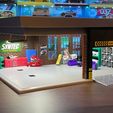
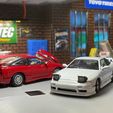
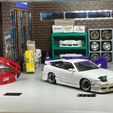
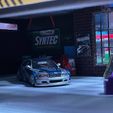
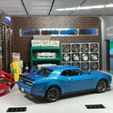
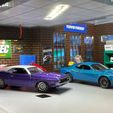
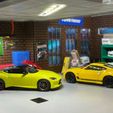
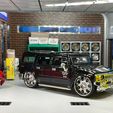
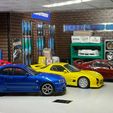
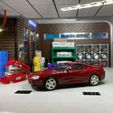
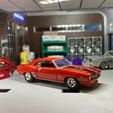
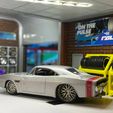
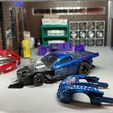
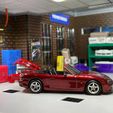
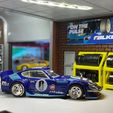
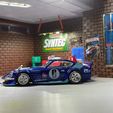
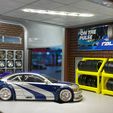
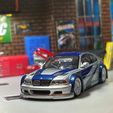
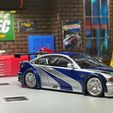
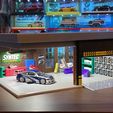
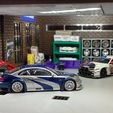
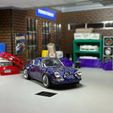
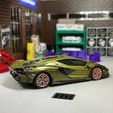
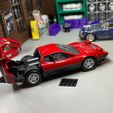
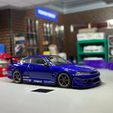
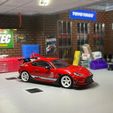
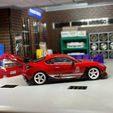
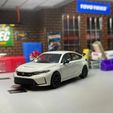
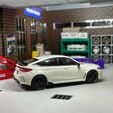
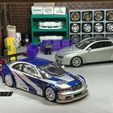
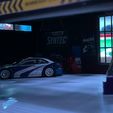
This diorama is inspired by the first safe house the player gets at the start of the game. There are some differences to the actual in game safe house to make it looks more lived in and populated with more props.
Checkout my showcase video: https://youtu.be/2AEmOWih-I0
The diorama is separated into multiple parts for easy printing. All files are separated into folders for easy printing. The files are arranged as follow:
1) Base:
- Base - Giant.STL
- FlatBase2.STL
*All of them are printed in grey
2) Walls:
- BackWall - Pt1 - V3.STL
- BackWall - Pt2 - V2.STL
- BackWall - Pt3 - V2.STL
- FrontWall - Removable -Pt1 - V2.STL
- FrontWall - Removable -Pt2 - V2.STL
- LeftWall - Removable - V2.STL
- RightWall - V2.STL
- PillarSupport2.STL
*All walls are printed with black background and brown bricks pattern, pillars are in brown
3) Roof & Ceiling:
- Ceiling2.STL
- Roof3.STL
- RoofCover.STL
*Ceiling is printed with black background and white tiles, roof is in silk silver and roof cover is in black
4) Exterior Walls:
- FrontExterior - Pt1 - Plain.STL
- FrontExterior - Pt2 - Build.STL
- LeftExterior.STL
- RightExterior.STL
*Main wall printed in a mix of grey, black and white, wall pillar in grey
5) Garage Door:
- Guide - V3 - Mirror.STL
- Guide - V3.STL
- NewGarageTest3.STL
*All printed in silk silver
6) Optional - Props:
There are 2 door variant, as a single piece or split in 2 so it can be printed with no support:
Door2.STL (Printed in silk silver)
**OR**
Door3 - Pt1.STL (Printed in silk silver)
Door3 - Pt2.STL (Printed in silk silver)
DrainCover.STL (Print x2 in black)
BumpersShelf.STL (Printed in green)
GarageBox3.STL (Printed in red)
LightCover.STL (Printed in black)
Locker.STL (Printed in blue)
OilBarrel.STL (Printed x3 in black)
RampExtension.STL (Printed in silk silver)
RimRack.STL (Printed in silk silver)
RoundTable.STL (Printed in black and hand painted in chrome for the top)
Sofa - 1 Seats.STL (Printed in purple)
Sofa - 2 Seats.STL (Printed in purple)
Sofa - 3 Seats.STL (Printed in purple)
ToolsHolder.STL (Printed in green)
TyreRack.STL (Printed x2 in yellow)
Additional Parts Used In My Build
- LED strips (for lighting the safe house)
- 2x AA battery holder
- Step Up Power Controller to convert 2.4V AA battery to 12V to run LED strip
- PVC sheet to use as “glass”
- Plenty of double sided tape, glue usable too if you prefer that
Print Settings
Nozzle size = 0.5 mm (0.4 will be printable and smaller better)
Layer height = 0.2 mm
Filament change layer for colours on "FrontExterior - Pt1 - Plain.STL":
1) Start (Overall wall colour, mine is in black)
2) Layer 9 (Line pattern colour, mine is in yellow)
Filament change layer for colours on "FrontExterior - Pt2 - Build.STL":
1) Start (Overall wall colour, mine is in black)
2) Layer 9 ("Manic" lettering, Line pattern and logo outline colour, mine is in yellow, "Manic" painted in chrome)
3) Layer 14 (Flame colour, mine is in red)
4) Layer 19 (Engine background colour, mine is in black)
5) Layer 24 (Engine logo colour, mine is in silver, painted in chrome)
Filament change layer for colours on "LeftExterior.STL":
1) Start (Overall wall colour, mine is in black)
2) Layer 8 (Line pattern, mine is in yellow)
Filament change layer for colours on "RightExterior.STL":
1) Start (Overall wall colour, mine is in black)
2) Layer 8 (Line pattern, mine is in yellow)
Filament change layer for colours on "BackWall - Pt1 - V3.STL":
1) Start (Overall brick gaps colour, mine is in black)
2) Layer 15 (Brick colour, mine is in brown)
Filament change layer for colours on "BackWall - Pt2 - V3.STL":
1) Start (Overall brick gaps colour, mine is in black)
2) Layer 13 (Brick colour, mine is in brown)
Filament change layer for colours on "BackWall - Pt3 - V3.STL":
1) Start (Overall brick gaps colour, mine is in black)
2) Layer 38 (Brick colour, mine is in brown)
Filament change layer for colours on "FrontWall - Removable -Pt1 - V2.STL":
1) Start (Overall brick gaps colour, mine is in black)
2) Layer 14 (Brick colour, mine is in brown)
Filament change layer for colours on "FrontWall - Removable -Pt2 - V2.STL":
1) Start (Overall brick gaps colour, mine is in black)
2) Layer 14 (Brick colour, mine is in brown)
Filament change layer for colours on "LeftWall - Removable - V2.STL":
1) Start (Overall brick gaps colour, mine is in black)
2) Layer 8 (Brick colour, mine is in brown)
Filament change layer for colours on "RightWall - V2.STL":
1) Start (Overall brick gaps colour, mine is in black)
2) Layer 16 (Brick colour, mine is in brown)
Assembly (Based on my photos build)
The car is just placed on the diorama, there are no holes to tie the cars down by wire.
Check out my assembly video to give you a better idea on how the build suppose to go: https://youtu.be/IrGFGnf5Jng
Others
Feel free to send me any feedback on how to improve the design. Suggestion on display base designs are welcomed too.
I can be contacted through Instagram or Twitter too:
Facebook: https://www.facebook.com/groups/1115757609295068
Twitter: https://twitter.com/Giga_Penguin
Instagram: https://www.instagram.com/GigaPenguin3DPrinting/
Custom display base designs are available from $5! Contact me to discuss what you want!

