Skip to content

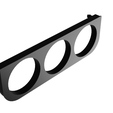
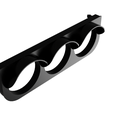
E36 Temp Control Gauge 3x52mm

Advertising
Advertising
?
Creation quality: 5.0/5 (1 vote)
Evaluation of members on the printability, utility, level of detail, etc.

  • 812 views
  • 2 likes
  • 4 downloads
  • 1 collection

License
3D design format
STL Folder details Close
  • 3x52mm Gauges Temperature Replacement Finned.stl
  • Base.stl

Learn more about the formats

Publication date 2023-09-20 at 12:31
Design number 1462678

GeeCeePee

3D printer file info

3D model description

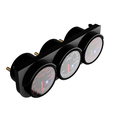
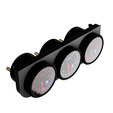
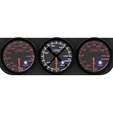
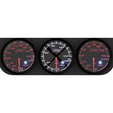
The E36 Temp Control Gauge accommodates three 52mm gauges and is designed to seamlessly replace the original 'Temp Control' panel situated below the radio head in E36s. You're given the option to choose between a 'finned' or 'finless' model, both of which are included with the purchase. If you have specific design adaptations in mind, please feel free to share your thoughts.

The model has been meticulously dimensioned to mirror the size and design of the original 'Temp Control' panel accurately. Numerous iterations and rigorous testing have taken place in my E36, a 1992 318IS, to guarantee a secure and precise fit. The panel features top clips that provide a satisfying and secure locking mechanism during installation.

Please be aware that the clearances for the clips are tight, requiring appropriate alignment and a firm push to insert. Some gentle wiggling may also be necessary for a secure latch. It's important to note that the clips have been reinforced with additional material to ensure durability and prevent breakage.

3D printing settings

I recommend utilizing an infill setting of 20% to strike a balance between print times and material usage, ensuring sufficient strength while avoiding excessive consumption of print material. It's worth noting that higher infill percentages do not necessarily result in linearly increased strength; instead, they can enhance flexibility.
By selecting a 20% infill, you can achieve a suitable combination of strength and flexibility for your printed object. This setting helps optimize print times and material usage without compromising the overall quality.

For support removal, I suggest utilizing a 10% support infill. However, it's important to note that the ideal support infill percentage can vary depending on the specific printer being used. As a general guideline, 20% is considered a standard infill setting.
Most settings are entirely printer dependent. Prints were conducted at a speed of 60mm/s which last around 3 hours and 5 hours respectively for the β€˜finless’ and β€˜finned’ models.

Advertising


Issue with this design? Report a problem.

Would you like to support Cults?

You like Cults and you want to help us continue the adventure independently? Please note that we are a small team of 3 people, therefore it is very simple to support us to maintain the activity and create future developments. Here are 4 solutions accessible to all:

  • ADVERTISING: Disable your banner blocker (AdBlock, …) and click on our banner ads.

  • AFFILIATION: Make your purchases online by clicking on our affiliate links here Amazon.

  • DONATE: If you want, you can make a donation via Ko-Fi πŸ’œ.

  • WORD OF MOUTH: Invite your friends to come, discover the platform and the magnificent 3D files shared by the community!


Sharing and downloading on Cults3D guarantees that designs remain in makers community hands! And not in the hands of the 3D printing or software giants who own the competing platforms and exploit the designs for their own commercial interests.

Cults3D is an independent, self-financed site that is not accountable to any investor or brand. Almost all of the site's revenues are paid back to the platform's makers. The content published on the site serves only the interests of its authors and not those of 3D printer brands who also wish to control the 3D modeling market.

100% secure payment by credit card, PayPal, Apple Pay, Google Pay, etc.
View all payment options.