Skip to content

+26mm Z Mod for Prusa MK2S, 2.5 & MK3

Advertising
Advertising
?
Creation quality: 0.0/5 (0 votes)
Evaluation of members on the printability, utility, level of detail, etc.

  • 672 views
  • 3 downloads

License
3D design format
Folder details Close
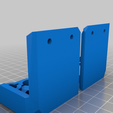
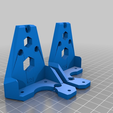
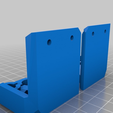
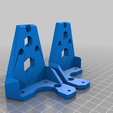
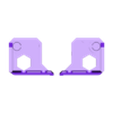
  • MK2S_bot.stl
  • MK2S_top.stl
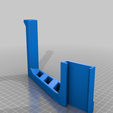
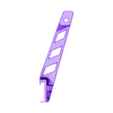
  • MK2_MK3_new_spool_holder.stl
  • MK3_bot.stl
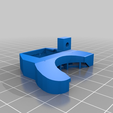
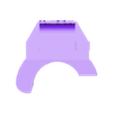
  • MK3_nozzle_fan_trim.stl
  • MK3_top.stl

Learn more about the formats

Publication date 2023-04-01 at 19:32
?
Published to Thingiverse on: 2018-09-04 at 07:39
Design number 1146592

3D printer file info

3D model description

Firmware download (.hex for easy flashing):
https://drive.google.com/file/d/1oHYlpksgzbGCRKHOrl9qC4OLmhx7LOPO/view?usp=sharing

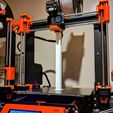
The area above the motors was not used for printing before. Utilize 100% of printability by raising Z motors and rods to access this area. These 3D models are edits from Prusa Research labeled "z-axis-top" "z-axis-bottom" "nozzle-fan" and "Spool-holder" credit belongs to them for original models.

You will need:
These 3D prints
alan key
zip ties
20 minutes

MK2S:
on the back of the extruder there is an arm that holds cables up with a long screw. I removed both and replaced with 2 zip ties. Move wires as close to the center and as low as possible and then apply the zip tie, while not too low that it would hit a print. May take a few tries/zip ties to get this right. Goal is to keep wires from colliding with top of frame as much as you can. Remove lower screw holding power supply from frame.

MK3 (and MK2.5):
the entire back plate has to be removed and is destroyed in the process. Unscrew, remove any zip ties except the ones holding the linear bearings on upper rod; DO NOT cut those. Grab the cables and pull them back tight, close to center and lower, then apply zip tie. May take a few tries/zip ties to get this right.
Filament sensor didn't work for me so I tied it back. It looked like there is enough space to have those wires for the sensor without hitting the frame if you still need it.

Both:
-Remove the original top and bottom 3d printed parts and rods
-Attach 3D printed bottom parts to frame
-Attach motors to those bottom prints
-Slide rods into X carriage and into bottom prints
-Attach top prints to frame and rods
-for MK3; remove old fan duct and replace with trimmed version
-Attach new Spool holder; it is thinner and required for this mod if you want to still use a frame mounted spool holder.
-Tape the cables leading to the extruder to the frame so it points up. See images for reference.

Fin! If you find this useful, tips are always welcome.

Notes:
-no effect on print quality; tested on an MK2S and two MK3's. Spool holders (imaged) and other things were printed after applying mod.
-You may set max Z height in slicer to 226mm (MK2S/2.5) or 236mm (MK3) and will print normally in this new area.
-Mesh bed level and z calibrate work as normal (see video)
-if you can mesh bed level after applying this mod, its a success. If you cant, make sure X carriage is not tilted so it can reach all bed points. Straighten by hand or Z calibrate, then it will mesh bed level ok.

https://www.youtube.com/watch?v=CyVrWQxP9kc&feature=youtu.be

Advertising


Issue with this design? Report a problem.

Would you like to support Cults?

You like Cults and you want to help us continue the adventure independently? Please note that we are a small team of 3 people, therefore it is very simple to support us to maintain the activity and create future developments. Here are 4 solutions accessible to all:

  • ADVERTISING: Disable your banner blocker (AdBlock, …) and click on our banner ads.

  • AFFILIATION: Make your purchases online by clicking on our affiliate links here Amazon.

  • DONATE: If you want, you can make a donation via Ko-Fi πŸ’œ.

  • WORD OF MOUTH: Invite your friends to come, discover the platform and the magnificent 3D files shared by the community!


Sharing and downloading on Cults3D guarantees that designs remain in makers community hands! And not in the hands of the 3D printing or software giants who own the competing platforms and exploit the designs for their own commercial interests.

Cults3D is an independent, self-financed site that is not accountable to any investor or brand. Almost all of the site's revenues are paid back to the platform's makers. The content published on the site serves only the interests of its authors and not those of 3D printer brands who also wish to control the 3D modeling market.

100% secure payment by credit card, PayPal, Apple Pay, Google Pay, etc.
View all payment options.