Skip to content

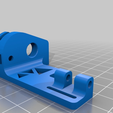
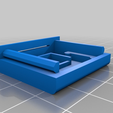
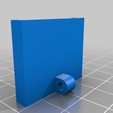
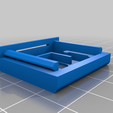
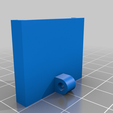
Ender 3 - X-Axis Pi camera mount + Enclosure v1.2

Advertising
Advertising
?
Creation quality: 3.3/5 (2 votes)
Evaluation of members on the printability, utility, level of detail, etc.

  • 1.9k views
  • 4 likes
  • 52 downloads
  • 1 make

License
3D design format
Folder details Close
  • PiCam_-_Housing_front_slotted.stl
  • PiCam_-_Housing_rear_slotted.stl
  • PiCam_-_mount_v1.stl
  • PiCam_-_mount_v2.stl
  • PiCam_v1_-_Housing_front.stl
  • PiCam_v1_-_Housing_rear.stl
  • PiCam_v2_-_Housing_front.stl
  • PiCam_v2_-_Housing_rear.stl

Learn more about the formats

Publication date 2023-04-05 at 13:08
?
Published to Thingiverse on: 2018-10-10 at 18:16
Design number 1152973

3D printer file info

3D model description

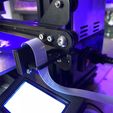
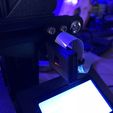
#X-AXIS PI CAMERA MOUNT + ENCLOSURE

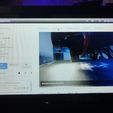
I found a lot of pi cam mounts for the ender 3, but i didnt like the ones for the y-axis, cause there is a lot of motion and vibrations that results in a bad video quality.
In my opinion, better use a mount on the x-axis!

And also i wanted a cam mount on the right side, cause there is a good position for the raspberry case under the LCD-screen.

Also a very important thing for me was, you should be able to attach it without touching any construction parts on the "Ender 3" like the belt-tensioner or the guide-wheels.

So i decided to create my own one, and this is the result!

#Things you need:
- PiCam v1.x or v2.x or other brand PiCam(Slotted case only)!
- 50cm camera extension cable
- 1x M3-Nut
- 1x M3x10 Screw (to fix the mount, longer ones also work)
- 1x m3x20 Screw (to mount PiCam enclosure)

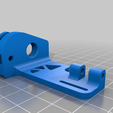
#2 versions of the PiCam mount:
- v1: for stock hotend part cooler + no Auto Bedleveling
- v2: for modified hotend part coolers + Auto Bedleveling

#3 versions of the PiCam front/rear case:
- v1: only for original PiCam v1.x
- v2: only for original PiCam v2.x
- slotted version: only for not original PiCam's

=======================================
#Focusing the Pi Cam:

Pi Cam's are typically set to infinty focus at the factory and glued in place. Be patient and remove any obvious glue in between the lens and square lens mount, then fit it securely in the housing.

Use a focusing tool such as this one:

https://www.thingiverse.com/thing:1570865

to turn it clockwise. Make a quarter turn then test, repeat until happy. I recommend you have the head in the middle of the bed and hold the camera at the edge for your tests.

=================================================================
I really like the raspberry case from "Giacomo Cavasin" so many thanks to you for this great work!
I like the design and you dont need screws to attach it to the "Ender 3"!

If you want the same configuration like me there 2 versions of this case:

  • 2 Rails version: (I use this one. Raspi with LM2596 directly connected to "Ender 3" PSU) https://www.thingiverse.com/thing:3075921 or
  • 1 Rail version: https://www.thingiverse.com/thing:3016364

=====================================
Update v1.1

Added a slotted version of the front PiCam case, cause it seems like there is a problem with not original Pi-Cams. The cable from board to lens is not long enough to fit correctly.
This should solve the problem!
Many thx @Icolederrick

=====================================
Update v1.2

Added a second version for the pi cam mount, with more clearance between the hotend and the camera (+12mm). Some part coolers like the "Petsfang" & "Bullseye" seem to crash into the camera housing during autobed leveling.
Many thx to "acwest"point out that problem and for his solution!

=====================================

Have fun printing!

Advertising


Issue with this design? Report a problem.

Would you like to support Cults?

You like Cults and you want to help us continue the adventure independently? Please note that we are a small team of 3 people, therefore it is very simple to support us to maintain the activity and create future developments. Here are 4 solutions accessible to all:

  • ADVERTISING: Disable your banner blocker (AdBlock, …) and click on our banner ads.

  • AFFILIATION: Make your purchases online by clicking on our affiliate links here Amazon.

  • DONATE: If you want, you can make a donation via Ko-Fi πŸ’œ.

  • WORD OF MOUTH: Invite your friends to come, discover the platform and the magnificent 3D files shared by the community!


Sharing and downloading on Cults3D guarantees that designs remain in makers community hands! And not in the hands of the 3D printing or software giants who own the competing platforms and exploit the designs for their own commercial interests.

Cults3D is an independent, self-financed site that is not accountable to any investor or brand. Almost all of the site's revenues are paid back to the platform's makers. The content published on the site serves only the interests of its authors and not those of 3D printer brands who also wish to control the 3D modeling market.

100% secure payment by credit card, PayPal, Apple Pay, Google Pay, etc.
View all payment options.