Skip to content

Hotend PTFE tube trimmer for PRUSA i3 MK2.5S/MK3S/MK3S+

Advertising
Advertising
?
Creation quality: 5.0/5 (1 vote)
Evaluation of members on the printability, utility, level of detail, etc.

  • 1.4k views
  • 6 likes
  • 24 downloads

License
3D design format
Folder details Close
  • PTFE_cutter_MK3S_MK25S.stl
  • PTFE_cutter_MK3Splus.stl
  • inlet_trimmer_olfa.stl
  • nut_xacto_x2.stl
  • outlet_trimmer_olfa.stl
  • ptfe_holder.stl
  • trimmer_front_xacto.stl
  • trimmer_rear_xacto.stl

Learn more about the formats

Publication date 2023-04-11 at 03:26
?
Published to Thingiverse on: 2022-03-07 at 13:50
Design number 1161923

3D printer file info

3D model description

[English]

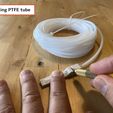
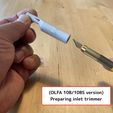
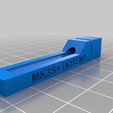
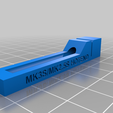
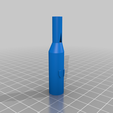
The PTFE tube inserted in the hotend of the PRUSA i3 MK2.5S/MK3S/MK3S+ must be bevel-cut at both ends at 60 degrees. It is recommended to purchase a genuine tube or drill it with a center drill, etc. However, to make it easier, I created jigs to cut and trim tube by using a standard craft knife (OLFA 10B/10BS) in Japan.

  1. Insert the PTFE tube into the cutting jig for MK3S+ (42.3mm) or MK3S/MK2.5S (44.3mm) and cut.
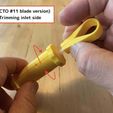
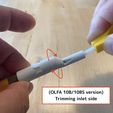
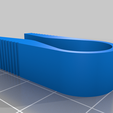
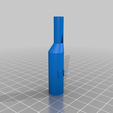
  2. Set the art knife into the inlet trimmer, insert the PTFE tubing from the opposite side, and rotate it to trim. It is easier to hold the tube in place with the holder and rotate the knife side.
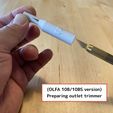
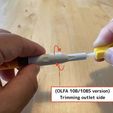
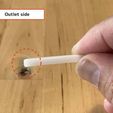
  3. Trim the other side with the outlet trimmer in the same way.

You can print it without any support.

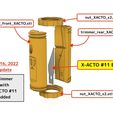
(May 16, 2022 Update)

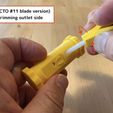
Added trimmers with X-ACTO #11 blades, easily accessible around the world.
Modified PTFE holder to prevent the tube from spinning.
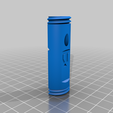
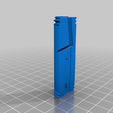
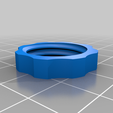
Place the blade between the two parts and fix the top and bottom with nut parts.

The top hole is for inlet trimming and the side hole is for outlet trimming.

[Japanese]

PRUSA i3 MK2.5S/MK3S/MK3S+のホットエンドに挿入するPTFEチューブは両端を60度のベベルカットにしなくてはいけません。純正品を購入したりセンタードリル等を使って加工することが推奨されていますが、もっと手軽に製作できるように一般的なアートナイフ(OLFA 10B/10BS)を使ってカットと両端のトリムを行えるジグを作成しました。

MK3S+用(42.3mm) または MK3S/MK2.5S用(44.3mm)のカットジグにPTFEチューブを奥まで差し込んでカットしてください。
インナートリマーにアートナイフを奥までセットし、反対側からPTFEチューブを差し込んで回転させ先端を削ってください。チューブをホルダーではさんで固定しナイフ側を回転させると楽です。
同様にアウタートリマーで反対側も削ってください。
全てサポートなしで出力できます。

(2022年5月16日 追加)

世界中で入手しやすいX-ACTO #11の刃を使用するトリマーを追加しました。
PTFE holderを改良してチューブが回転しにくいようにしました。
刃を2つのパーツで挟み込んで上下をナットパーツで固定してください。

上の穴が入口用のトリミング用、側面の穴が出口用のトリミング用です。

Advertising


Issue with this design? Report a problem.

Would you like to support Cults?

You like Cults and you want to help us continue the adventure independently? Please note that we are a small team of 3 people, therefore it is very simple to support us to maintain the activity and create future developments. Here are 4 solutions accessible to all:

  • ADVERTISING: Disable your banner blocker (AdBlock, …) and click on our banner ads.

  • AFFILIATION: Make your purchases online by clicking on our affiliate links here Amazon.

  • DONATE: If you want, you can make a donation via Ko-Fi 💜.

  • WORD OF MOUTH: Invite your friends to come, discover the platform and the magnificent 3D files shared by the community!


Sharing and downloading on Cults3D guarantees that designs remain in makers community hands! And not in the hands of the 3D printing or software giants who own the competing platforms and exploit the designs for their own commercial interests.

Cults3D is an independent, self-financed site that is not accountable to any investor or brand. Almost all of the site's revenues are paid back to the platform's makers. The content published on the site serves only the interests of its authors and not those of 3D printer brands who also wish to control the 3D modeling market.

100% secure payment by credit card, PayPal, Apple Pay, Google Pay, etc.
View all payment options.