Skip to content

Toy Road Grader - Fully 3D Printed

Advertising
Advertising
?
Creation quality: 5.0/5 (1 vote)
Evaluation of members on the printability, utility, level of detail, etc.

  • 765 views
  • 1 like
  • 17 downloads
  • 1 make

License
3D design format
Folder details Close
  • AxelHalf.stl
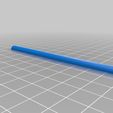
  • CabPeg.stl
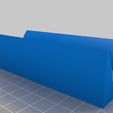
  • GraderBlade.stl
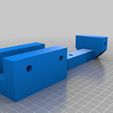
  • GraderBody.stl
  • GraderCab.stl
  • GraderControlKnob.stl
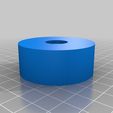
  • GraderWheels.stl

Learn more about the formats

Publication date 2023-04-12 at 22:55
?
Published to Thingiverse on: 2014-01-03 at 08:05
Design number 1165600

3D printer file info

3D model description

Just before holiday break, I challenged my students to design their own custom toys which became their final projects for the semester. My students worked for nearly 3 weeks and created some amazing things (some of which are posted on Thingiverse) and their hard work inspired me to use some of my break time to design and create my very own toy design.

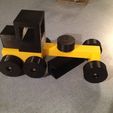
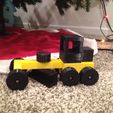
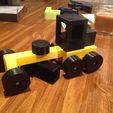
I introduce to you the "Toy Road Grader" which is 100% 3D printed. I was inspired to create this toy by the old Tonka toys that I played with as a child as well as a wooden road grader that I also had as a child. My version of the road grader has a fully movable blade so you can decide what angle to grade those pesky dirt piles at.

Here is a demonstration video: http://www.youtube.com/watch?v=oyLMPi3nYc0 I used some loose change to represent a pile of dirt (would of went outside, but it's 0 degrees out).

Some may ask "Why 3D print a toy?" Well here's why:

#1 - 3D printed toys are super cool!

#2 - You can customize your toy so it's unique

#3 - If it breaks, you can just print out a new part or even the whole entire toy.

3D printing settings

Print the following items along with quantities:

(1) GraderBody

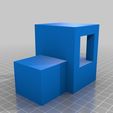
(1) GraderCab

(1) Grader Blade

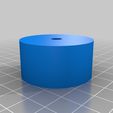
(6) Grader Wheels

(1) Grader Control Knob

(8) Axel Halves

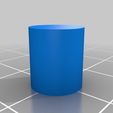
(2) Cab Pegs

** Construction **

1. Take the two cab pegs and glue them in the two holes that are in the Grader body. I use Krazy Glue for this.

  1. Take the Grader Cab and put glue in the holes. Also apply glue on the bottom face to make sure that the cab and body are secured firmly.

  2. Take one of the axle halves and insert it into a wheel. You may need to hit it gently with a small hammer to get the axle to go down all the way. Once one half is snug, repeat the process with the other half.

  3. Take your axle and wheel and place it through the axle hole in the grader body then take another wheel and attach it to the sticking out axle end. Again, this may require a small hammer.

  4. Once you have all of your wheels and axles on, it is time for the grader blade. The hole in the blade is smaller than the axle halves because I wanted to ensure a snug fit. You will need to ream out the hole a little to make the axle halves fit.

  5. The axle halves are too long because I wanted the creator to decide how big of an adjustment they wanted for the blade. I Got my down to about 5 cms. Once your axle halves are cut, insert one end into the blade and the other into the control knob.

** For reference see http://www.thingiverse.com/thing:192938 **

I plan on posting some sort of build manual soon, but until then feel free to ask me any question. Enjoy!!!

Advertising


Issue with this design? Report a problem.

Would you like to support Cults?

You like Cults and you want to help us continue the adventure independently? Please note that we are a small team of 3 people, therefore it is very simple to support us to maintain the activity and create future developments. Here are 4 solutions accessible to all:

  • ADVERTISING: Disable your banner blocker (AdBlock, …) and click on our banner ads.

  • AFFILIATION: Make your purchases online by clicking on our affiliate links here Amazon.

  • DONATE: If you want, you can make a donation via Ko-Fi πŸ’œ.

  • WORD OF MOUTH: Invite your friends to come, discover the platform and the magnificent 3D files shared by the community!


Sharing and downloading on Cults3D guarantees that designs remain in makers community hands! And not in the hands of the 3D printing or software giants who own the competing platforms and exploit the designs for their own commercial interests.

Cults3D is an independent, self-financed site that is not accountable to any investor or brand. Almost all of the site's revenues are paid back to the platform's makers. The content published on the site serves only the interests of its authors and not those of 3D printer brands who also wish to control the 3D modeling market.

100% secure payment by credit card, PayPal, Apple Pay, Google Pay, etc.
View all payment options.