3D model description
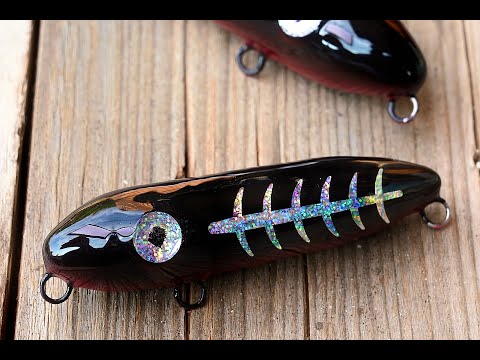
Stick baits are very popular when targeting aggressive saltwater species. Stickbaits under 90mm are not very common, but they are very effective when targeting smaller species on light tackle. This is a 55mm stick bait that weighs in at around 10g and sinks slowly. It has a wiggling S-pattern swimming action at any speed from slow to super fast for attracting little GT, Kingfish, Queenies, Garrick and a host of other saltwater species. Likely to be good for Bass and some freshwater species as well, though I haven't used it for that yet. Also doubles as a twitch bait with a slow, slightly nose-down sinking posture. Pairs well with #5-6 trebles or size 4-5 singles
The material you'll need:
20-30cm of 1mm stainless wire for the hook and tie-on eye.
2x 8mm flat or holographic 3D eyes
3x 4.5mm BB's as ballast weight and rattle inserted during the print which results in a seamless final print that only needs hook eyes inserted prior to painting. Two in the belly and one is the nose.
I haven't finished a build video for this one yet, but feel free to watch the below video from another one of my lures to see how I do the hook and tie-on eyes. The process is identical.
https://www.youtube.com/watch?v=_B8rJpB5Ois
Please be aware that these files are for non-commercial use only. Print one or print a million, it's up to you. You are welcome to hand them out to friends and fellow anglers. Your friend wants one but doesn't have a printer? Print it for them and have them reimburse you for the cost of the material. No problem. Just do not mass produce and sell this design.
Please respect the fact that a lot of time and effort went into making these designs and associated media. You may not under any circumstances resell the design (file) or the resultant lure made from the print at profit.
3D printing settings
The following are my suggested Cura settings. These work and work very well. after having printed 50+ lures, I know these settings are ideal. You are welcome to deviate, but you do so at your own peril.
Print the model in the orientation you find it in (upright). Do not scale. Wall thicknesses have been designed with specific line width settings and buoyancy in mind to give you the strongest possible allure while maintaining proper performance. countless hours and numbers of prototypes have gone into refining the design. Deviate and change at your own risk.
0.4mm Nozzle
Layer height- 0.16mm
Initial Layer Height- 0.2mm
Line width 0.45mm
Wall Line count- 4
Fill gaps between walls Yes
Z Seam alignment User specified
Z Seam position back
Seam Corner Preference Smart Hiding
Bottom/Top thickness 1.6mm
Infill Density 10%
Infill Pattern Gyroid
Print Speed 75mm/s
Combing mode Not on skin (Important to not knock parts over)
Avoid Printed Parts when Traveling (Not on skin (Important to not knock parts over)
Travel avoidance Distance 0.625mm
Cooling is critical if printing PLA. I suggest using PLA+ at 100% colling. If you get bad surface detail/drooping/ or the support feet adhere too much to the body it is because you have inadequate cooling.
Build plate adhesion Brim
Brim line count 10
Required weights:
3 x 4.5mm BB’s ballast. One in the nose and two in the belly
Weights and rattles are inserted during the printing process to decrease assembly time. I strongly suggest you review the model images for where there the weights and rattles should go and check your model during slicing to get an approximate idea of when they should be inserted. A suggestion is at approximately 66% and 90% I prefer to slow down the printing process via the printer’s control panel to its lowest speed to insert the weights and rattles, then speed it up after insertion. You can pause the print to make it easier, but I always seem to have a perceptible misalignment after pausing which increases sanding time afterwards. Pausing negates any risk of knocking the print over. Just slowing down carries the risk of having the print head collide with your hand or a set of needle nose pliers.
:format(webp)/https://fbi.cults3d.com/uploaders/19766919/illustration-file/ef1fb5a8-8d0a-4180-8aad-21a1bfd0f7dd/Lures-0256.jpg)

/https://preview3d-images.cults3d.com/raozwskwwl4el2lt9n1rokt5bbf9)


:format(webp)/https://fbi.cults3d.com/uploaders/19766919/illustration-file/22b6f134-739b-453f-aede-46d1c035808b/JJM_2847.jpg)
:format(webp)/https://fbi.cults3d.com/uploaders/19766919/illustration-file/7b49e38e-44d0-402f-97e8-8fab2c06d53b/JJM_2847.jpg)
:format(webp)/https://fbi.cults3d.com/uploaders/19766919/illustration-file/85e55ce6-f94f-4830-85dd-8ae431b4e3f4/Consumable-stock-2900.jpg)
:format(webp)/https://fbi.cults3d.com/uploaders/19766919/illustration-file/66e824db-8f7a-4424-8143-0e58c4a7407b/Consumable-stock-2900.jpg)