Skip to content

double use fan, for Orca v0.2

Advertising
Advertising
?
Creation quality: 0.0/5 (0 votes)
Evaluation of members on the printability, utility, level of detail, etc.

  • 301 views
  • 1 like
  • 2 downloads

License
3D design format
Folder details Close
  • 01.STL
  • 02.STL
  • 03.STL
  • 04.STL
  • 05.STL
  • 06.STL
  • 07.STL

Learn more about the formats

Publication date 2023-05-03 at 00:27
?
Published to Thingiverse on: 2011-10-28 at 06:37
Design number 1199881

3D printer file info

3D model description

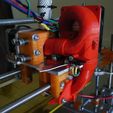
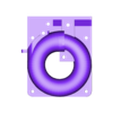
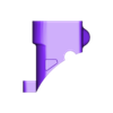
My printer 3d (Orca v0.2), has a cooling fan (40x40) that blows air towards the top of hotend (extruder motor area). I realizzaro this project to add air jet on the pieces that are printed, to prevent warping, especially if they are of small size and high print speeds. This project allows you to use a single fan (60x60) for both goals. A flow diverter, activated with a lever, you can choose whether to send only hotend air with the fan running slow, or also on the piece in print. In this case, a microswitch bypasses a resistance and the fan runs at full speed.

So for the project you need a resistance of 40ΓƒΒŽΓ‚Β© (approximately), and a microswitch (I salvaged from an old mouse).

Unlike the simple cooling fan directed on the piece in print, this directs to flow where it is needed, avoiding hotend cool.

The photo with the two cubes 10x10 (printed at 130 mm/s), show the difference.

3D printing settings

-Print the parts with good detail (support not required). For the piece 05 (door) uses a very slow speed and a cooling fan on the piece, to reduce the deformation in the upper part (square section).

-Check the pairings, especially between the main piece and the door, and the one between the door and lever (square), and if necessary with a utility knife to trim the door.

-Make a deep 10mm hole in the head of piece 05 with a 1mm drill bit. Be careful of heat.

-Assemble first 01 with 05 and 02

-Drill holes in the workpiece 02 for microswitch, so that when you turn the lever action.

-Solder the wires to the microswitch before fixing.

-Mount the workpiece 04 on Orca

-He puts the piece 03 in 04

-Mount the assembly 01_02_05 on Orca

-Mount the workpiece 07 and the fan

-Connect the wires and the resistance as shown in figure

Use it

Advertising


Issue with this design? Report a problem.

Would you like to support Cults?

You like Cults and you want to help us continue the adventure independently? Please note that we are a small team of 3 people, therefore it is very simple to support us to maintain the activity and create future developments. Here are 4 solutions accessible to all:

  • ADVERTISING: Disable your banner blocker (AdBlock, …) and click on our banner ads.

  • AFFILIATION: Make your purchases online by clicking on our affiliate links here Amazon.

  • DONATE: If you want, you can make a donation via Ko-Fi πŸ’œ.

  • WORD OF MOUTH: Invite your friends to come, discover the platform and the magnificent 3D files shared by the community!


Sharing and downloading on Cults3D guarantees that designs remain in makers community hands! And not in the hands of the 3D printing or software giants who own the competing platforms and exploit the designs for their own commercial interests.

Cults3D is an independent, self-financed site that is not accountable to any investor or brand. Almost all of the site's revenues are paid back to the platform's makers. The content published on the site serves only the interests of its authors and not those of 3D printer brands who also wish to control the 3D modeling market.

100% secure payment by credit card, PayPal, Apple Pay, Google Pay, etc.
View all payment options.