3D model description
This is a 3 phase (2 winding per phase) 4 pole AC generator. THIS USES POWERFUL MAGNETS, HANDLE AT YOUR OWN RISK, YOU ARE LIABLE FOR YOUR OWN INJURIES. So have fun :) This is a very time intensive but gratifying project, especially for a science fair or alternative energy. I wish I had more time to test this to give you guys solid numbers, so I apologize. But I can tell you spinning it at a few hundred RPM I was able to produce ~1 Watt from one of the three phases. I will be putting my smaller models of generators on here at first opportunity! Thank you!!(if you feel inclined to tip it will go towards more alternative energy prints!)
Parts list:
1/4-20X2 1/4/bolts----------------------------------(4 of them:stator/mounting)
4-40x 1.5--------------------------------------------(4 of them: rotor)
~1/8 diameter bolts ~2 to 3 inches in length--(12 for the stator core)
1 inch cube N50 or N52 magnet----------------(4 for rotor poles) ~10$ each
1/4 ID inch ball bearings 1/2" OD---------------(2 actobotics/sparkfun)
1/4 inch shaft spacers-----------------------------(~6 actobotics/sparkfun)
1/2lb 28 gauge magnet wire----------------------(1 roll will do ya')
1/4 shaft collars/hub/sprocket------------------(2 depending on how you want it powered)
1/4 D-shaft 6 to 12" long------------------------(actobotics/sparkfun)
The Rotor:
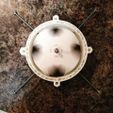
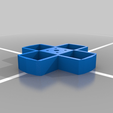
I printed 2 of the rotor files placed the magnets and held the two halves together with a few 4-40 nuts and bolts i had laying around.
The rotor was printed to fit a 1/4 inch Actobotics D-Shaft. I used 1 inch magnets (4 of them) arranged alternating N and S (N,S,N,S).
Magnet Link:
https://www.amazon.com/Applied-Magnets-Strong-Neodymium-Magnet/dp/B0012DNFP6/ref=sr_1_1?ie=UTF8&qid=1471988660&sr=8-1&keywords=1+inch+magnet+cube
The Stator:
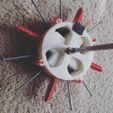
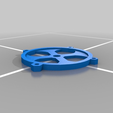
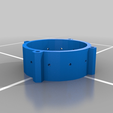
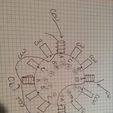
The stator is about 5 1/2 inches in diameter. The bolts holding the cap and the stator together are 1/4-20 x 2 1/2". For the "Stator core" I used bolts that are ~1/8" in diameter and 2" in length. Screw the ~1/8" diameter bolts into the 12 holes on the side. Pick a bolt to start on wrap 28 gauge wire around clock-wise 1400 times( at 12 o' clock....This part sucks) . Now without cutting the wire move to the bolt at a 90 degree angle(3 o'clock) from the bolt you just wrapped and wrap 1400 turns of wire around this bolt in the counter-clockwise direction. Move on to the bolt at the 6 o'clock position(without cutting the wire) and wind 1400 times in the clockwise direction. Lastly move on to the 9 o'clock bolt and wind 1400 turns in the counter clock wise direction...Whew you can cut the wire ...Now your A phase is done, now the B and C phases. So, Immediately next to the 12 o'clock bolt (the 1 o'clock bolt I guess) do the exact same thing as the A phase BUT the 1 o'clock winding should be in the Counter clockwise direction! wind 1 o'clock counter-clockwise, 4 o'clockwise, 7 o'clock counter-clockwise, and the 10 o'clock clockwise. This is your C phase. lastly the 11 o'clock bolt is wound counter-clockwise, 2 o'clock clockwise. 5 o'clock counter-clockwise, and the 8 o'clock counter-clockwise. This is your B phase.
So your rotor is assembled and your stator is wound. now place a shaft collar on the shaft and tighten it down at your desired length from the end(leave space for rotor ect.). Now stack on top of the shaft collar a shaft spacer, a 1/4 bearing, 2 to 3 more shaft spacers to keep your rotor from hitting the casing while rotating, your rotor(may have to be pressed in with a vice or heat the shaft depending on tolerance...be careful!!!), then 2 to 3 more shaft spacers, the second bearing, one more spacer, and FINALLY your hub/shaft collar/sprocket.
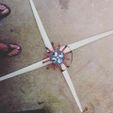
BOOM...spin and produce all of the electricity! Wire in Delta or Wye configuration.The blades I made for the wind turbine were made following these instructions ---> http://greenterrafirma.com/making-pvc-wind-turbine-blades.html use a hub to mount them or thread the shaft and use bolts! I've not been able to do much testing because i work 12 hours a day 7 days a week, but in the back of a pickup truck going 15 mph it easily produced 20 volts. Lastly the output can be increased just a tad by creating a complete path for the magnetic flux. I used hobby strips of stainless steel around the outside to create a return path for the flux.

/https://fbi.cults3d.com/uploaders/20234108/illustration-file/8883e24c-11cc-486d-9234-61633fc5bdbf/windgen.jpg)
