Skip to content

HDX Metal Shelving Connector

Advertising
Advertising
?
Creation quality: 0.0/5 (0 votes)
Evaluation of members on the printability, utility, level of detail, etc.

  • 412 views
  • 1 like
  • 1 download

License
3D design format
Folder details Close
  • Shelving.dxf
  • Shelving.obj
  • Shelving_Connector.stl

Learn more about the formats

Publication date 2023-05-06 at 14:43
?
Published to Thingiverse on: 2018-05-28 at 17:32
Design number 1206051

3D printer file info

3D model description

Do you like HDX metal shelving, but they don't make them tall enough? I had two sets of HDX shelves from Home Depot. The dimensions of the shelves are 37 in. H x 36 in. W x 14 in. D. I'm guessing the shelves are only sold with a maximum of 37 inch height for stability/safety/legal reasons--smaller footprint + greater height = less stable.

I really wanted to stack these shelves, but I couldn't find any "official" way to stack them safely. The bottom of the posts have welded, threaded holes for the plastic feet. The top of the posts have a removable plastic cap, but the inside of the post is not threaded.

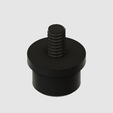
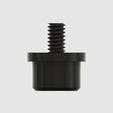
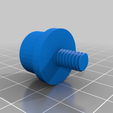
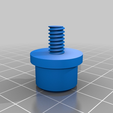
So, I created my own part--the HDX Metal Shelving Connector. You simply remove the feet from one set of shelves and screw in the part. On the other set of shelves, you remove the plastic caps. The bottom of the part then is inserted into the top of the post.

Keep in mind that these shelves were not designed to be this tall. Please use extra caution if you decide to use this. Use them at your own risk. I will not be responsible for any harm that may occur if your shelves tip over. You should consider using a wall anchor to avoid tipping.

This part is designed specifically for the HDX shelves from Home Depot: https://www.homedepot.com/p/HDX-37-in-H-x-36-in-W-x-14-in-D-3-Shelf-Wire-Unit-in-Chrome-EH-WSHDI-006/204603431

Please note that the pictures of the actual part show the bottom of the rack where the feet usually screw in. Once you screw in the connectors into the bottom of the posts for the top shelving, you flip it over and then can place it on top of the other rack.

I'm sure this design could be modified to support other shelves from other manufacturers.

This Thing was modeled in Fusion 360 in 3 sections: base, spacer, and screw. See below for steps.

Tags

Advertising


Issue with this design? Report a problem.

Would you like to support Cults?

You like Cults and you want to help us continue the adventure independently? Please note that we are a small team of 3 people, therefore it is very simple to support us to maintain the activity and create future developments. Here are 4 solutions accessible to all:

  • ADVERTISING: Disable your banner blocker (AdBlock, …) and click on our banner ads.

  • AFFILIATION: Make your purchases online by clicking on our affiliate links here Amazon.

  • DONATE: If you want, you can make a donation via Ko-Fi πŸ’œ.

  • WORD OF MOUTH: Invite your friends to come, discover the platform and the magnificent 3D files shared by the community!


Sharing and downloading on Cults3D guarantees that designs remain in makers community hands! And not in the hands of the 3D printing or software giants who own the competing platforms and exploit the designs for their own commercial interests.

Cults3D is an independent, self-financed site that is not accountable to any investor or brand. Almost all of the site's revenues are paid back to the platform's makers. The content published on the site serves only the interests of its authors and not those of 3D printer brands who also wish to control the 3D modeling market.

100% secure payment by credit card, PayPal, Apple Pay, Google Pay, etc.
View all payment options.