Skip to content

Shearwater 125 Anchor Wizard Mounting Plate

Advertising
Advertising
?
Creation quality: 5.0/5 (1 vote)
Evaluation of members on the printability, utility, level of detail, etc.

  • 1.1k views
  • 6 downloads

License
3D design format
STL Folder details Close
  • AnchorWizardPlate_Port_DriversSide.stl
  • AnchorWizardPlate_Starboard_PassengerSide.stl

Learn more about the formats

Publication date 2023-05-08 at 12:26
Design number 1209493

3D printer file info

3D model description

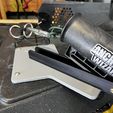
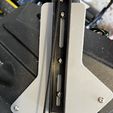
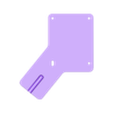
I have an Anchor Wizard for my Shearwater 125 fishing kayak. This plate screws into the Micro Power Pole mounting point on the back and allows the Anchor Wizard drop tube to fully lower to get the best functionality. I only printed & tested the Port (driver's side) version. The starboard

It should be oriented with the top-face down, the little rigidity-bump facing up.

Print with a strong, non-brittle material. PETG or better. High, 60%, infill. Several walls and top & bottom layers.

The Anchor Wizard tube & the anchor will hang off the back side of the kayak, perfect for aligning with an anchor trolley if you so desire. side is a mirror, but untested.

Mounting:

Use M5 bolts to fasten the plate to the back of the kayak. I aligned the Anchor Wizard rail's center hole to the slotted mounting plate hole and used a slightly longer bolt.
Mark the points on the plate you want to add extra bolts. I use two more bolts, one near the end and one over the center, where the decorative or drain-channel is on the Shearwater deck.
Remove mounting plate from the kayak and the Anchor Wizard.
Drill 5mm or 6mm holes in the plate where you marked.
Fasten the anchor wizard to the plate using M5 bolts and nuts in the newly drilled holes. Use a washer on each end of the bolt! Leave slightly loose for minor adjustments
Reattach mounting plate to kayak using M5 bolts. Get a bolt started in one corner, hand tighten only a couple turns, then do the diagonal corner.
Once all M5 bolts are in place, tighten it all down
Because the Shearwater 125 deck surface is relatively thin, I see a bit of warping. This is why one of the holes is a slot and why I didn't print the hole to mount the Anchor Wizard onto the plate. Once I see a couple examples, I'll be more confident with their placement. OTOH, drilling them is not that big of a deal either!

3D printing settings

Print with a strong, non-brittle material. PETG or better. High, 60%, infill. Several walls and top & bottom layers.

Advertising


Issue with this design? Report a problem.

Would you like to support Cults?

You like Cults and you want to help us continue the adventure independently? Please note that we are a small team of 3 people, therefore it is very simple to support us to maintain the activity and create future developments. Here are 4 solutions accessible to all:

  • ADVERTISING: Disable your banner blocker (AdBlock, …) and click on our banner ads.

  • AFFILIATION: Make your purchases online by clicking on our affiliate links here Amazon.

  • DONATE: If you want, you can make a donation via Ko-Fi 💜.

  • WORD OF MOUTH: Invite your friends to come, discover the platform and the magnificent 3D files shared by the community!


Sharing and downloading on Cults3D guarantees that designs remain in makers community hands! And not in the hands of the 3D printing or software giants who own the competing platforms and exploit the designs for their own commercial interests.

Cults3D is an independent, self-financed site that is not accountable to any investor or brand. Almost all of the site's revenues are paid back to the platform's makers. The content published on the site serves only the interests of its authors and not those of 3D printer brands who also wish to control the 3D modeling market.

100% secure payment by credit card, PayPal, Apple Pay, Google Pay, etc.
View all payment options.