Bambu Lab setup for AMS with LED / RGB / coils / coil holder - Bambu Lab setup for AMS with LED / RGB / coils / coil holder
Video of my construction
https://youtu.be/zKUoaOzXjaQ
The idea behind the structure
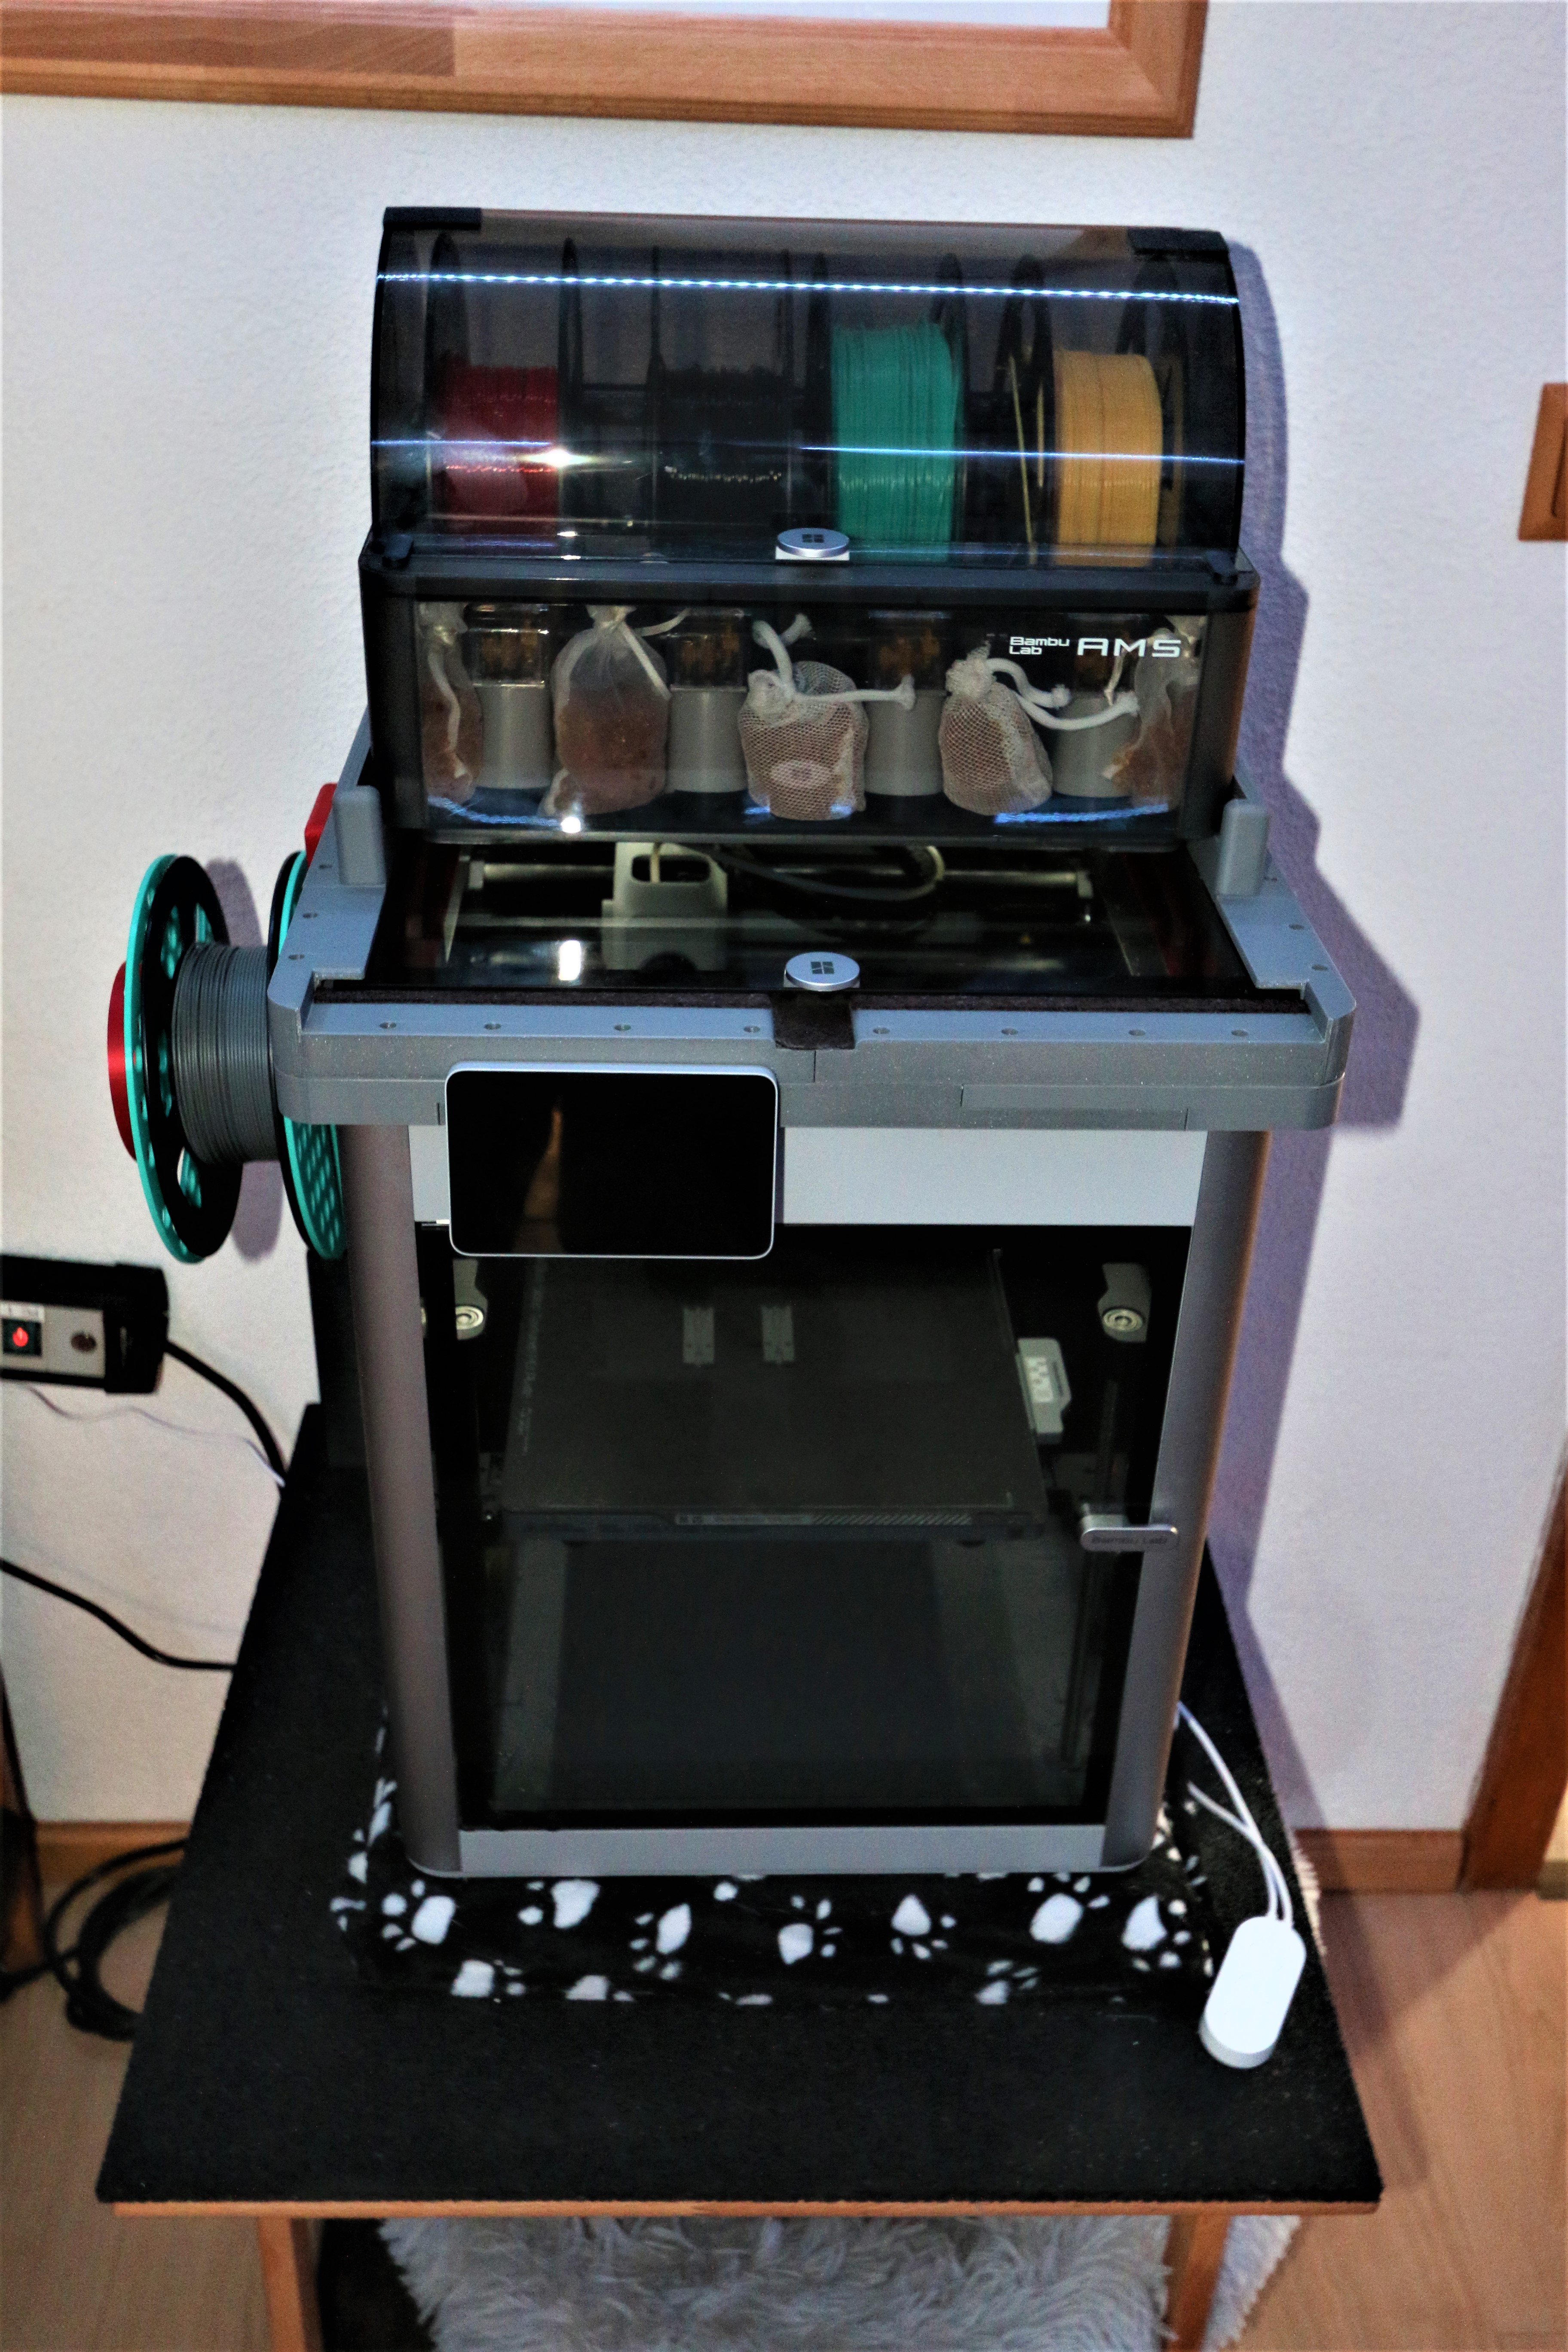
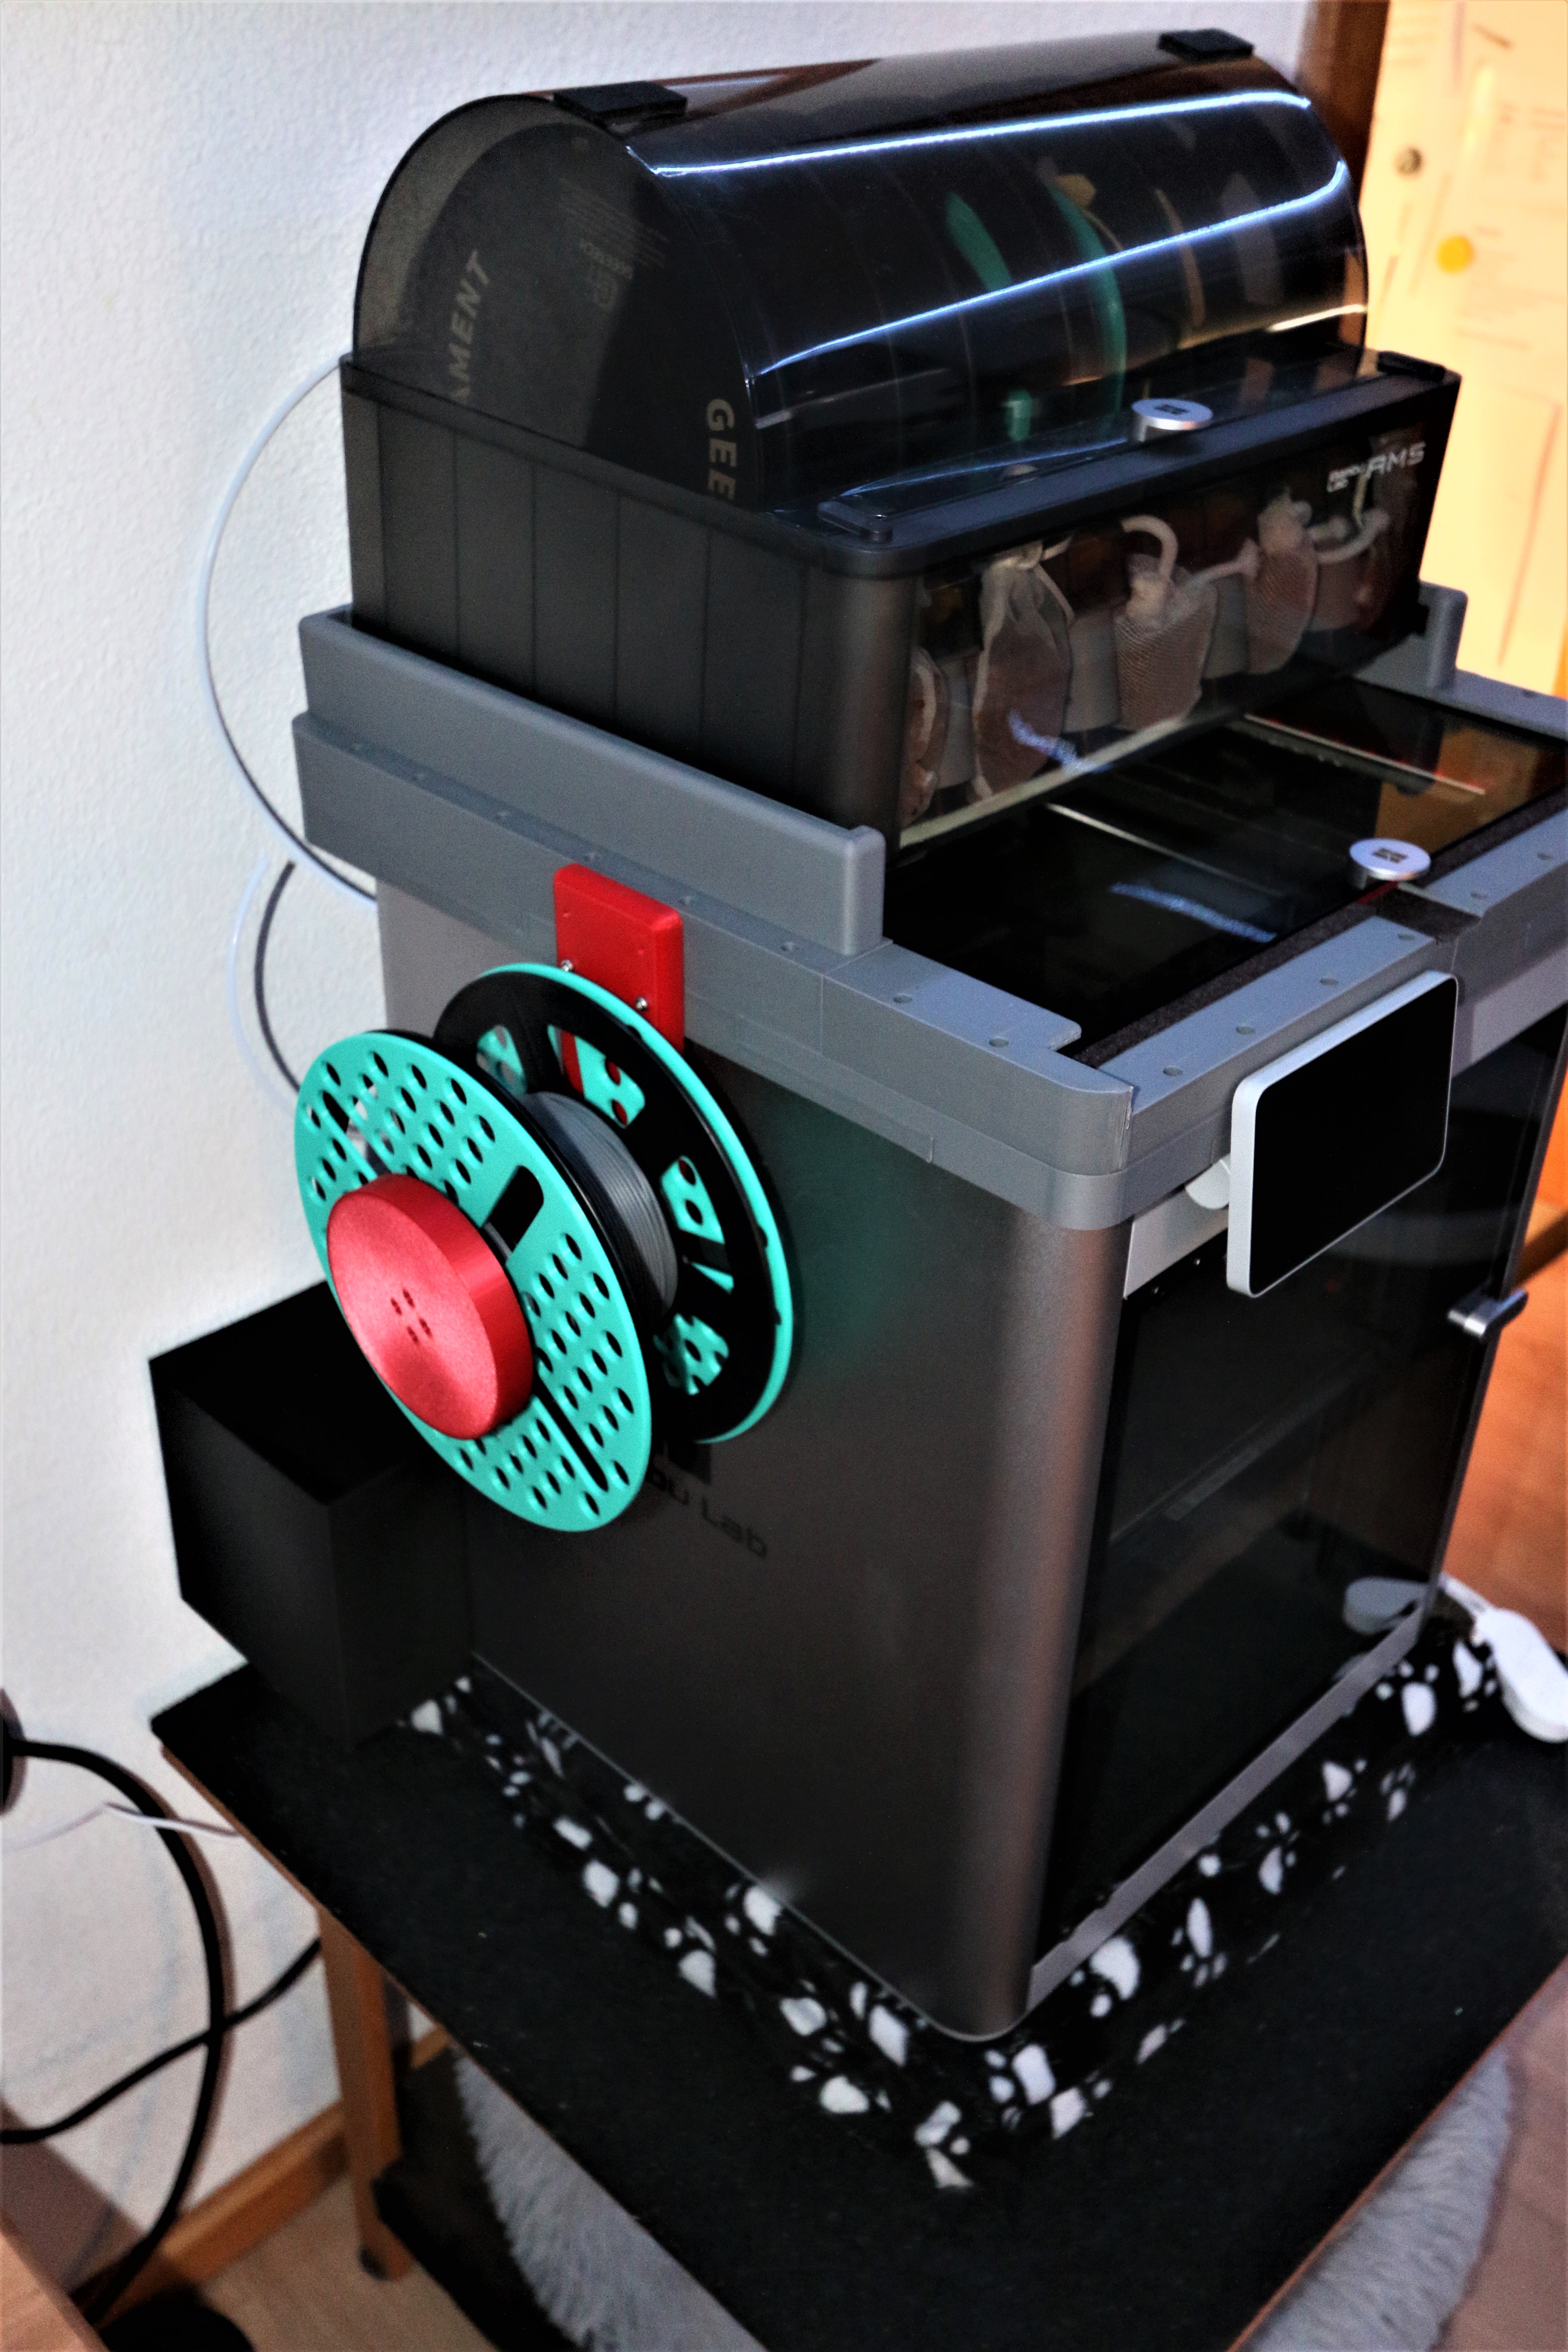
I constructed the setup to shed more light 😊 and to use a fifth roll of filament in addition to the AMS without always having to rummage around behind the printer. The fifth roll of filament is now housed on the left side and is very accessible.
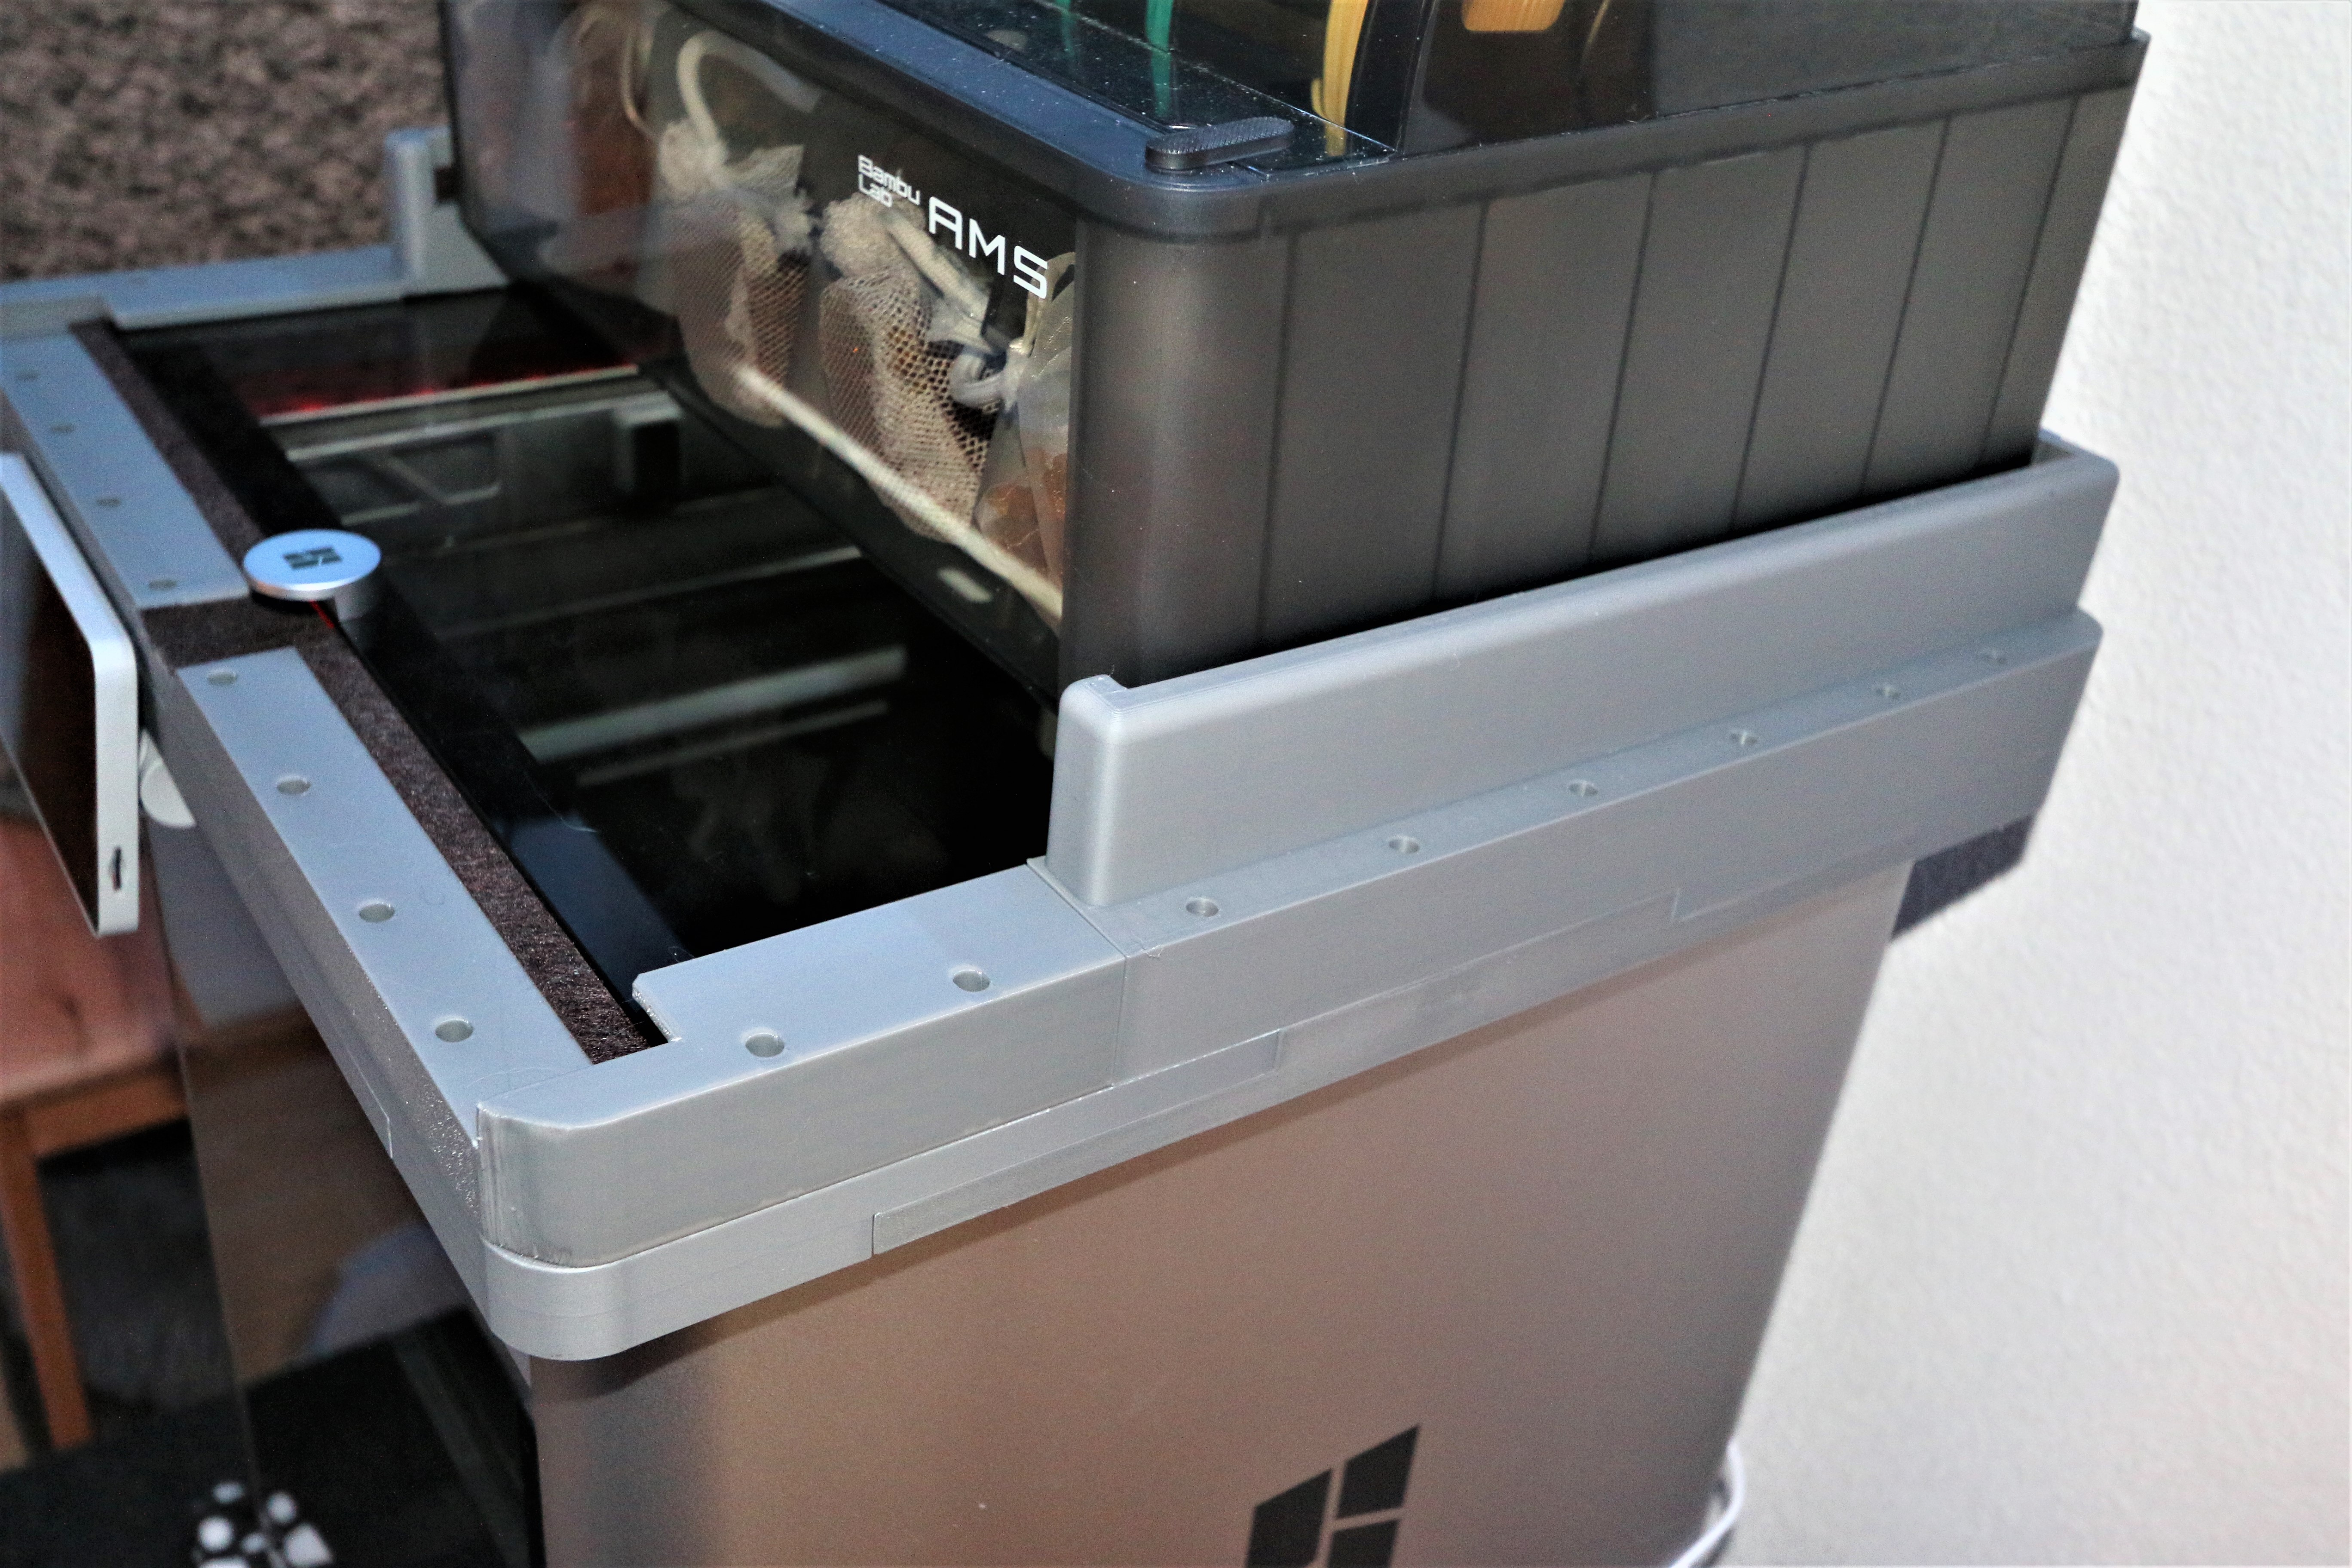
With the setup, it's also possible to just slide the glass out and back in without having to take the AMS down. This has the advantage that in the summer at elevated temperatures, the accumulated heat can simply be dissipated upwards without the AMS must be dismantled, quasi pane out and ready 😊
Another thing to mention is, I designed this so that 1cm wide felt strips can be attached to protect against damage, then the structure fits like a glove (which it is).
All parts have been printed on the Bambu Lab X1 - Carbon. Some parts require a little dexterity in alignment, but anyone should be able to manage that.
Coils and coil holders
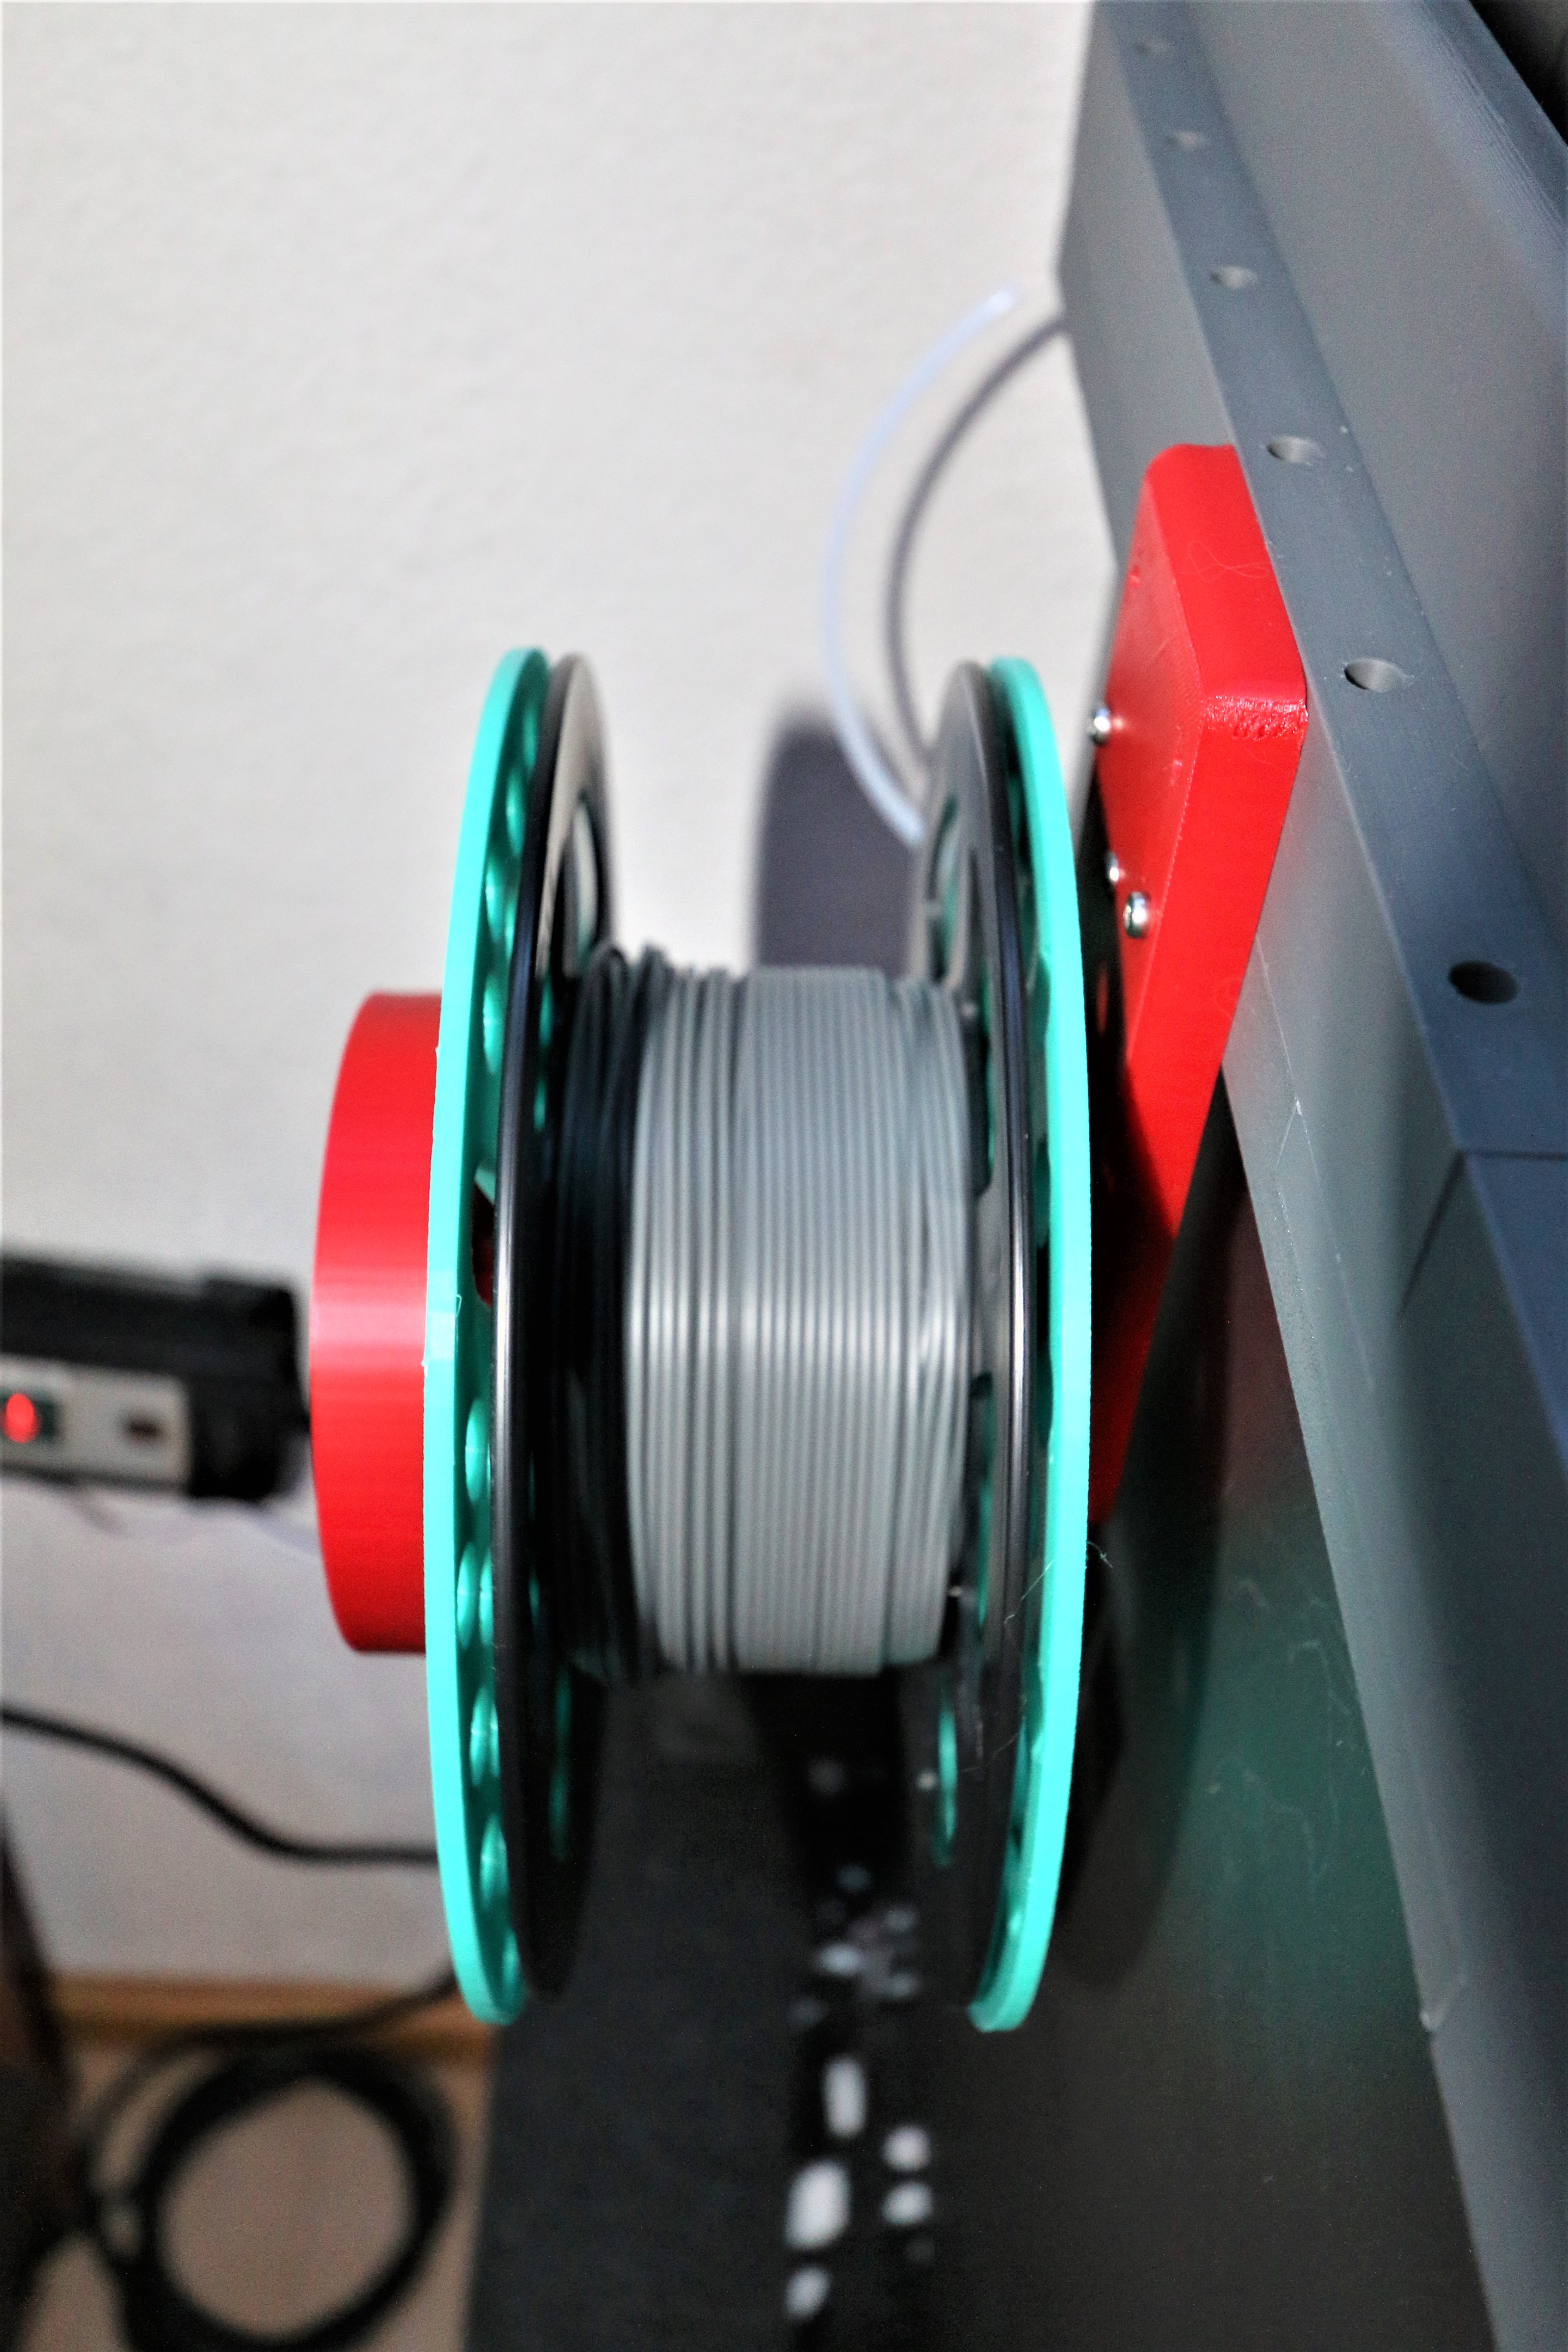
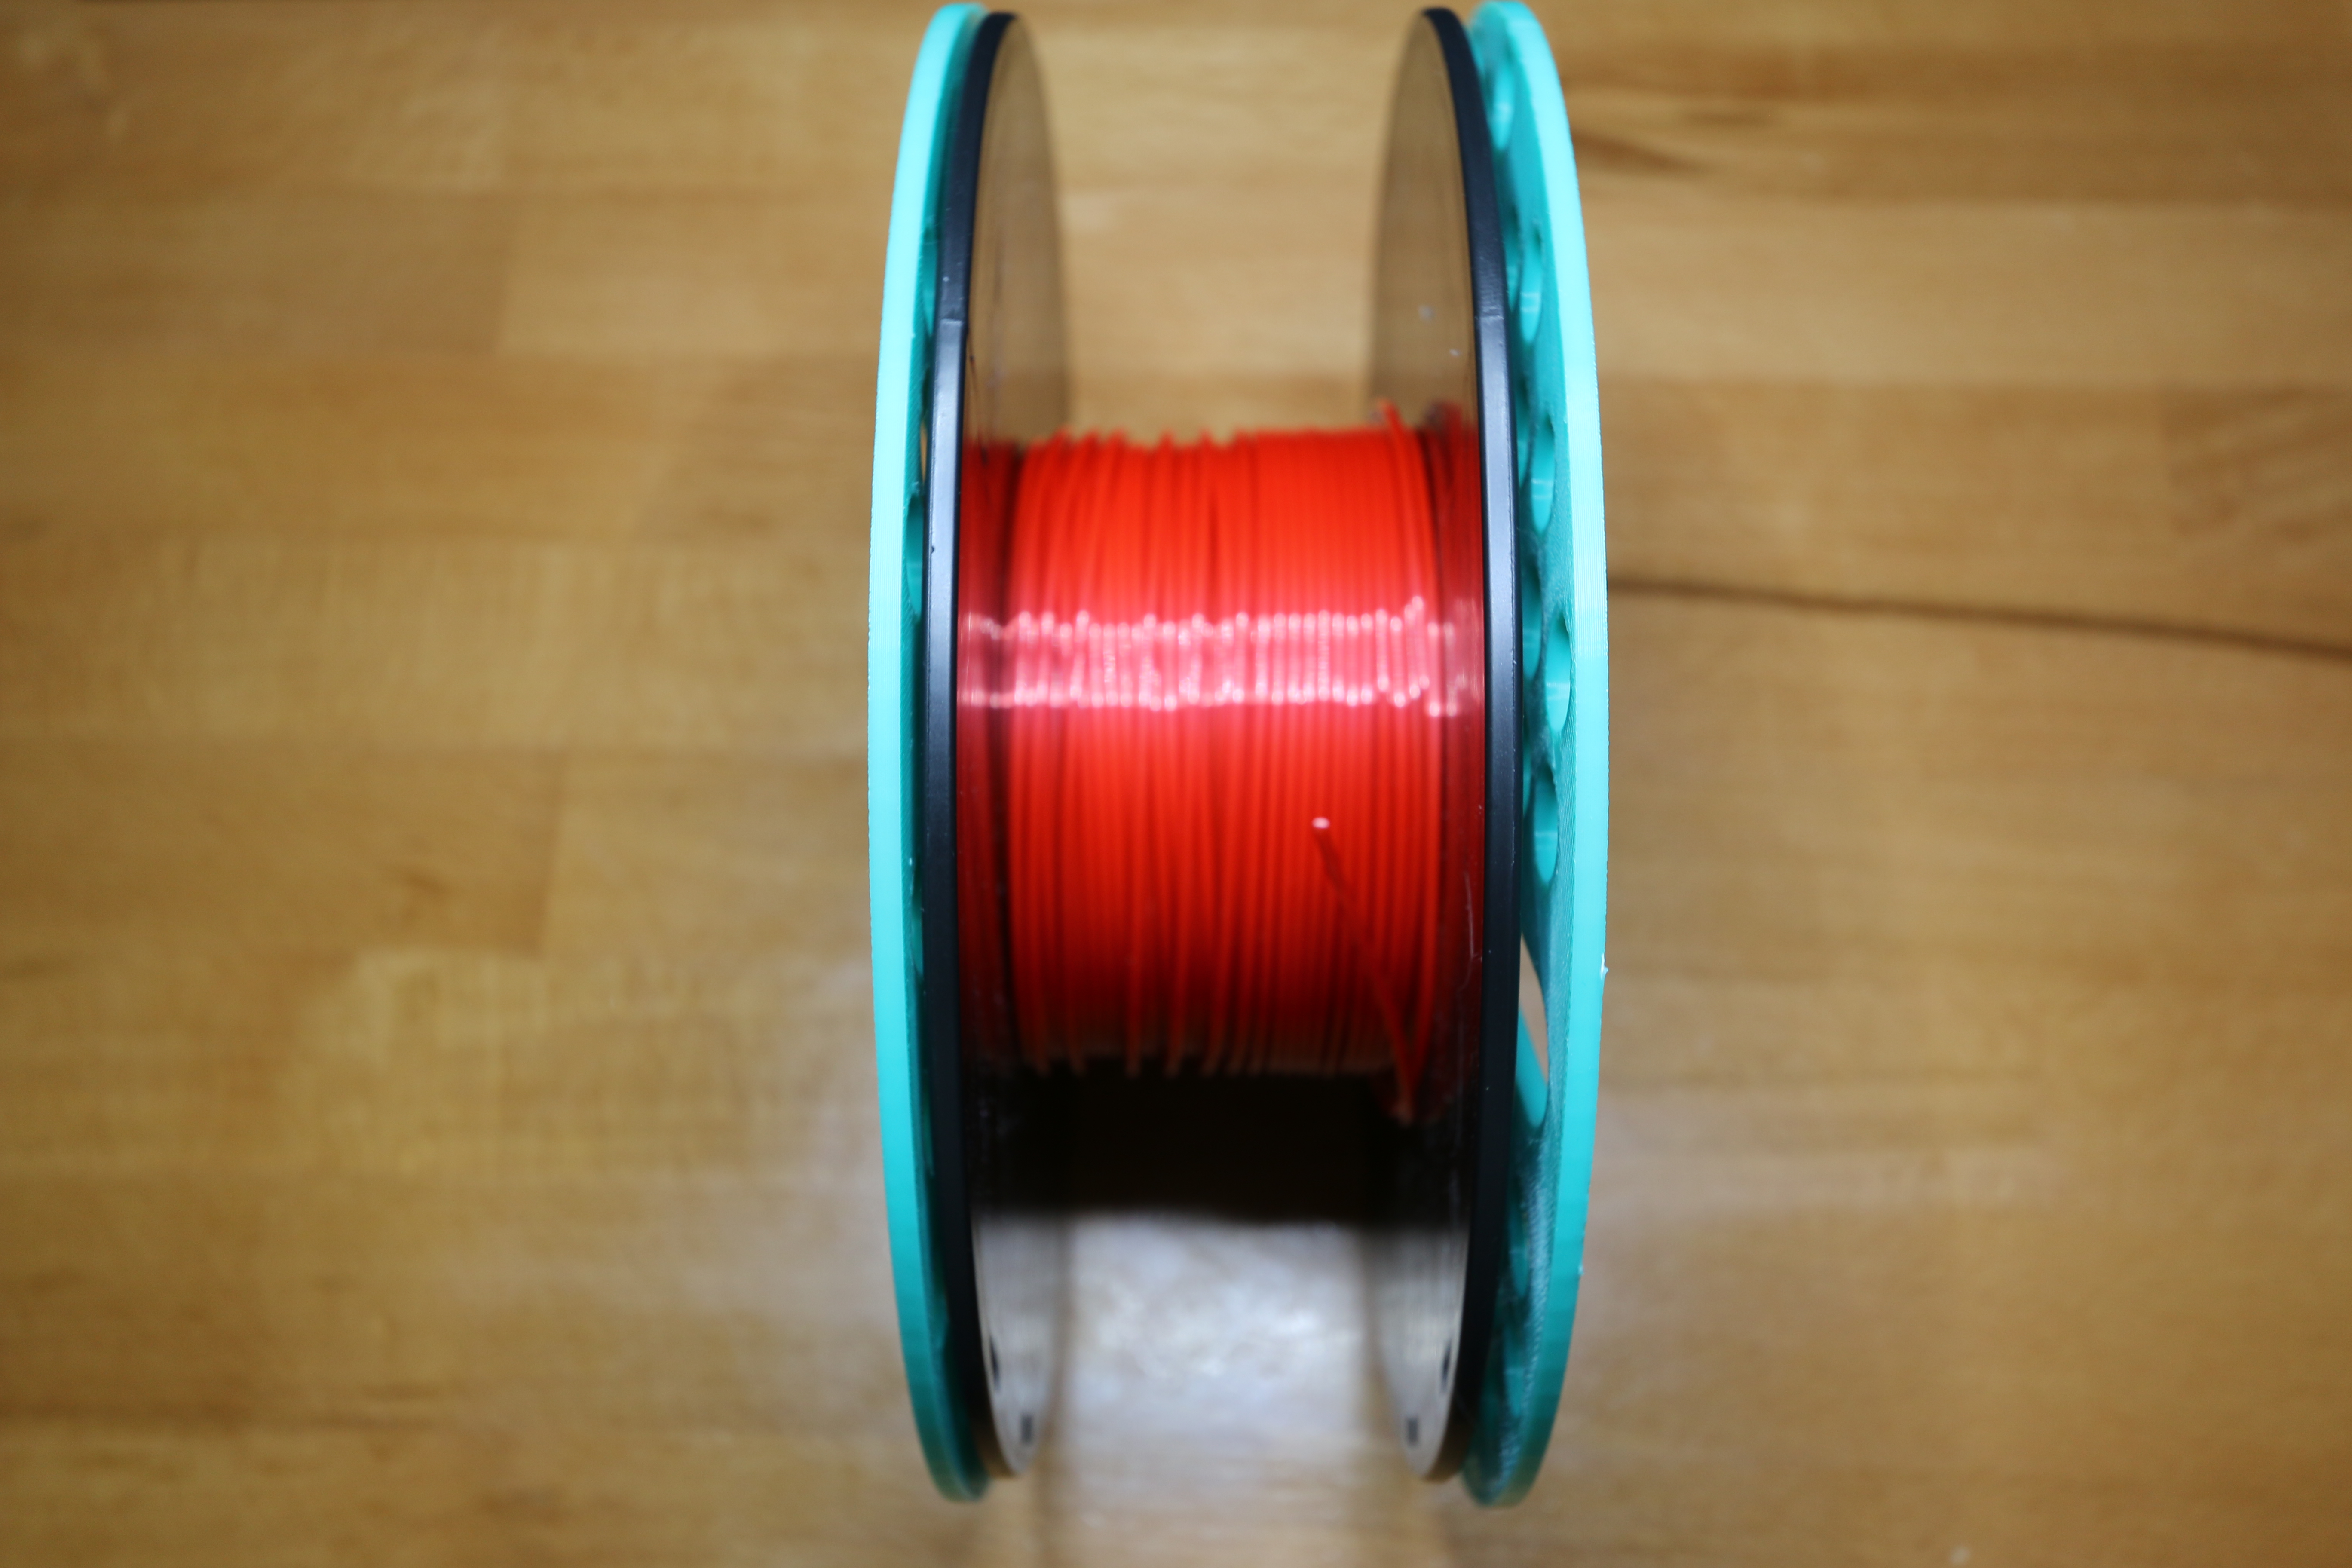
I have the coil, the Bambu Lab coil modeled, only that my coil is provided with a magnetic lock, which means that my coil is super fast to open and close again, without the sometime the lock can wear out. The opening goes by a slight twist and pull movement super easy by hand, while a simple pull off is associated with increased force.
Since the spool is easy to open and close again, I have also designed exceptions for different filament suppliers. Thus, very easy unwinding of the filament is possible without the roll tilting, leaning or jamming.
Magnetic closure on the filament holder.
Since the magnetic stopper has already worked so well on the spool, I made the system work here as well. The stopper has the purpose to fix the bobbin on the bobbin holder, so that slipping of the bobbin will be prevented.
The stopper is also easy to open by a twisting and pulling motion, although pulling it off without a twisting motion involves considerably more force.
With the adapter for the magnet coil - 7.2 cm outer diameter, fit reels that have 7.2 cm inner diameter, such as b.
With adapter fit: Sunlu reels / Geeetech reels /.
Without adapter fit: Bambu Lab rolls / Jayo cardboard rolls.
One more note, my reels fit beautifully in the AMS, except my reels don't work in the AMS. I have no idea why, the dimensions fit, the frame thickness fits, the weight shouldn't matter as the original reels are lighter or heavier at times. It doesn't bump, it doesn't jam, my coils run nice and easy in the guide, I've built around 6 different versions on coils to test where the fault is (I have no idea what it's on), even the ID chip from Bambu Lab is recognized immediately and correctly, if anyone has any ideas or tips I'd really appreciate it.
If there is interest in other distance adapters, just send the desired dimensions to me.
LED strip and LED holder
The 4 LED holders, have a recess for 10mm LED strips. I have also ensured here that the LED strips could not fall into the printer, because they are inserted into a groove and are thus secured against falling out (from gluing I have refrained from the outset, because it will not last long anyway (😊heat and glue do not fit together 😊) and before the printer or the printed material is damaged.
The LED holders are screwed in individually and can be exchanged for other holders with a smaller groove. But there are only holders with a 10mm groove in the print file, on request I can create holders with 8mm or 12mm groove (free of charge 😉).
The LED/RGB power cable can be conveniently led out through the recess in the component (2 - 2 - Top - Rear - Left structure).
The structure of the substructure
Step 1
Parts needed for this step are:
1 - 1 - Body Bottom - Rear - Left
1 - 2 - Structure Bottom - Rear - Right
1 - 3 - Structure Bottom - Center - Rear
1 - 4 - Body Bottom - Center - Left - Print Holder Hole
1 - 5 - Structure Bottom - Center - Right
1 - 6 - Structure Bottom - Center - Front
1 - 7 - Structure Bottom - Front - Left
1 - 8 - Structure Bottom - Front - Right
1 - 9 - RGB - Holder - REAR
1 - 10 - RGB - Holder - Front
1 - 11 - RGB - Holder - Right
1 - 12 - RGB - Holder - Left
LED / RGB holder required screws
M3 lens head screw 32 pieces x 10mm
M3 self-locking nuts 32 pieces
The first thing you should do is to put the lower rim (that's the 8 pieces) that you can see in the pictures in the picture gallery on the table.
Please make sure that the part (1 - 4 - Build Bottom - Center - Left - Print Holder Hole) goes on the left side.
Now take the 4 LED holders and screw those to the inside of the bottom crown as shown in the pictures.
The screw head should sit flush in the recess at the top of the LED holder and the nut should sit flush in the recess in the lower wreath.
The led holders are screwed to the lower crown with 24 x 10mm screws, 24 x self-locking nuts (Please use the inner holes).
Step 2
Now the parts with the designation (Body- Top) are screwed to the lower construction.
Top structure - parts and screws needed
2 - 1 - Top assembly - Left
2 - 2 - Structure Top - Rear - Left - Recess for LED/RGB power cable.
2 - 3 - Structure Top - Rear - Right
2 - 4 - Structure Top - Right
2 - 5 - Structure Top - Front - Left with handle recess
2 - 6 - Body Top - Front - Right with handle recess
2 - 1 - Structure Top - Left
6 X 30mm screws
6 X self-locking nuts
2 - 2 - Structure Top - Rear - Left - with side holes.
4 X 30mm screws
4 X self-locking nuts
2 - 3 - Top - Rear - Right structure
4 X 30mm screws
4 X self-locking nuts
2 - 4 - Structure Top - Right
6 X 30mm screws
6 X self-locking nuts
2 - 5 - Structure Top - Front - Left with handle recess
6 X 30mm screws
6 X self-locking nuts
2 - 6 - Top - Front - Right structure with handle recess
6 X 30mm screws
6 X self locking nuts
Step 3
Before attaching the coil holder, you should press the magnets into the recesses. These should sit quite tightly in the recesses, very important is the polarity of the magnets, although I have 4 small holes in the stopper, to press out the magnets (if a mistake in the polarity happened). On the filament holder, the 4 holes were not possible (so please pay attention).
Video how to insert the magnets without it comes to the wrong polarity 😊
https://youtu.be/lYHocF0vfnU
Magnets link
https://www.ebay.de/sch/i.html?_from=R40&_trksid=p2334524.m570.l1313&_nkw=Neodym+Magnete+5x5x5&_sacat=0&LH_TitleDesc=0&_osacat=0&_odkw=5x5x5+magnete
Last, screw the coil holder to the left side'.
The parts and screws needed
3 - 1 - Coil holder
3 - 2 - Stopper for coil holder
Screws and magnets
1 x 24mm screws
4 x 45mm screws
5 x self-locking nuts
8 X 5x5x5 magnets
The remaining parts
3 - 1 - Magnet coil - upper part. 8 x 5x5x5 magnets
3 - 2 - Magnet coil - Lower part. 8 x 5x5x5 magnets
3 - 3 - Magnet coil adapter - 7.2cm outer diameter.
3 - 4 - Spacer ring
There are more updates planned for the build.
I am open to suggestions and ideas.
I hope I have forgotten nothing 😊
Kind regards from Hesse
Anubis - MK