Skip to content

Arduino powered Portal Gun - Modification and shopping list

🔫 3D models of guns or weapons are dummy objects or prop toys and have no real functionality as weapons. They are intended for entertainment or decorative purposes only. For any design violating our T&Cs, please report them.

Advertising
Advertising
?
Creation quality: 5.0/5 (2 votes)
Evaluation of members on the printability, utility, level of detail, etc.

  • 8k views
  • 62 likes
  • 275 downloads
  • 3 collections

License
3D design format
STL Folder details Close
  • PG_Backcover_Full.stl

Learn more about the formats

3D model size X 226 × Y 323 × Z 167 mm
Publication date 2023-05-18 at 14:26
?
Published to Thingiverse on: 2022-08-24 at 18:36
Design number 1226904

3D printer file info

3D model description

ATTENTION Moved to printables. Please use following link for the newest Version:
https://www.printables.com/de/model/795771-arduino-powered-portal-gun-modification-and-shoppi

To make your own Portal Gun with light and sound you need parts from here:
https://www.thingiverse.com/thing:3579224
and change them with parts from here (Filenames will guide you).
https://www.thingiverse.com/thing:4641037

And now you are done. Follow the instructions in the second link form Lunchbox7985).
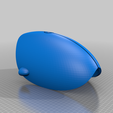
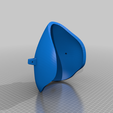
But if you like my remix from the button-hatch with three arcade-buttons instead of two AND if you got a large printer like the FLSUN QQ-S Pro and want to print the white shell-parts in one piece you have to change the white shell-parts and the hatch-Part with my parts as follows.

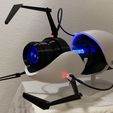
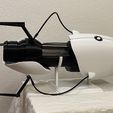
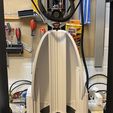
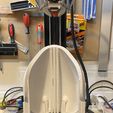
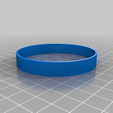
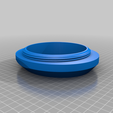
I printed the white shell-parts of the case each "in one piece" on a Flsun QQ-S Pro. This worked great and so I didn't have to worry about gluing it all together.

The designer of the Arduino Portal Gun used a 2.5 inch tube because he lives in the USA. I had overlooked that when I printed the "modified_collector.stl" part. So I needed an adapter to be able to use a 60mm acrylic tube.
So get the right tube and print the right part before you print ;-)
Otherwise you can use my adapter "PG Acryl Rod Adapter.stl".
Or you print the right part from Lunchbox7985: "modified_collector_larger_center_hole_original_outer_size.stl".

The last modification is for the Generator Hatch for the buttons:
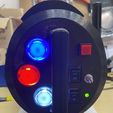
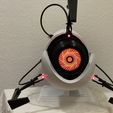
I modified the case cover to fit a total of 3 arcade switches. The white button is for "Cancel Portal" and only lights up when there is a portal to cancel. (You need a slight modification of the software for the Arduino, I attached the source code file, and you have to connect the LED from the white arcade button to port "A3" of the Arduino (right next to the connectors for the two portal buttons)

The Cancel button can be operated comfortably with the little finger.
The power-up switch (in the middle) can be operated with the knuckle of the ring finger.
You can use PG-Grip_R.stl and PG-Grip_L.stl from the original Portal Gun Design from Evarate (https://www.thingiverse.com/thing:3579224)

I used the following parts:
Arcade buttons
https://www.amazon.de/gp/product/B08RC2DB3H/ref=ppx_yo_dt_b_asin_title_o00_s03?ie=UTF8&psc=1

Acrylic tube
https://www.amazon.de/gp/product/B09F68PSPJ/ref=ppx_yo_dt_b_asin_title_o02_s00?ie=UTF8&psc=1

Use painter's masking tape and with an angle sign in rows the measure (146mm) and saw carefully with a hacksaw piece by piece.

Acrylic rod
https://www.amazon.de/gp/product/B07JLFBQVV/ref=ppx_yo_dt_b_asin_title_o03_s00?ie=UTF8&th=1

No need to shorten. The ends of the rod should be polished so that the light shines through better.

Other components:
Loudspeaker
https://www.amazon.de/gp/product/B07M98D9GZ/ref=ppx_yo_dt_b_asin_title_o04_s00?ie=UTF8&psc=1

Arduino clone
https://www.amazon.de/gp/product/B078SBBST6/ref=ppx_yo_dt_b_asin_title_o01_s00?ie=UTF8&psc=1

Sound board
https://www.amazon.de/gp/product/B010M8UOR8/ref=ppx_yo_dt_b_asin_title_o09_s00?ie=UTF8&psc=1

Neopixel ring
https://www.amazon.de/gp/product/B08PBPT4LH/ref=ppx_yo_dt_b_asin_title_o01_s00?ie=UTF8&psc=1
SOLD OUT
Replace with:
https://www.amazon.de/Bits-WS2812-RGB-LED-Ringlampe-integrierten-Treibern/dp/B07L82FBL3/ref=sr_1_3?__mk_de_DE=ÅMÅŽÕÑ&crid=15Q4L4YTE06OR&keywords=led+ring+16&qid=1680545860&sprefix=led+ring+16%2Caps%2C83&sr=8-3

Neopixel Jewel 2x
https://www.amazon.de/gp/product/B07WPCQ9NY/ref=ppx_yo_dt_b_asin_title_o09_s00?ie=UTF8&psc=1

Power-Up / Power-Switch
https://www.amazon.de/gp/product/B087PYW9BS/ref=ppx_yo_dt_b_asin_title_o00_s03?ie=UTF8&psc=1

Neopixel for status
https://www.amazon.de/gp/product/B01D1FFVOA/ref=ppx_yo_dt_b_asin_title_o00_s02?ie=UTF8&psc=1

Amplifier
https://www.amazon.de/gp/product/B07KQCKWF8/ref=ppx_yo_dt_b_asin_title_o00_s01?ie=UTF8&psc=1

Battery pack
https://www.amazon.de/gp/product/B088BTYSLX/ref=ppx_yo_dt_b_asin_title_o00_s02?ie=UTF8&psc=1

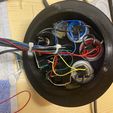
I didn't feel like soldering the components onto a board, so I used a breadboard and jumper cables:
https://www.amazon.de/gp/product/B078JGQKWP/ref=ppx_yo_dt_b_asin_title_o00_s00?ie=UTF8&th=1

The three black cables are each 32cm long and come from the hardware store (Home Depot): H03VV-F 2×0,75mm² and mounting with hot glue in their mounting points to the big white part.

Glue for connecting the main parts:
https://www.amazon.de/Pattex-PSE6N-Stability-Express-Adhesive/dp/B01N4UZT34/ref=sr_1_6?keywords=pattex+stabilit+express&qid=1661358039&sprefix=pattex+sta%2Caps%2C80&sr=8-6

Small parts with UHU Hartkunstsoffkleber
https://www.amazon.de/UHU-Spezialkleber-HART-KUNSTSTOFF-Infokarte/dp/B01HJG9FR6/ref=sr_1_5?keywords=uhu+hart+kunststoff&qid=1661358246&sprefix=uhu+hart%2Caps%2C75&sr=8-5

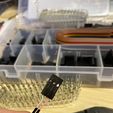
For the connection to the Arduino and the amplifier I used DuPont connectors:
https://www.amazon.de/gp/product/B07QX51F3B/ref=ppx_yo_dt_b_search_asin_title?ie=UTF8&psc=1

The cable from the sound module to the amplifier is an old headphone cable.

Advertising


Issue with this design? Report a problem.

Would you like to support Cults?

You like Cults and you want to help us continue the adventure independently? Please note that we are a small team of 3 people, therefore it is very simple to support us to maintain the activity and create future developments. Here are 4 solutions accessible to all:

  • ADVERTISING: Disable your banner blocker (AdBlock, …) and click on our banner ads.

  • AFFILIATION: Make your purchases online by clicking on our affiliate links here Amazon.

  • DONATE: If you want, you can make a donation via Ko-Fi 💜.

  • WORD OF MOUTH: Invite your friends to come, discover the platform and the magnificent 3D files shared by the community!


Sharing and downloading on Cults3D guarantees that designs remain in makers community hands! And not in the hands of the 3D printing or software giants who own the competing platforms and exploit the designs for their own commercial interests.

Cults3D is an independent, self-financed site that is not accountable to any investor or brand. Almost all of the site's revenues are paid back to the platform's makers. The content published on the site serves only the interests of its authors and not those of 3D printer brands who also wish to control the 3D modeling market.

100% secure payment by credit card, PayPal, Apple Pay, Google Pay, etc.
View all payment options.