YET ANOTHER AUTO POWER-OFF (AFTER COOL DOWN) FOR ENDER 3/PRO
Features:
Only 2 printables (No support)
Printer's original parts are kept
Simple & effective mount/unmount and use
Serail to the printer's main switch (Main Switch).
No relay or electronics.
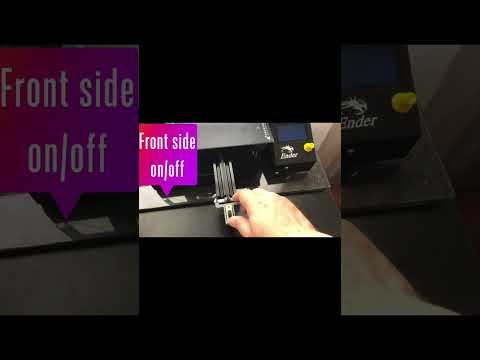
Front side "on/off" (if you keep Main Switch always "on")
Waits for hotend to cool down to 50C degs to avoid damage
Simple "End G-Code"
The Switch (Slide Switch):
The switch I had on hand was a 10amp 110/220 V on/off slide switch (23mm X 14mm) with a 6-10mm handle. So, I designed the switch holder box accordingly. However, the box can be modified by a simple cad program (like Tinckercad) based on the size of your slide switch.
The Cables:
You need a "two-line" electricity cable 40cm long, 10amp 110/220V.
The electricity voltage in my country is 220V but the voltage that comes to the "on/off" switch is 110V, probably because Creality designed the power supply to be compatible with both voltages; 110 and 220. Nevertheless, when mounting the switch and the cables always disconnect the printer from the outlet to avoid any electric shocks. Preferably use lug cables to easily connect the cables between the Main Switch and the Slide Switch. So, you won't need any soldering. Firmly isolate the connections on the Slide Switch after connecting the cables either with lugs or with soldering, to avoid hazardous electric shocks while using.
Printing:
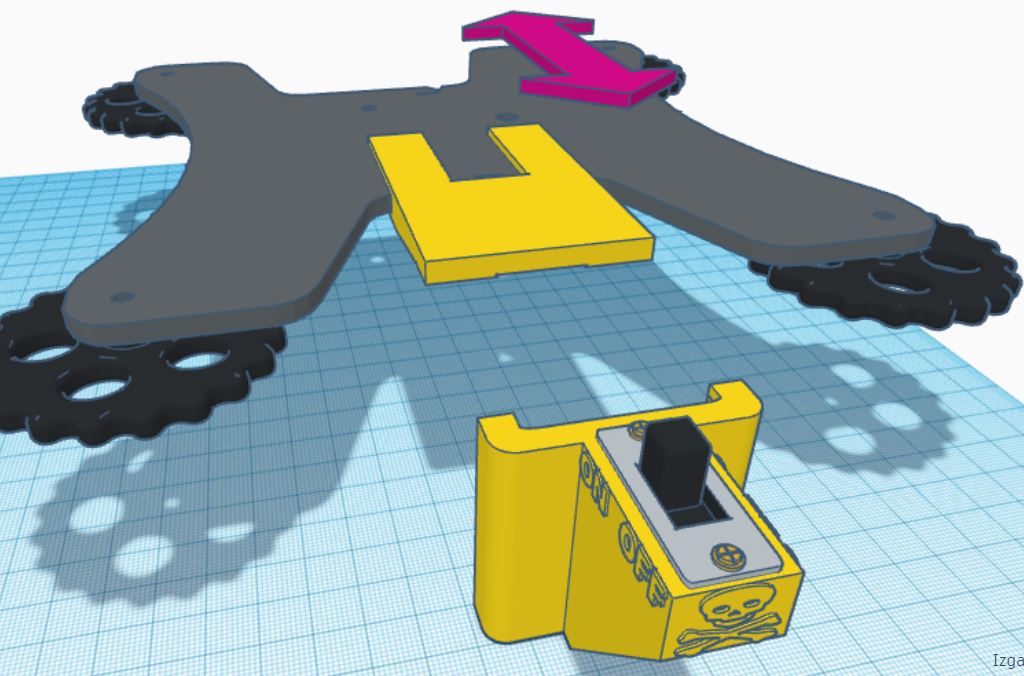
There are two printable parts;
1) the Switch Holder
2) the Trigger
Print the Switch Holder upside down for good adhesion to the bed, while the Trigger should be printed vertically and preferably with a "brim" for good adhesion(although I designed the part long enough to have good adhesion). You can also print both parts in one shot (using brim if necessary).
Other Settings:
Quality: 0.28mm (low quality to save time) or standard quality (0.2mm)
Support: None
Build plate Adhesion: None (Brim may be needed only for the Trigger).
Mounting:
1) Disconnect the printer from the outlet to avoid any electric shocks.
2) Unscrew the Main Switch from the printer's power supply.
3) Unplug the lugs of the "short red cable" from its connections and take it out (and keep it safe with your other aux printer parts).
4) Plug in the new cable's lugs to the same connections. There is no +/- polarization (connect any one of the cables to any one of the connections and the other cable to the other connection).
5) Pass the cable through the inside of the power supply and pull it out from the back cable hole of the power supply.
6) Mount back the Main Switch to the power supply.
7) Pass the cable under the printer and inside the Switch Holder and connect the cable to the Slide Switch either with the lugs or with soldering. In both cases isolate the connections very firmly to avoid any electric shocks when using.
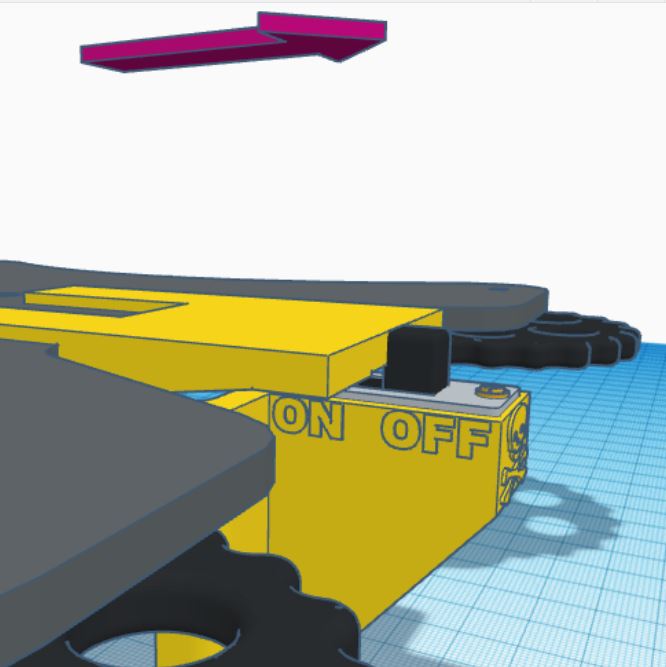
8) Mount the Slide Switch to the Switch Holder with two small screws (3mm dia). The "Slide Handle" of the switch should be at "on" position and facing the printer side.
9) Attach the Switch Holder to the front side of the printer's middle carrier beam.
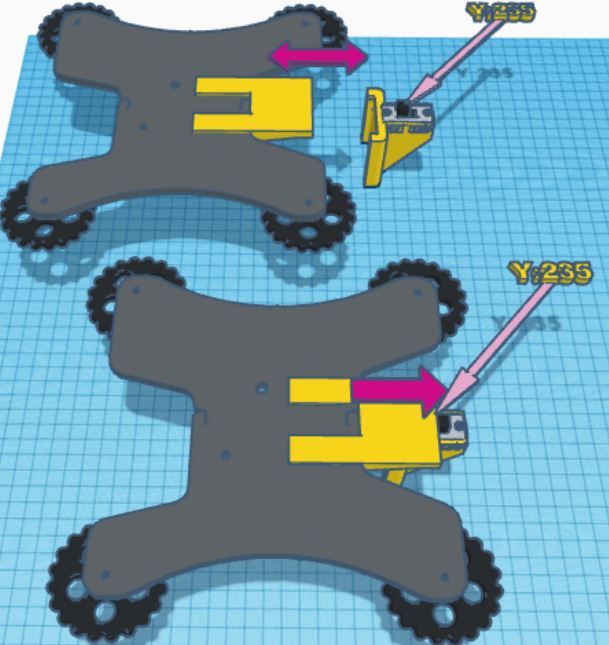
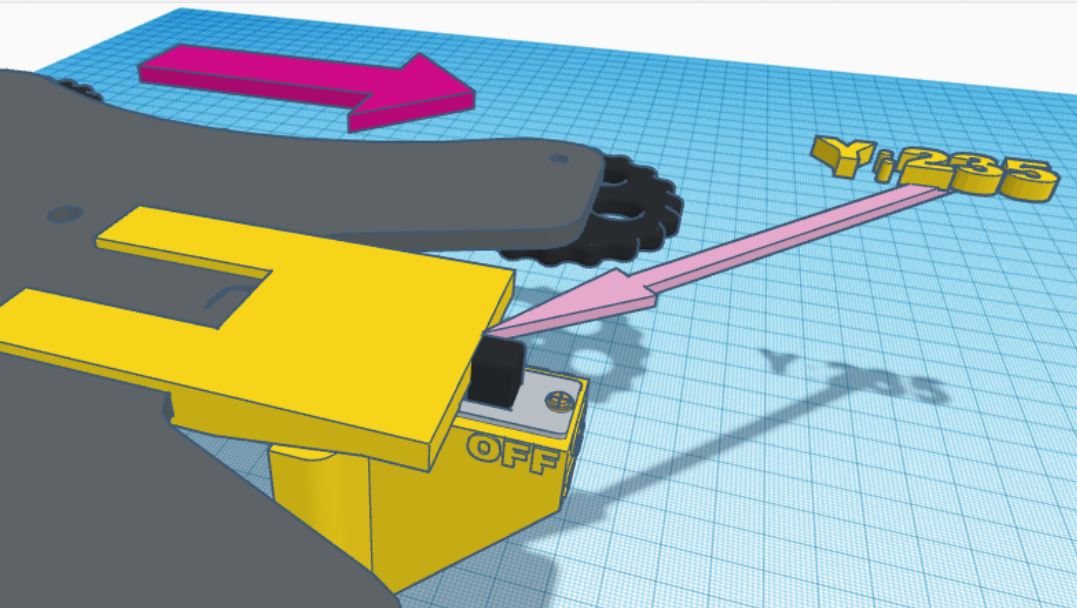
10) Attach the Trigger part to the Y-Carriage Plate as seen in the pictures. No screwing or gluing is needed but ensure that the Trigger part would go to the very end and touch and nesting on the holes of the Y-Carriage Plate.
Testing:
1) Power up the printer and turn on the Main Switch.
2) If the Slide Switch is at "on" position, the printer should run now.
3) Auto-home the print head and;
4) Move the Y axis to 235mm and the Slide Switch should now be pushed by the Trigger and the power should go "off". See the videos:
https://www.youtube.com/watch?v=2B_UX4fm1Mg&t=78s
G-code:
In CURA, go to Settings-->Printer-->Manage Printers-->Printers-->Machine Settings-->End G-Code
And change the End G-Code as follows (copy the following and replace the original end G-code):
;*END G-CODE **
;*(COPY & REPLACE WITH THE ORIGINAL END G-CODE)*
G91 ; Relative positioning
G1 E-2 F2700 ; Retract a bit
G1 E-2 Z0.2 F2400 ; Retract and raise Z
G1 X5 Y5 F3000 ; Wipeout
G1 Z10 ; Raise Z more
G90 ; Absolute positioning
M106 S0 ; Turn-off fan
M104 S0 ; Turn-off hotend
M140 S0 ; Turn-off bed
M117 Print Completed ; LCD message
M300 S440 P200 ; Beep
M300 S660 P250 ; Beep
M300 S880 P300 ; Beep
;***AUTO POWER-OFF SCRIPT*
G1 X0 Y220 ; Move bed up to 220mm and present print
M109 R50 ; Wait for hotend to cool down to 50C degrees
G1 Y235 ; Move bed up to 235mm and trigger power-off switch
;***END OF END G-CODE*
How to use:
Print as usual. When the print is finished the printer will;
First present the print @ Y:220
Beep to inform you that the print is complete
Wait for the hotend to cool down to 50C deg
Move the bed to Y:235 and slide the switch to "off"
In case of any questions please let me know.
Happy printings...
:format(webp)/https://fbi.cults3d.com/uploaders/16688082/illustration-file/e36b567a-ad2b-4e50-9b2e-931dea0436da/Top3.jpg)


/https://preview3d-images.cults3d.com/62eyp3nhmtzmqufcrfeceh0kbpjb)
/https://preview3d-images.cults3d.com/97gruo2viqnm0txhs34q7gbkcze5)
/https://preview3d-images.cults3d.com/l2kqnsyz8xk7zvc3ceazsuhthr3j)


