Skip to content

Dremel Workstation 220 adapter for heat-set inserts

Advertising
Advertising
?
Creation quality: 5.0/5 (1 vote)
Evaluation of members on the printability, utility, level of detail, etc.

  • 1.4k views
  • 2 likes
  • 18 downloads

License
3D design format
OBJ Folder details Close
  • Adapter 16mm (inserts).obj
  • Adapter 16mm (nuts).obj
  • Adapter 20mm (inserts).obj
  • Adapter 20mm (nuts).obj
  • Clamp 16mm.obj
  • Clamp 20mm.obj

Learn more about the formats

Last update 2023-08-04 at 01:21
Publication date 2023-06-02 at 13:19
Design number 1250531

3D printer file info

3D model description

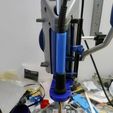
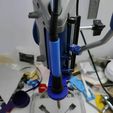
Dremel Workstation 220 adapter for heat-set inserts

It's a small and fun project I made on April 2022 when working with some heat-set inserts.
Using a soldering iron with bare hands does not guarantee enough accuracy, and since I had that Dremel press since quite a long time, well, making an adapter seemed to be the best (and cheapest) way to add heat-set inserts without any hassle.


This adapter fits soldering irons with 16 and 20mm-diameter shafts, other variants may be added on request.
It replaces the existing drill machine adapter and uses the same original hardware (nuts, washers, bolts).

All you need is :
- 2x M3x12 or M3x16 hex socket screws (or any M3x12/M3x16 screw you got)
- 2x M3 nuts for nut-based version OR 2 M3 heat-set inserts (length : 5mm) for insert-based version


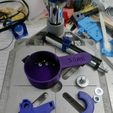
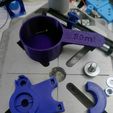
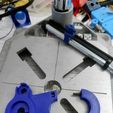
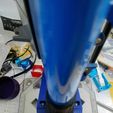
Assembly is very easy, the pic order can be used as visual tips.

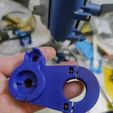
The soldering iron adapter is made out of 2 parts : the main adapter that replaces the original drill adapter, and a clamp that secures the soldering iron.

  1. The first thing to do is adding either nuts or inserts. The nut-based variant has 2 recesses for the nuts, just put the nuts where they should. They slide in, enough clearance has been added so they're not captive (see pictures for more details on the assembly).

  2. Drive the two screws through the clamp and screw them until there is a little space between the adapter and the clamp. The whole thing should not fall apart, it should be just a bit loose.

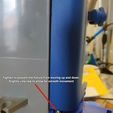
  3. Fully screw the small brass grub screw located on the bottom left of the height-adjustable rod. This is to prevent it to move up and down using the lever.

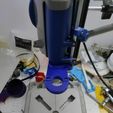
  4. Attach the previously assembled part with the original hardware, replacing the original drill adapter. Tighten reasonably, nothing should move.

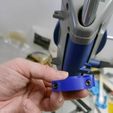
  5. Slide the soldering iron though the hole, maintain it in place if needed while tighening the screws, making sure the soldering iron is firmly held in place.

  6. Unscrew the small brass grub screw to allow the assembly to move up and down using the lever. You only need to unscrew it until things move up/down smoothly.

Done !


CHANGELOG

04/08/2023 : Upgrade to V2, with nuts or inserts for assembly
23/07/2023 : added a version for 16mm diameter soldering * irons
April 2022 : initial version (V1)

3D printing settings

Use 0.25mm thick layers, 4 perimeters, 25% infill.
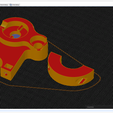
SuperSlicer users shall activate "Fill the voids with bridges" (see pics) to avoid using supports, or use "snug" supports
Other slicers may require supports to avoid printing some perimeters "in the air".
Print parts with the largest flat area faceing the buildplate (see pictures below).

You might wonder "what material should I use ?". Well, I don't really advise to use PLA (unless you make a 100% solid part that's annealed afterwards). PETG/PCTG works very well, yet you can use any material that is stiff enough and has decent heat resistance.
I made mine in ABS (FormFutura Titan X, dark blue shade).

Advertising


Issue with this design? Report a problem.

Would you like to support Cults?

You like Cults and you want to help us continue the adventure independently? Please note that we are a small team of 3 people, therefore it is very simple to support us to maintain the activity and create future developments. Here are 4 solutions accessible to all:

  • ADVERTISING: Disable your banner blocker (AdBlock, …) and click on our banner ads.

  • AFFILIATION: Make your purchases online by clicking on our affiliate links here Amazon.

  • DONATE: If you want, you can make a donation via Ko-Fi πŸ’œ.

  • WORD OF MOUTH: Invite your friends to come, discover the platform and the magnificent 3D files shared by the community!


Sharing and downloading on Cults3D guarantees that designs remain in makers community hands! And not in the hands of the 3D printing or software giants who own the competing platforms and exploit the designs for their own commercial interests.

Cults3D is an independent, self-financed site that is not accountable to any investor or brand. Almost all of the site's revenues are paid back to the platform's makers. The content published on the site serves only the interests of its authors and not those of 3D printer brands who also wish to control the 3D modeling market.

100% secure payment by credit card, PayPal, Apple Pay, Google Pay, etc.
View all payment options.