Skip to content

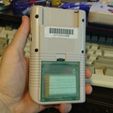
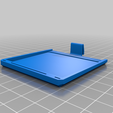
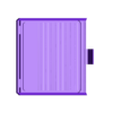
LiPo pack for GameBoy DMG-01

Advertising
Advertising
?
Creation quality: 0.0/5 (0 votes)
Evaluation of members on the printability, utility, level of detail, etc.

  • 595 views
  • 2 likes
  • 4 downloads

License
3D design format
Folder details Close
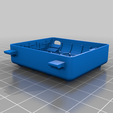
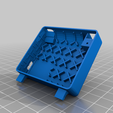
  • DMG-01_Battery_Body.stl
  • DMG-01_Battery_Body_45.stl
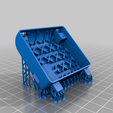
  • DMG-01_Battery_Body_Supported.stl
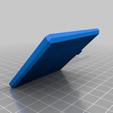
  • DMG-01_Battery_Cover.stl
  • DMG-01_Battery_Cover_45.stl
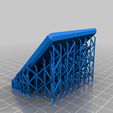
  • DMG-01_Battery_Cover_Supported.stl

Learn more about the formats

Publication date 2023-06-07 at 03:31
?
Published to Thingiverse on: 2021-09-09 at 22:01
Design number 1258239

3D printer file info

3D model description

Intended for resin printing.

Additional supplies

You'll need the following parts to complete assembly:
* TP4056 LiPo BMS: https://smile.amazon.com/gp/product/B07T816M2X
* 103450 LiPo pack: https://www.aliexpress.com/item/1005001303560042.html
* Positive terminal: https://www.aliexpress.com/item/32949854416.html
* Negative terminal: https://www.aliexpress.com/item/4000953728880.html

Assembly

  • Print. The "45" files are in recommended print orientation.
  • Finish printed parts. Remove supports, file excess, sand, etc.
  • Use 1.5mm drill bit to ream the pilot hole for the positive terminal.
  • Secure positive terminal with an M2, 6mm screw.
  • Push negative terminal into position - it will lock itself in place.
  • Solder LiPo "+" wire (red), and TP4056 "BAT+" terminal to the positive battery terminal.
  • Solder LiPo "-" wire (black), and TP4056 "BAT-" terminal to the negative battery terminal.
  • Isolate battery from contact with TP4056 using Kapton or other tape.
  • Assemble pieces within "Body".
  • Secure LiPo & TP4056 with small amount of hot glue.
  • Reinforce wires with hot glue.
  • Glue "Panel" in place.
  • File/sand as necessary to fine-tune the fit with your GameBoy.

Technical notes

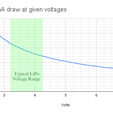
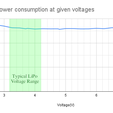
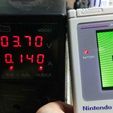
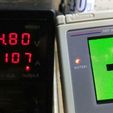
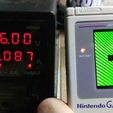
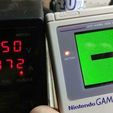
The original GameBoy ran on 4xAA batteries, so the nominal power input would have been 6V. A 103450 LiPo pack however, only provides 3.2V-4.3V, depending on how fully charged it is. This is not a problem for the GameBoy DMG-01, because it contains an internal voltage regulator, which converts arbitrary inputs (within reason) to 5V. I've tested & confirmed this with a DC Power Supply, and confirmed that the GameBoy runs fine on all voltages a LiPo may output. The screen cuts out under ~2.5V, but the BMS board on the LiPo pack shouldn't allow it to discharge past 3.2V, to protect the LiPo itself from damage. Further, the power (W) consumption of the GameBoy does not vary significantly from 3-7V

Advertising


Issue with this design? Report a problem.

Would you like to support Cults?

You like Cults and you want to help us continue the adventure independently? Please note that we are a small team of 3 people, therefore it is very simple to support us to maintain the activity and create future developments. Here are 4 solutions accessible to all:

  • ADVERTISING: Disable your banner blocker (AdBlock, …) and click on our banner ads.

  • AFFILIATION: Make your purchases online by clicking on our affiliate links here Amazon.

  • DONATE: If you want, you can make a donation via Ko-Fi πŸ’œ.

  • WORD OF MOUTH: Invite your friends to come, discover the platform and the magnificent 3D files shared by the community!


Sharing and downloading on Cults3D guarantees that designs remain in makers community hands! And not in the hands of the 3D printing or software giants who own the competing platforms and exploit the designs for their own commercial interests.

Cults3D is an independent, self-financed site that is not accountable to any investor or brand. Almost all of the site's revenues are paid back to the platform's makers. The content published on the site serves only the interests of its authors and not those of 3D printer brands who also wish to control the 3D modeling market.

100% secure payment by credit card, PayPal, Apple Pay, Google Pay, etc.
View all payment options.