Skip to content

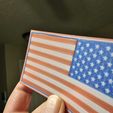
American/US/USA Flag - Paper thin/with color/wallet size - Print In Place

Advertising
Advertising
?
Creation quality: 5.0/5 (1 vote)
Evaluation of members on the printability, utility, level of detail, etc.

  • 685 views
  • 1 like
  • 7 downloads

License
3D design format
STL Folder details Close
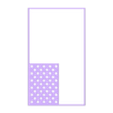
  • 1stflagblue.stl
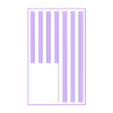
  • 2ndflagred.stl
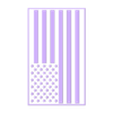
  • 3rdflagwhite.stl

Learn more about the formats

Publication date 2023-06-09 at 05:08
Design number 1262170

3D printer file info

3D model description

American/US/USA Flag - Paper thin/with color/wallet size - Print In Place
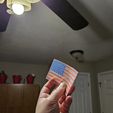
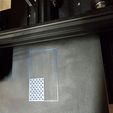
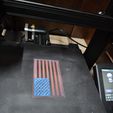
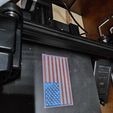
Happy 4th of July! I wanted to create something for the upcoming holiday. I spent weeks trying to figure out the best way to accomplish creating this flag with colors right on the build plate. It is a 3 part z-hop method. It was designed so you don't have to remove the parts from the build plate so you have one solid flag when you are finished.
It is EXTREMELY important to check the settings on your own printer to accomplish this. Mine has a BL touch that forced me to make some GCODE changes to accomplish the multi-color effects. I only have a single extruder, so you may need to change your settings according to what your printer can do. Check the 3d Print Settings section for instructions and printer settings. Please enjoy :)

3D printing settings

Filament Brand = SUNLU (requires 210*C temperature)
Ender 3 V2 Neo with BL touch

Cura Slicer
Super Quality 0.12 Default With the following modifications:
Skirt/Brim/Supports = Disabled
Enable Ironing = True
Printing Temp = 210*C
Z Hop = True
Z Hop Height = 0.5 mm (Specific to the height of this design)
Minimum Layer Time = 15s
Minimum Speed = 5.0 mm/s

Start GCode for 1stflagblue (use blue filament)

M104 S180 ; Start pre-heating the nozzle to a safe temperature where the filament won't ooze to save time
M190 S{material_bed_temperature_layer_0} ; Start heating the bed to the target temperature specified in Print Settings and wait until the temperature is reached
G92 E0 ; Reset extruder
G28 ; Auto Home all axes
G29 ; ABL
M420 S1 ; Automatic bed leveling with saved mesh
M104 S{material_print_temperature_layer_0} ; Start heating the nozzle to the target temperature specified in Print Settings
G1 Z2.0 F3000 ; Move Z Axis up
G1 X0.1 Y20 Z0.3 F5000.0 ; Move to start position
M109 S{material_print_temperature_layer_0} ; Wait until the nozzle is heated to the target temperature specified in Print Settings
G1 X0.1 Y200.0 Z0.3 F1500.0 E15 ; Draw the first line
G1 X0.4 Y200.0 Z0.3 F5000.0 ; Move to the side
G1 X0.4 Y20 Z0.3 F1500.0 E30 ; Draw the second line
G92 E0 ; Reset extruder
G1 Z2.0 F3000 ; Move Z Axis up
G1 X5 Y20 Z0.3 F5000.0 ; Move over to prevent blob squish

Start GCode for 2ndflagred and 3rdflagwhite (change filament in-between prints WITHOUT removing the previous print from the build-plate)

M104 S180 ; Start pre-heating the nozzle to a safe temperature where the filament won't ooze to save time
M190 S{material_bed_temperature_layer_0} ; Start heating the bed to the target temperature specified in Print Settings and wait until the temperature is reached
G92 E0 ; Reset extruder
G28 ; Home axis
M420 S1 ; Automatic bed leveling with saved mesh
M104 S{material_print_temperature_layer_0} ; Start heating the nozzle to the target temperature specified in Print Settings
G1 Z2.0 F3000 ; Move Z Axis up
G1 X0.1 Y20 Z0.3 F5000.0 ; Move to start position
G0 Z-0.5 ; Move to adjusted height specifically for this print
G92 Z0 ; Treat this new height as the new zero point
M109 S{material_print_temperature_layer_0} ; Wait until the nozzle is heated to the target temperature specified in Print Settings
G1 X0.1 Y200.0 Z0.3 F1500.0 E15 ; Draw the first line
G1 X0.4 Y200.0 Z0.3 F5000.0 ; Move to the side
G1 X0.4 Y20 Z0.3 F1500.0 E30 ; Draw the second line
G92 E0 ; Reset extruder
G1 Z2.0 F3000 ; Move Z Axis up
G1 X5 Y20 Z0.3 F5000.0 ; Move over to prevent blob squish

Remember to change your GCode back to the original when you are finished so your nozzle doesn't dig into the build plate on future prints.

Advertising


Issue with this design? Report a problem.

Would you like to support Cults?

You like Cults and you want to help us continue the adventure independently? Please note that we are a small team of 3 people, therefore it is very simple to support us to maintain the activity and create future developments. Here are 4 solutions accessible to all:

  • ADVERTISING: Disable your banner blocker (AdBlock, …) and click on our banner ads.

  • AFFILIATION: Make your purchases online by clicking on our affiliate links here Amazon.

  • DONATE: If you want, you can make a donation via Ko-Fi πŸ’œ.

  • WORD OF MOUTH: Invite your friends to come, discover the platform and the magnificent 3D files shared by the community!


Sharing and downloading on Cults3D guarantees that designs remain in makers community hands! And not in the hands of the 3D printing or software giants who own the competing platforms and exploit the designs for their own commercial interests.

Cults3D is an independent, self-financed site that is not accountable to any investor or brand. Almost all of the site's revenues are paid back to the platform's makers. The content published on the site serves only the interests of its authors and not those of 3D printer brands who also wish to control the 3D modeling market.

100% secure payment by credit card, PayPal, Apple Pay, Google Pay, etc.
View all payment options.