Skip to content

Magnetic phone holder for laptop screen

Advertising
Advertising
?
Creation quality: 0.0/5 (0 votes)
Evaluation of members on the printability, utility, level of detail, etc.

  • 739 views
  • 1 like

License
3D design format
STL Folder details Close
  • Phone Magnet - Base.stl
  • Phone Magnet - Bras.stl
  • Phone Magnet - ButΓ©e.stl

Learn more about the formats

Publication date 2023-04-29 at 11:09
Design number 1193573

3D printer file info

3D model description

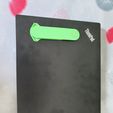
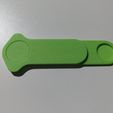
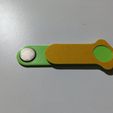
Magnetic phone holder for laptop screen.

This holder attaches to the back of your laptop screen using double-sided tape. ATTENTION to the quality of adhesion of your tape, which must be sufficient, otherwise your phone will fall under its own weight. Tip: use 3M-type tape.

This design uses numerous magnets to hold the mechanism in the various positions of use. Being symmetrical, this bracket can be placed either on the left or right of your screen. Pay attention to the magnetic quality of your magnets. The 20 * 3 mm magnet should be of high strength.

Materials required:

  • 8 neodymium magnets: diameter 4mm and thickness 1mm

  • 1 neodymium magnet: diameter 20mm and thickness 3mm

  • cyanoacrylate glue

  • Metal plate for standard phone magnet holder

Assembly:

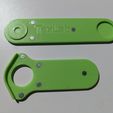
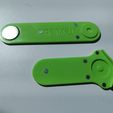
  • Fix the small magnets with cyanoacrylate glue in the slots provided on the 2 hinged parts. ATTENTION must be paid to the polarities of the magnets facing each other between the two parts. They must attract, NOT repel.

TIP: Tie 2 magnets together and mark the sides to be glued with a felt-tip pen in preparation for gluing. Separate the 2 magnets to glue them. To ensure that the mechanism runs smoothly, always keep a reference magnet to ensure that ALL magnets have the same polarity once fitted.

  • Assemble the 2 parts at the joint.

  • Glue the printed washer with a small drop of cyanoacrylate glue in the center of the washer. Maintain pressure between the articulated arm and the washer while the glue dries. Be careful not to let the glue run over. This would stick the joint and render it non-functional.

  • Using cyanoacrylate glue, glue the larger magnet in the slot provided on the articulated arm.

  • Apply double-sided tape to the back of the articulated base. Cut off any excess tape with a scalpel. TIP: If possible, cut and remove the double-sided tape at the joint so as not to interfere with joint movement.

    • Place and glue (using the double-sided tape previously applied) the assembly to the back of your laptop screen.

ENJOY!!!

3D printing settings

PLA : Green ICE

Temperatures: 200Β°C / 60Β°C

Infill : 15% to 20%

Walls: 1.2 mm

Substrates: base only

Advertising


Page translated by automatic translation. See the original version.
Issue with this design? Report a problem.

Would you like to support Cults?

You like Cults and you want to help us continue the adventure independently? Please note that we are a small team of 3 people, therefore it is very simple to support us to maintain the activity and create future developments. Here are 4 solutions accessible to all:

  • ADVERTISING: Disable your banner blocker (AdBlock, …) and click on our banner ads.

  • AFFILIATION: Make your purchases online by clicking on our affiliate links here Amazon.

  • DONATE: If you want, you can make a donation via Ko-Fi πŸ’œ.

  • WORD OF MOUTH: Invite your friends to come, discover the platform and the magnificent 3D files shared by the community!


Sharing and downloading on Cults3D guarantees that designs remain in makers community hands! And not in the hands of the 3D printing or software giants who own the competing platforms and exploit the designs for their own commercial interests.

Cults3D is an independent, self-financed site that is not accountable to any investor or brand. Almost all of the site's revenues are paid back to the platform's makers. The content published on the site serves only the interests of its authors and not those of 3D printer brands who also wish to control the 3D modeling market.

100% secure payment by credit card, PayPal, Apple Pay, Google Pay, etc.
View all payment options.