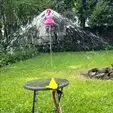
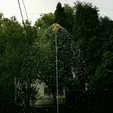
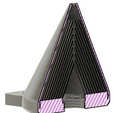
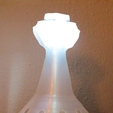
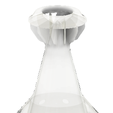
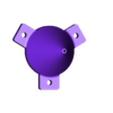
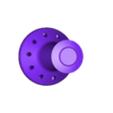
Need a fun summer print? Meet the H2ufO - The Untethered Floating Water Drone. The H2ufO magically balances on a stream of water, while spinning and spraying an umbrella of droplets downward.
See it in action!
More video and pictures here: Check it out!
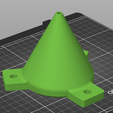
The print is in two parts, both of which need NO supports. The nozzle attaches to your garden hose to create a strong, clear stream of water upward. The H2ufO drone sits on top of the water stream and uses the stream to propel it upward, defying gravity.
The nozzle has standard female garden hose threads. Print with bottom on plate - no supports needed. Inside the nozzle are many fins which help ensure that the water stream is laminar. You can see these fins inside while slicing the model - the bottom fins move the water outward, and the cone shape fins focus the water and accelerate it upward to the nozzle opening. I used 90% gyroid infill to ensure the tabs and threads are strong. Included is a thread test print. For 1+1/16" US GHT threads, before printing the nozzle, you can print the thread test file to check the fit on your own hose. For a snug fit, start with scaling of x,y=101%, Z=104.5%. Adjust as you wish , and then use the same scaling factors for printing the nozzle. (X/Y should be the same number; so that the hole is not oval).
I've also included a nozzle model and thread check print for BSP G threads (DN20). Try the threads check print first. Start with x,y=101% and Z=100% scaling. Adjust as you wish , and then use the same scaling factors for printing the nozzle. (X/Y should be the same number; so that the hole is not oval).
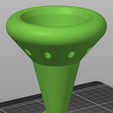
The H2ufO drone is also printable easily with no supports. There are some slight overhangs, so make sure you have adequate part cooling after the first layer. Print upside down, so that the small end (top) is on the bed. If your bed adhesion is low, add a brim in your slicer. You can experiment with infill - I used 50% gyroid.
B10 - Original Release
B19 - Moved more weight downward and strengthened neck of H2ufO.
D4 - Big Update! Added an LED light to the H2ufO! Light up the night! And prints in 20% less time!
For D4 H2uf0 with LED, you'll need an LED puck. Amazon Same recommendations as above for printing - use a brim if needed. This model needs very little infill, 20% gyroid would be sufficient. I printed in clear PLA, but any will work. To attach the light, I cut up a Ziploc plastic bag, placed it over the top hole, and pushed the puck down in. Two or three layers of film works. That way it's removable, and the plastic protects the light. Video here!
Optional part - I've included a 90 degree hose stake, which holds the hose end so it points upward. So that a clamp isn't needed to hold the nozzle. Print with flat side on bed, no supports needed. Print with extra walls and strong infill. Sized for common garden hose diameter, 5/8" ID.
You should not need any cleanup after printing, aside from brim if added. Attach the nozzle to your garden hose and clamp the nozzle to something firm and level like the edge of the table. I've included clamp tabs and screw holes for mounting. Try to aim the nozzle straight up. Turn the water on gently and fill the nozzle with water - wait until all air bubbles are purged out. Aim the nozzle so the water stream falls right back down.
Turn the water off and set the H2ufO drone on the nozzle. Now slowly turn the water on, more and more, until the drone starts spinning and lifts off of the nozzle.
Once the drone is floating, you can try some fun things like seeing how high up you can make it float, or changing water flow quickly to make it bounce up and down. Try flushing your toilet also, to see how much water gets diverted!
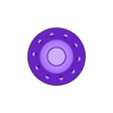
This model can be a teaching tool also. The drone is balanced by an equation of gravity, water flow rate and velocity, and angular momentum. Gravity pulls the drone down to earth while water flow pushes it up. The spinning action creates angular momentum, which, along with the tapered cone, helps the drone stay centered on the water stream. The base of the drone is much heavier than the top, which helps keep it upright and stable. The heavy bottom shifts the center of gravity down lower, closer to the bottom, for stability. The bottom of the drone also has a special chamber with holes. What is it for?
Want to experiment? Try scaling the H2ufO a little bigger or smaller in your slicer, to see how it reacts. You can also stop the print early, effectively "cutting off" some of the weighted bottom of the drone.

/https://fbi.cults3d.com/uploaders/22130047/illustration-file/12193945-99f5-4294-9a2b-234965a4df64/UFO4.gif)
