You won't see the STL details in the preview - they are many and easy to get confused. The project contains two archive files - for a flat cyclone and for a conical cyclone. The archives also include source files in Solidworks 2018 and STEP 214 format.
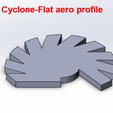
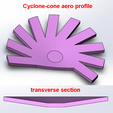
You see a preview of CycloneFlatAeroProfile. It is absolutely unnecessary for making an air duct, but a project cannot be completed without attaching at least one STL outside the archive. :)
I want to tell you about my air deflectors. They have one peculiarity - their bottom surface is made of thin aluminum sheet.
First, I used the Scott_3D deflector available in the Hypervube Evolution project files.
But I quickly saw that blowing the part on only one side did not make it possible to print spherical detals with good quality. In addition, I was printing PLA deflectors, and the bottom surface quickly became curved - from heating by the hotbed and air reflected from the part and the heating block.
Then I tried using a deflector that guides air from three sides. And when making it, I first tried to make the bottom surface of aluminum. This deflector worked much better, but I was hoping to find a suitable cyclone type deflector.
I finally developed such a deflector myself and made it.
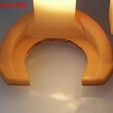
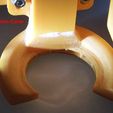
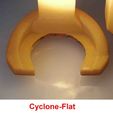
I made two versions of cyclonic blowing - a flat, directing cyclone only in the horizontal plane, and the second - a conical one.
They work great! And I like the work of the flat, perhaps even more.
Look applied photo for compare ducts. The photo shows the air flow over the water surface.
I print deflectors by cutting them into several parts, and this is how I solve several problems at the same time:
+ printing time is greatly reduced;
+ the direction of the layers during printing can be chosen such that the part has the greatest strength;
+ I do not have any partitions that reduce the cross section of the air channel;
+ I do not have sagging bridges that reduce the cross section of the air channel;
+ full access to the inner surface of the duct for grinding, I get an absolutely clean surface inside the duct;
+ the thickness of the bottom plate decreases - while the cross-section of the air channels increases by 25%;
+ the air duct outlets are closer to the table.
Then the parts of the deflector are glued together with cyacrine glue. Cyacrine glue also adheres perfectly to aluminum! In any case, for a deflector, the strength of the aluminum-PLA bond is quite sufficient.
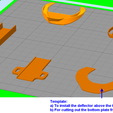
Look applied screenshot as sample. This is how I arranged the parts of the Cone Blower Cyclone for printing.
The source of aluminum is a beer can. The side to be glued is cleaned with sandpaper. Then I glue paper tape on it and trace the outline of the future part on it according to the printed template. The detail is neatly cut out with small scissors; it is important to avoid pulling the metal along the cut edge. It is better to leave a larger allowance - the excess is very easy to remove with a scalpel and a file after gluing.
The masking tape is removed, the surface is wiped with acetone and glued.
After the glue is completely dry, the contour of the glued aluminum is finished. Apply force to the tool only from the aluminum side to the plastic side - so that there is no force that tears the aluminum away from the plastic.
The vertical part of the duct (3 pieces of PLA) and the flow former (2 pieces of PLA and aluminum plate) are glued separately. The vertical part is installed on the carriage, the flow former is placed on the table, and in this position they are glued together - this ensures strict parallelism to the table.
The template for cutting out the aluminum plate is then used to adjust the height of the deflector. The table rises until it touches the nozzle, a template is placed on the table. The deflector is lowered, pressed against the template and in this position is fixed with screws to the carriage. So I get a precisely set gap between the deflector and the future part = 1mm (template thickness).
I draw the attention of those who want to repeat my project without changes: the BP6 extruder has a slightly specific heating block. The axis of the nozzle is offset from the center of the heating block.

/https://fbi.cults3d.com/uploaders/28920674/illustration-file/28a146ec-a685-449b-9957-10b30aa69fe2/Flat.jpg)
