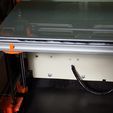
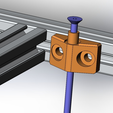
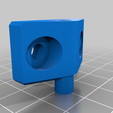
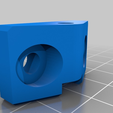
The main goal is to get the most rigid mount for a hot bed on the table frame.
At first, I did not quite correctly understand how to use the HyperCube size calculator. Because of this, I ordered a hot bed 310x310 with holes 240x240.
But in the end I made, probably, the best way to fix a hot bed to the table frame, which can be implemented in my setup.
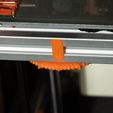
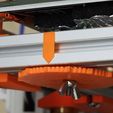
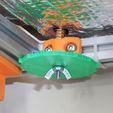
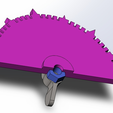
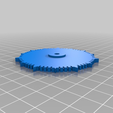
Now I have a hot bed mounted on M4 screws with a normal thread pitch (0.7 mm). On the handle made 70 marks, corresponding to the movement of the table at 0.01 mm. There are 7 large and 7 small protrusions, making it easy to mark the movement at 0.1 mm and 0.05 mm.
Principles of development
The principles on which it is implemented are rules! If you do not take my version of the bracket for your printer, but you will develop your own (files for SolidWorks are attached to the project.), I recommend that you pay attention to them!
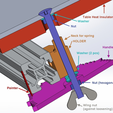
1) The bracket must be short in order for it to be tough and light at the same time.
2) The bracket should help reduce lateral bending and spring vibrations. Spring must be tough! Very tough!
3) The bracket should exclude the backlash of the screw that secures the hot bed. The greater the length of the screw inside the bracket - the better!
4) The screw should move in the bracket with minimal clearances. Ideally - with a slight tightness.
5) The whole structure should provide the maximum possible stiffness of attaching a hot bed to the table frame.
6) In the working position, the hot bed should be as close as possible to the table frame. In my version, this distance is limited by the thickness of the insulation.
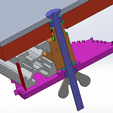
7) In the working position, the screw of one of the fasteners must be tightened until the coils on the spring are closed (this is the highest point of the hot bed). On the other three mounts, the screws are loosened just enough to keep the hot bed horizontal.
8) The guide tube for the spring should be so long that the gap remaining to the screw nut at the moment when the spring is tightened before the coils are closed, is minimal. This will ensure the greatest possible rigidity of the screw landing in the bracket. Uncompressed spring should be put on the guide tube without a gap, with a slight fit.
9) The adjustment knobs should have a large diameter, ensuring that the hot bed moves vertically.
10) We must take action against arbitrarily turning away the handles.
Bill of Materials
Hot bed
I bought the my heat bed on Aliexpress (https://www.aliexpress.com/item/Funssor-24v-260w-Reprap-Prusa-i3-MK3-310-310-3mm-aluminum-heated-bed-with-cableCR-10/32886375100.html?spm=a2g0v.10010108.1000001.11.42f943d0fGvvzA&fbclid=IwAR31Fz6UwtpTUzfrdnpEgaFUWsXJ9_EmKpQcm4HEPIVs0BjKs3MqfJfnzmw).
I am satisfied with the purchase - the table is smooth, in my opinion it is made with high quality. I had to change the thermistor, because I needed a resistor with a different characteristic.
Heating Bed Heat Insulation
I also bought thermal insulation on Aliexpress (https://www.aliexpress.com/item/2pcs-200mm-300mm-Heating-Bed-Heat-Insulation-Cotton-Foil-Self-adhesive-Insulation-Cotton-Sticker-10mm-Thickness/32879281956.html?spm=a2g0s.9042311.0.0.27424c4dCaHSWm).
I am satisfied with the purchase.
Springs
Spring must be tough. Spring should not be long. If there is a choice, then it is better to use a spring with a large inner diameter, worn on a guide, than a spring with a small inner diameter, dangling and unwittingly voluntarily as bent on a thin screw. My spring:
internal diameter of the coil = 7 mm,
outer diameter of the coil = 9 mm,
length in free (uncompressed) state = 15mm.
These springs I bought on Aliexpress: https://www.aliexpress.com/item/Free-shipping-5pcs-lot-Ultimaker-2-spring-fine-print-platform-edging-1-2x15mm-for-3d-printer/32726657936.html?spm=a2g0s.9042311.0.0.27424c4da9ecQC
Screws, washers, nuts and wing nut
M4x50, DIN7991 or DIN965 = 4 pcs;
Wide washer M4 DIN9021 = 4pcs, to protect conductive tracks of a hot bed against damage by a spring and nut;
Low nut M4 DIN439 = 4pcs, for fixing the screw to the hot bed;
Washer M4 DIN125 = 8pcs;
Nut M4 DIN555 = 4pcs;
Wing nut M4 DIN315 = 4 pcs.
You can use ordinary nut (DIN555) instead of low nuts (DIN439). But this will slightly increase the height of the table above the bracket. And therefore violates principle #4.
Material used
Print bracket is necessary from the most heat-resistant material that you can use. The plastic should not soften from the heated table and screws/springs.
I printed my brackets from PLA. But this material fits very badly. On my printer, I'm going to work with PET-G, and with such a strong warming up of the table my brackets are probably deformed. I will redo them; at least print from PET-G.
Or maybe even order their production from aluminum.
Table frame on my printer
I assembled a table from the profile of 20x20, while beams were used:
415 mm = 2 pieces,
255 mm = 3 pieces.
But for these dimensions and mounting holes in the hot bed 240x240mm my brackets have been developed. Strictly speaking, the distance between the holes along the X axis is not very important, since the brackets can be moved left or right along the 415mm beams.
Conclusion
My bracket for fixing the hot bed:
Provides precise adjustment of the hot bed,
When carefully manufactured, there are no gaps and vibrations,
Hot bed adjustment is easy and convenient to control,
He is light,
It is small,
and, in my humble opinion, it is rather elegant :) :) :)

/https://fbi.cults3d.com/uploaders/28920674/illustration-file/c257a561-9e32-4c44-8c78-330017f61292/BedLevelAdjust_1.JPG)
