Skip to content

Little Acro (3d-printed RC electric glider)

Advertising
Advertising
?
Creation quality: 5.0/5 (1 vote)
Evaluation of members on the printability, utility, level of detail, etc.

  • 8.2k views
  • 21 likes
  • 401 downloads
  • 2 collections

License
3D design format
3MF, GCODE, and PDF Folder details Close
  • 01_l_Tragflaeche_Segment_01_v02_Ender3_PLALW.3mf
  • 01_l_Tragflaeche_Segment_01_v02_Ender3_PLALW_245.gcode
  • 01_r_Tragflaeche_Segment_01_v02_Ender3_PLALW.3mf
  • 01_r_Tragflaeche_Segment_01_v02_Ender3_PLALW_245.gcode
  • 02_l_Tragflaeche_Segment_02_v02_Ender3_PLALW.3mf
  • 02_l_Tragflaeche_Segment_02_v02_Ender3_PLALW_245.gcode
  • 02_r_Tragflaeche_Segment_02_v02_Ender3_PLALW.3mf
  • 02_r_Tragflaeche_Segment_02_v02_Ender3_PLALW_245.gcode
  • 03_l_Tragflaeche_Segment_03_v02_Ender3_PLALW.3mf
  • 03_l_Tragflaeche_Segment_03_v02_Ender3_PLALW_245.gcode
  • 03_r_Tragflaeche_Segment_03_v02_Ender3_PLALW.3mf
  • 03_r_Tragflaeche_Segment_03_v02_Ender3_PLALW_245.gcode
  • 04_l_Tragflaeche_Segment_04_v02_Ender3_PLALW.3mf
  • 04_l_Tragflaeche_Segment_04_v02_Ender3_PLALW_245.gcode
  • 04_r_Tragflaeche_Segment_04_v02_Ender3_PLALW.3mf
  • 04_r_Tragflaeche_Segment_04_v02_Ender3_PLALW_245.gcode
  • 05_l_Tragflaeche_Segment_05_v02_Ender3_PLALW.3mf
  • 05_l_Tragflaeche_Segment_05_v02_Ender3_PLALW_245.gcode
  • 05_r_Tragflaeche_Segment_05_v02_Ender3_PLALW.3mf
  • 05_r_Tragflaeche_Segment_05_v02_Ender3_PLALW_245.gcode
  • 06_l_Tragflaeche_Segment_06_v02_Ender3_PLALW.3mf
  • 06_l_Tragflaeche_Segment_06_v02_Ender3_PLALW_245.gcode
  • 06_r_Tragflaeche_Segment_06_v02_Ender3_PLALW.3mf
  • 06_r_Tragflaeche_Segment_06_v02_Ender3_PLALW_245.gcode
  • 07_Tragflaeche_Segment_07_v02_Ender3_PLALW.3mf
  • 07_Tragflaeche_Segment_07_v02_Ender3_PLALW_245.gcode
  • 08_Tragflaeche_Segment_00_v02_Ender3_PLALW.3mf
  • 08_Tragflaeche_Segment_00_v02_Ender3_PLALW_245.gcode
  • 10_Servohalterung_Amewi_902MG_Ender3_PLA.3mf
  • 10_Servohalterung_Amewi_902MG_Ender3_PLA_215.gcode
  • 11_Ruderhoerner_4x_Ender3_PLA.3mf
  • 11_Ruderhoerner_4x_Ender3_PLA_215.gcode
  • 12_QR_01_Ender3_PLALW.3mf
  • 12_QR_01_Ender3_PLALW_245.gcode
  • 13_QR_02_03_Ender3_PLALW.3mf
  • 13_QR_02_03_Ender3_PLALW_245.gcode
  • 14_QR_04_05_Ender3_PLALW.3mf
  • 14_QR_04_05_Ender3_PLALW_245.gcode
  • 15_QR_06_07_Ender3_PLALW.3mf
  • 15_QR_06_07_Ender3_PLALW_245.gcode
  • 16_QR_08_09_10_Ender3_PLALW.3mf
  • 16_QR_08_09_10_Ender3_PLALW_245.gcode
  • 17_Winglets_Ender3_PLALW.3mf
  • 17_Winglets_Ender3_PLALW_245.gcode
  • H_01_HR_01_Ender3_PLALW.3mf
  • H_01_HR_01_Ender3_PLALW_245.gcode
  • H_02_HR_02_03_Ender3_PLALW.3mf
  • H_02_HR_02_03_Ender3_PLALW_245.gcode
  • H_03_HR_Winglets_Ender3_PLALW.3mf
  • H_03_HR_Winglets_Ender3_PLALW_245.gcode
  • R_01_Rumpf_Segment_01_v02_Ender3_PLALW.3mf
  • R_01_Rumpf_Segment_01_v02_Ender3_PLALW_245.gcode
  • R_02_Rumpf_Segment_02_v02_Ender3_PLALW.3mf
  • R_02_Rumpf_Segment_02_v02_Ender3_PLALW_245.gcode
  • R_03_Rumpf_Segment_02b_V02_Ender3_PLALW.3mf
  • R_03_Rumpf_Segment_02b_V02_Ender3_PLALW_245.gcode
  • R_04_Rumpf_Segment_03a_V02_Ender3_PLALW.3mf
  • R_04_Rumpf_Segment_03a_V02_Ender3_PLALW_245.gcode
  • R_05_Rumpf_Segment_03b_v02_Ender3_PLALW.3mf
  • R_05_Rumpf_Segment_03b_v02_Ender3_PLALW_245.gcode
  • R_06_Rumpf_Segment_04_v02_Ender3_PLALW.3mf
  • R_06_Rumpf_Segment_04_v02_Ender3_PLALW_245.gcode
  • R_07_Rumpf_Segment_05_v02_Ender3_PLALW.3mf
  • R_07_Rumpf_Segment_05_v02_Ender3_PLALW_245.gcode
  • R_08_Rumpf_Segment_06_v02_Ender3_PLALW.3mf
  • R_08_Rumpf_Segment_06_v02_Ender3_PLALW_245.gcode
  • R_09_Rumpf_Segment_07_v02_Ender3_PLALW.3mf
  • R_09_Rumpf_Segment_07_v02_Ender3_PLALW_245.gcode
  • R_10_Rumpf_HR_Lager_v02_Ender3_PLA.3mf
  • R_10_Rumpf_HR_Lager_v02_Ender3_PLA_215.gcode
  • R_11_Servoplatte_v02_Ender3_PLA.3mf
  • R_11_Servoplatte_v02_Ender3_PLA_215.gcode
  • R_12_Rumpfspant_hinten_v02_Ender3_PLA.3mf
  • R_12_Rumpfspant_hinten_v02_Ender3_PLA_215.gcode
  • R_13_Tragflachenbefestigung_v02_Ender3_PLA_215.gcode
  • R_13_Tragflächenbefestigung_v02_Ender3_PLA.3mf
  • R_14_Servobrackets_v02_Ender3_PLA.3mf
  • R_14_Servobrackets_v02_Ender3_PLA_215.gcode
  • R_16_Haube_v02_Ender3_PLALW.3mf
  • R_16_Haube_v02_Ender3_PLALW_245.gcode
  • R_17_Adapter_Haube_v03_PLA.3mf
  • R_17_Adapter_Haube_v03_PLA_215.gcode
  • R_18_Akkuplatte_v02_PLA.3mf
  • R_18_Akkuplatte_v02_PLA_215.gcode
  • R_19_SR_Scharnier_v02_Ender3_PLA.3mf
  • R_19_SR_Scharnier_v02_Ender3_PLA_215.gcode
  • R_20_Motorspant_v02_Ender3_PETG.3mf
  • R_20_Motorspant_v02_Ender3_PETG_233.gcode
  • R_21_Motorhaube_breit_v02_Ender3_PETG.3mf
  • R_21_Motorhaube_breit_v02_Ender3_PETG_233.gcode
  • R_21_Motorhaube_v02_Ender3_PETG.3mf
  • R_21_Motorhaube_v02_Ender3_PETG_233.gcode
  • R_23_aufnahme_fahrtenregler_v03_Ender3_PETG.3mf
  • R_23_aufnahme_fahrtenregler_v03_Ender3_PETG_233.gcode
  • S_01_Seitenruder_v02_Ender3_PLALW.3mf
  • S_01_Seitenruder_v02_Ender3_PLALW_245.gcode
  • Teileliste.pdf
  • little_acro_fuselage_build_01.pdf
  • little_acro_fuselage_build_02.pdf
  • little_acro_fuselage_build_03.pdf
  • little_acro_fuselage_build_04.pdf
  • little_acro_fuselage_build_05a.pdf

Learn more about the formats

Last update 2023-07-27 at 18:55
Publication date 2023-06-20 at 21:31
Design number 1282505

3D printer file info

3D model description

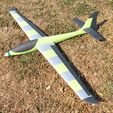
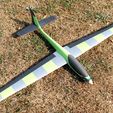
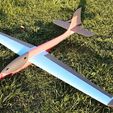
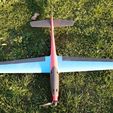
Little Acro, an RC electric glider with brushless drive

span: approx. 1200 mm

Hull length: approx. 720 mm

Take-off weight (LW-PLA, electric glider): approx. 450-500 g

Functions: Altitude / bank / rudder / motor

Center of gravity: 35 mm behind the wing nose on the fuselage

Rudder deflections:

Aileron: 20-30°, EXPO-setting: 20%

Flaperons: 10° down for landing (and possibly also take-off)

Pendulum elevator: 10°, EXPO-setting: 20%

Motor: Brushless motor 28mm diameter, 25mm length

Battery: 3s Lipo 900 mAh

The Little Acro is a small, trunk-compatible aerobatic glider with electric drive.

The wing is in one piece and attached to the fuselage by a screw connection. It can be easily removed to provide good access to the servos in the fuselage if adjustments or repairs are required.

Thanks to its compact dimensions, the Little Acro can be transported fully assembled in the trunk. So you can simply "go for a quick flight", which was also the basis for this concept.


The Little Acro is not a beginner's model. You should already have some flying experience with aileron models and be able to land a model safely.

I have programmed flaperons (approx. 10° downwards) for landing. This makes the plane significantly slower.

However, the assembly is uncomplicated. Once all the parts have been printed out, the model can be built by an experienced model builder in 15 to 20 hours.


I have described the construction in various videos. I have created a playlist with the construction videos on YouTube:

YouTube: Playlist: Little Acro

A video of the first flight is also available on YouTube:

YouTube: First flight Little Acro


If you decide to build the model, I would be happy to receive a short report on your experience in the comments or you can contact me via the Cults Messenger.

This would help me a lot to improve the design of my new models or to fix bugs in the current models.

Modifiers in PrusaSlicer are used in the print files. These are essential for the stability and structure of the individual parts! The adhesive surfaces for connecting the individual parts are created with the help of modifiers.


Parts required for the assembly

Carbon rods or fiberglass rods and various adhesives are required for the body.

Adhesives:

Superglue, low to medium viscosity

Carbon rods:

Carbon rod 1 mm: 4 pieces (465 mm length)

Carbon rod 1 mm: 1 piece (525 mm length)

Carbon rod 1 mm: 2 pieces (500 mm length)

Carbon rod 1 mm: 1 piece (200 mm length)

Carbon rod 1.5 mm: 2 pieces (1000 mm length)

Carbon rod 2 mm: 1 piece (110 mm length)

Carbon rod 2 mm: 1 piece (125 mm length)

Carbon tube 3 mm: 1 piece (180 mm length)

Carbon rod 0.5x6 mm: 1 piece (450 mm length)

For the elevator pushrod:

Carbon rod 2mm (500mm length)

Steel wire

Steel wire 1 mm: 1 piece (approx. 500 mm length)

Bowden tube

Outer diameter 3mm: 1 piece (approx. 500 mm length)

Screws

Wood screws 2x10 mm (d x h): 20 pieces

Wood screws 2x16 mm (d x h): 4 pieces

M3x10 mm screws: 4 pieces (for motor mounting)

M3 washers: 4 pieces

Electronic components

Servos

Wing: Micro servos (maximum dimensions (LxHxW): 23.5x10x24mm) 2 pieces

Fuselage: 9g mini servo (standard dimensions) 2 pieces

I use metal gear servos.

Receiver

Minimum: 5 channels

Motor

Brushless motor (maximum dimensions (d x H) 28 x 25 mm)

ESC (speed controller)

Minimum: 20A (3-4S)

BEC minimum: 2A

3D printing settings

When designing and producing parts for my RC model aircraft, I use the PrusaSlicer, which can be downloaded from https://www.prusa3d.de/prusaslicer/, to realize special desired properties for 3D printing. These properties (e.g. adhesive surfaces or internal support structures) are difficult or impossible to realize using the CAD program alone. I use modifiers in Prusaslicer, without which it is not possible to build the glider.

For this reason I do not provide stl files, but 3mf files for download. If you still need stl files, here is a link on how to export stl files to PrusaSlicer:

YouTube: Extract stl files from 3mf files


The gcode files are sliced for use on an Ender3 Pro printer.

In some cases, there are several parts on the print bed, which are printed sequentially one after the other as whole objects. This reduces the stringing.

I also have a link to an instructional video on YouTube:

YouTube: Print parts sequentially as whole objects


The print files are intended for a 0.4mm nozzle and a layer height of 0.2mm.

The parts are mainly printed in LW-PLA, but also in PETG or PLA.

The files for download include a parts list showing the material for printing.

Advertising


Page translated by automatic translation. See the original version.
Issue with this design? Report a problem.

Would you like to support Cults?

You like Cults and you want to help us continue the adventure independently? Please note that we are a small team of 3 people, therefore it is very simple to support us to maintain the activity and create future developments. Here are 4 solutions accessible to all:

  • ADVERTISING: Disable your banner blocker (AdBlock, …) and click on our banner ads.

  • AFFILIATION: Make your purchases online by clicking on our affiliate links here Amazon.

  • DONATE: If you want, you can make a donation via Ko-Fi 💜.

  • WORD OF MOUTH: Invite your friends to come, discover the platform and the magnificent 3D files shared by the community!


Sharing and downloading on Cults3D guarantees that designs remain in makers community hands! And not in the hands of the 3D printing or software giants who own the competing platforms and exploit the designs for their own commercial interests.

Cults3D is an independent, self-financed site that is not accountable to any investor or brand. Almost all of the site's revenues are paid back to the platform's makers. The content published on the site serves only the interests of its authors and not those of 3D printer brands who also wish to control the 3D modeling market.

100% secure payment by credit card, PayPal, Apple Pay, Google Pay, etc.
View all payment options.