Skip to content

Adjustable legs + end caps for CAMPZ Kyoto camping table

Advertising
Advertising
?
Creation quality: 5.0/5 (1 vote)
Evaluation of members on the printability, utility, level of detail, etc.

  • 881 views
  • 1 like
  • 1 download

License
3D design format
STL Folder details Close
  • Embout CΓ΄tΓ© Droit v2.0.stl
  • Embout CΓ΄tΓ© Gauche v2.0.stl
  • Pied Ajustable Insert v3.0.stl
  • Pied Ajustable Vis v1.0.stl

Learn more about the formats

Publication date 2023-06-23 at 08:13
Design number 1286821

3D printer file info

3D model description

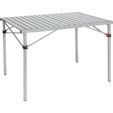
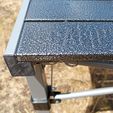
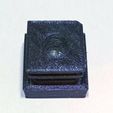
Adjustable tips and feet for aluminum camping table from CAMPZ, model Kyoto.

CAMPZ Kyoto Table Aluminium 107x70x70cm, silver

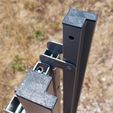
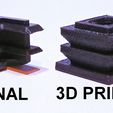
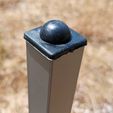
As this table was delivered to me with 2 of the 4 rigid plastic end caps broken, I asked to obtain replacement parts from Campz.

Unfortunately, they are not available...

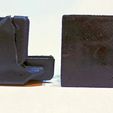
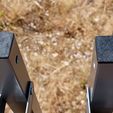
So I modeled them, 2 right and 2 left, with flexible filament printing so they wouldn't break.

Materials required:

  • TPU-type flexible filament

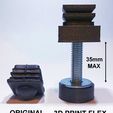
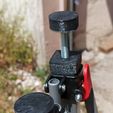
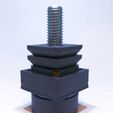
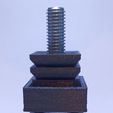
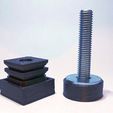
I've also upgraded this table by replacing the original 4 fixed legs with height-adjustable versions up to 35mm.

I modeled them for flexible filament printing and with the addition of steel screws to ensure excellent reliability and stability.

Material required (per foot):

  • 1 screw 10mm in diameter and 50mm (or more) in length

  • 1 nut 10mm and 6mm high (maximum)

  • 1 25 to 30mm diameter washer drilled to 10mm

  • 1 tube of universal instant glue

  • TPU-type flexible filament

PS: it is likely that these legs are compatible with most square table legs of about 25.5mm sides and 1mm metal thickness.

3D printing settings

4 End caps (2 right + 2 left):

  • FLEX filament (TPU)

  • Temperature depending on filament and printer (225Β° for me)

  • No shrinkage

  • 0.15mm layer thickness

  • 50% filling


4 Round foot bases:

  • FLEX filament (TPU)

  • Temperature depending on filament and printer (225Β° for me)

  • No shrinkage

  • 0.15mm layer thickness

  • 50% filling

After printing, place the hex head of the screw in the base, glue one side of the washer, assemble.


4 Square foot inserts:

  • FLEX filament (TPU)

  • Temperature depending on filament and printer (225Β° for me)

  • No shrinkage

  • 0.15mm layer thickness

  • 50% filling

  • Pause on layer nΒ°97 (in 0.15mm)

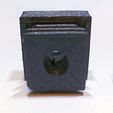
When the printer pauses on layer number 97, insert the nut in the dedicated slot, then resume printing.


After removing the original leg, replace it with this piece in the square tube of the table leg, then screw the base onto it.

Advertising


Page translated by automatic translation. See the original version.
Issue with this design? Report a problem.

Would you like to support Cults?

You like Cults and you want to help us continue the adventure independently? Please note that we are a small team of 3 people, therefore it is very simple to support us to maintain the activity and create future developments. Here are 4 solutions accessible to all:

  • ADVERTISING: Disable your banner blocker (AdBlock, …) and click on our banner ads.

  • AFFILIATION: Make your purchases online by clicking on our affiliate links here Amazon.

  • DONATE: If you want, you can make a donation via Ko-Fi πŸ’œ.

  • WORD OF MOUTH: Invite your friends to come, discover the platform and the magnificent 3D files shared by the community!


Sharing and downloading on Cults3D guarantees that designs remain in makers community hands! And not in the hands of the 3D printing or software giants who own the competing platforms and exploit the designs for their own commercial interests.

Cults3D is an independent, self-financed site that is not accountable to any investor or brand. Almost all of the site's revenues are paid back to the platform's makers. The content published on the site serves only the interests of its authors and not those of 3D printer brands who also wish to control the 3D modeling market.

100% secure payment by credit card, PayPal, Apple Pay, Google Pay, etc.
View all payment options.