Skip to content

Eggbot Frame Remix (jjrobots version)

Advertising
Advertising
?
Creation quality: 0.0/5 (0 votes)
Evaluation of members on the printability, utility, level of detail, etc.

  • 87 views
  • 1 download

License
3D design format
Folder details Close
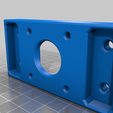
  • Arduino_Leonardo_Mount.stl
  • Cutaway_Idler_Carriage.stl
  • Cutaway_Motor_Carriage.stl
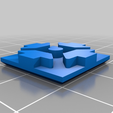
  • Extrusion_End_Cap.stl
  • Idler_Carriage.stl
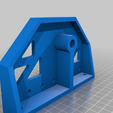
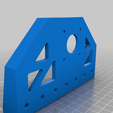
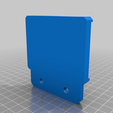
  • Left_Bracket.stl
  • Motor_Carriage.stl
  • PenCap.stl
  • Right_Bracket.stl
  • Tool_Mount.stl
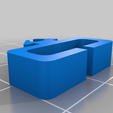
  • wire-clip.stl

Learn more about the formats

Publication date 2023-10-01 at 23:38
?
Published to Thingiverse on: 2019-02-22 at 19:45
Design number 1486821

3D printer file info

3D model description

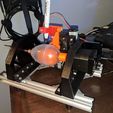
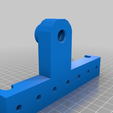
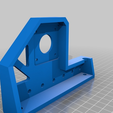
This is based on the jjrobots eggbot project and provides a frame with a little more room for larger objects. Their frame is awesome, obviously.

Notable "enhancements" I've made in this model include:

  • Based on 2020 aluminum extrusions.
  • Adjustable idler and egg motor carriages permit larger or smaller objects.
  • Adjustable vertical arm allows for greater precision on pen adjustment
  • Adjustable tool height

Here is a public link to my design in Fusion 360. I think it's easier just to download the model from there in whatever form you want it.

Here are links to what I purchased to build this:

150mm Extrusions
250mm Extrusions
Nifty Feet
Assorted M5 Brackets, Nuts, and Bolts

I did also purchase a couple assortments of zip ties and other odd nuts and bolts as well, but most people probably have that kind of stuff just lying around.

I also printed up 13 of the quick change (https://www.thingiverse.com/thing:1996091) pen thingies to use with mine. Since I used the ultra fine point sharpies, his lid didn't work. So I am including the STL for my lid in the files here. It's pretty sexy. A note about putting that together... seat the magnets in the base part first and glue them in place. Then let the magnets for the changeable end rest on those so they are oriented the right way... not just back to front, but circular. Then mark them with an arrow and pull them off one at a time and glue them to the quick change end as exactly as possible (left to right, back to front, and at the same angle). If you don't things can get weird there. I know this entire paragraph is technically non sequitur, but you get it...

Putting this together should be self explanatory. If it isn't, feel free to reach out and ask questions. You know the hobby license to Fusion 360 is free, so if you get that installed and open my export you should be able to play around with things. I probably should have made the bolt holes bigger everywhere because they can be tight, particularly on the tool head. That part is difficult to adjust unless you open those holes up some.

This is rough I know, but I'm not working on it anymore. If you want something specific, let me know. Otherwise feel free to remix it yourself as I've granted access directly to the cad work I did already. Have fun!

Tags

Advertising


Issue with this design? Report a problem.

Would you like to support Cults?

You like Cults and you want to help us continue the adventure independently? Please note that we are a small team of 3 people, therefore it is very simple to support us to maintain the activity and create future developments. Here are 4 solutions accessible to all:

  • ADVERTISING: Disable your banner blocker (AdBlock, …) and click on our banner ads.

  • AFFILIATION: Make your purchases online by clicking on our affiliate links here Amazon.

  • DONATE: If you want, you can make a donation via Ko-Fi πŸ’œ.

  • WORD OF MOUTH: Invite your friends to come, discover the platform and the magnificent 3D files shared by the community!


Sharing and downloading on Cults3D guarantees that designs remain in makers community hands! And not in the hands of the 3D printing or software giants who own the competing platforms and exploit the designs for their own commercial interests.

Cults3D is an independent, self-financed site that is not accountable to any investor or brand. Almost all of the site's revenues are paid back to the platform's makers. The content published on the site serves only the interests of its authors and not those of 3D printer brands who also wish to control the 3D modeling market.

100% secure payment by credit card, PayPal, Apple Pay, Google Pay, etc.
View all payment options.