3D model description
10-14-2014 - Lesson#1 be careful when testing on the thrust gauge, don't take shortcuts when securing the motor and prop ... enough said. The current combination, the #35 motor and 10x6 prop @ 40% throttle produced 500g of thrust; this provided an acceptable speed and controllability. I have a Turnigy 2836-2350 with a 6x4 prop that I will use on Ver 2. It produces 900g of thrust but with the smaller diameter prop, the torque effect will be greatly reduced. Take off @ half throttle should be no problem. HK still sells these motors and they are a power house. The only problem is the prop shaft comes out the wrong side. I have machining capability and can machine a groove to flip around the shaft and reposition the 'C' clip, but I don't suggest that as a solution for everyone. Have a look for a similar motor, speed (KV) and thrust on a 6" prop combo and you should be good to go. New build coming next.
(Switching to "Thing in Progress" as I get ready to build a new one for the season, I will be updating the power plant to better match the design. Stay tune for the design updates. 4/21/2014 Otherwise, it does fly as expected if you follow the current instructions.)
I love flying RC and so I decided to have fun recreating the classic "Dart" style paper airplane. With 3D printing this made designing and printing up all the custom parts, to make this happen, a cinch. There are a few parts to make this work, so have fun printing and assembling.
Remember, this has moving parts so be careful. Everything you do with respect to this project is at your own risk; please be smart, careful, and respectful of others and property.
I designed and printed this with my RepRap using a 0.35mm head and 0.25mm layers; this provided excellent results. Larger heads may cause gaps between the outside walls when you slice it, so be aware of that and adjust the model as needed. (General Wall thickness on the parts is 1mm to keep it light and strong).
The main material is a sheet of 30 x 40 foam board from your local office supply store. The power plant is a Prop Drive 35-36 1400kV electric motor with a 10x6 prop and NTM Prop Drive 35 Series Accessory Pack (see Hobby King in this case). This is being driven by a 60A ESC (Speed Control) with BEC (Battery Elimination Circuit. The receiver is the OrangeRx R615. I am using two Hi-Tec HS-82MG servos configured for a delta wing (configured in the transmitter). (Keep in mind that if you are using different parts, you will most likely have to change your balance from what is shown in the design.)
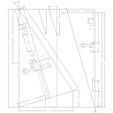
All the Inventor Fusion files are included for your mods. A DXF / DWG file (dimensions indicated in inches) is included indicating cut outs and general placement dimensions for the parts. Check you balance, CG is indicated in the DXF / DWG. The CG was pulled directly from a paper folded model that had a good glide ratio. Test flights confirm good placement. Please see instructions for model configuration.
3D printing settings
Build is pretty straight forward. The DXF/DWG file (dimensions are in inches) indicates the cut outs for the servo tray, motor and prop, and Battery box with placement for the ESC and receiver tray. Your CG may vary; make sure you keep the CG as designed by shifting parts forward or aft as needed.
Please pay attention:
If you purchase the motor / ESC combo listed in the Description, be aware that it has extremely to much rotational force (torque) at full throttle. I promise you that your plane will spin uncontrollably if you do not artificially dial back the max throttle setting. A smaller prop would also in theory work. On my DX7s I set my throttle travel to 100% on the low side and 40% on the high side. Set your Elevons for a max throw of +/- 0.25" on low rates at the outer tips. You can program in more control through your high rate switch which can be handy for flight testing and quick recovery or if you want to do fancy aerobatics on a simple paper airplane ;-).
Please be careful, some ESCs cause noise in the BEC which can cause the receiver to drop connection. Do all range tests at various throttle settings to make sure you do not have issues. You can also use a receiver battery pack or independent BEC to eliminate any issue with noise / interference.
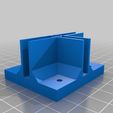
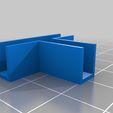
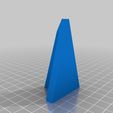
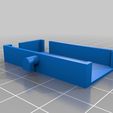
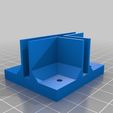
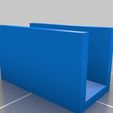
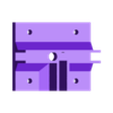
The rear skid pieces are used to protect the wing tips and the bottom vertical stabilizer. The tail piece provides a method to align the vertical stabilizer (the part that sticks down from the wing) to the wing when glueing. If cut right, the servo tray will fit inside the vertical stabilizer as depicted in the image. Make sure you glue it :-)
Glue, I use foam safe CA. The nose can be bit tricky with CA because of the speed at which it cures and I may switch to polyurethane (white gorilla glue) for that item in the future. The rest of the build works great with CA.
Be safe and enjoy.

/https://fbi.cults3d.com/uploaders/15517291/illustration-file/352e3de1-65c1-4204-8b6c-dfd51391328b/image.jpg)

