Skip to content

MPCNC 525 J - 8mm Lead Screw Adaptor

Advertising
Advertising
?
Creation quality: 0.0/5 (0 votes)
Evaluation of members on the printability, utility, level of detail, etc.

  • 216 views

License
3D design format
Folder details Close
  • MPCNC525J_8mm-Nut_Trap.stl
  • MPCNC525J_Z-Bottom_8mm_Lead_Screw_Bearing.stl
  • MPCNC_525_-_8mm_Nut_Trap.f3d
  • MPCNC_525_-_8mm_Nut_Trap.step
  • Z_Bottom_-_8mm_Lead_Screw.f3d
  • Z_Bottom_-_8mm_Lead_Screw.step

Learn more about the formats

Publication date 2023-10-05 at 11:08
?
Published to Thingiverse on: 2017-04-04 at 00:30
Design number 1494737

3D printer file info

3D model description

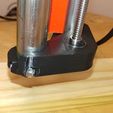
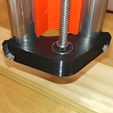
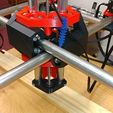
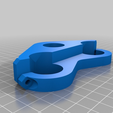
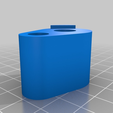
I wasn't 100% happy with the 5/16" threaded rod application. I decided to buy an 8mm Lead Screw kit that came with coupler, lead screw, and bearing brackets. I swapped out the pineapple coupler for the 5mm to 8mm flex coupler, and popped the bearing out of the bracket that came with the kit. I also swapped out the nut trap for the one displayed here. I used the round brass nut with 4 x M3 bolts. I believe they were 10-12mm M3 bolts. You could use screws to make sure it's seated properly, but the holes on the nut trap should be tight enough to make your own threads when adding the bolts.

Lastly, I wanted to brace up the 8mm rod, so I took the Z Lower and created something similar for the bottom of the Z Rails. This is for the 1" or J version of the MPCNC 525. Also, I'm using this with the MPCNC Universal Mount. I don't think the original tool mount will cause any issues, but if so, let me know, and I can add a different model with adjustments. I'll throw in the Fusion 360 file when I get back to the office, so you can make your own adjustments if desired.

Pictures will come shortly! Sorry, I forgot to take a pic of the nut trap before inserting it into the assembly. If I ever have to break it down again, I'll be sure to add it at a later date. Also, here is the kit I purchased, so you can see all of the pieces and how they're used: https://www.amazon.com/gp/product/B01H1PXE5Y/

Just a side note, I had to change the steps/min down to something like 800 for the Z-Axis. I haven't had a chance to check or calibrate anything else, should it need it. I'll update this post with any adjustments when/if they happen.

Cheers!

Advertising


Issue with this design? Report a problem.

Would you like to support Cults?

You like Cults and you want to help us continue the adventure independently? Please note that we are a small team of 3 people, therefore it is very simple to support us to maintain the activity and create future developments. Here are 4 solutions accessible to all:

  • ADVERTISING: Disable your banner blocker (AdBlock, …) and click on our banner ads.

  • AFFILIATION: Make your purchases online by clicking on our affiliate links here Amazon.

  • DONATE: If you want, you can make a donation via Ko-Fi πŸ’œ.

  • WORD OF MOUTH: Invite your friends to come, discover the platform and the magnificent 3D files shared by the community!


Sharing and downloading on Cults3D guarantees that designs remain in makers community hands! And not in the hands of the 3D printing or software giants who own the competing platforms and exploit the designs for their own commercial interests.

Cults3D is an independent, self-financed site that is not accountable to any investor or brand. Almost all of the site's revenues are paid back to the platform's makers. The content published on the site serves only the interests of its authors and not those of 3D printer brands who also wish to control the 3D modeling market.

100% secure payment by credit card, PayPal, Apple Pay, Google Pay, etc.
View all payment options.