Skip to content

PG35L Micro Extruder for Printrbot Simple Metal (E3D v6 and Ubis hotends)

Advertising
Advertising
?
Creation quality: 0.0/5 (0 votes)
Evaluation of members on the printability, utility, level of detail, etc.

  • 249 views
  • 1 like
  • 1 download

License
3D design format
Folder details Close
  • extruderfanbracket2.skp
  • extruderfanbracket2.stl
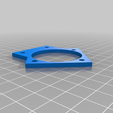
  • fanshroud_pbsm_E3D_v2.stl
  • me_idler_v2_624.stl
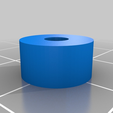
  • pbsm_bed_spacer_5mm.stl
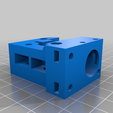
  • printrbot_microextruder_E3D_v6_rev1.stl
  • printrbot_microextruder_ubisfit_rev2.skp
  • printrbot_microextruder_ubisfit_rev2.stl

Learn more about the formats

Publication date 2023-10-07 at 01:22
?
Published to Thingiverse on: 2014-11-20 at 15:10
Design number 1498318

3D printer file info

3D model description

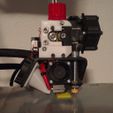
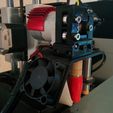
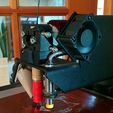
I ran into a lot of stepper skipping with Printrbot's aluminum direct drive extruder (stock on the Simple Metal), even with active cooling on the stepper motor and the current pots adjusted (up, down, middle, anywhere). My Ultibots K250VS kit introduced me to the world of skip-free extruding with their PG35L-based micro extruder, so I modified their design to fit the Simple Metal's bracket and ubis hot end. Later I realized that the uncooled ubis hot ends are total garbage (I can't speak for the cooled variety), so I swapped it for an E3D v6, which is all win all the time.

I've been printing with this extruder for years now with the ubis hotend and I haven't run into any issues with it.

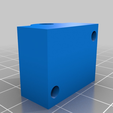
Updated (9/8/2016): I successfully tested the E3Dv6 setup this morning. :) The fan shroud has been updated as it didn't fit as well as I would have liked. The spacers go between the delrin bocks that the 6mm rods fit into and the bed; longer M3 screws are necessary here (maybe 16mm, I'm not sure). If you have the bed insulator kit the delrin spacers that fit between the mount blocks and the bed are not necessary when using the 5mm spacers. You'll need 2 16mm screws (longer is okay, just be careful not to strip everything out) to secure the E3D v6 hotend.

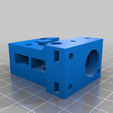
Updated (9/7/2016): Added a new extruder body to accommodate an E3D v6 hotend; an updated fan shroud and bed mount spacers have also been posted. The E3D hotend is significantly shorter than the standard printrbot ubis hotend; this requires raising the bed a bit so the Y movement assembly doesn't crash into the M3 socket head cap screws below it, a new fan shroud, adjusting the inductive bed sensor, and updating the firmware to use temp sensor 5 (semitec thermistor) in Marlin instead of 0. The E3D hotend does fit in the new extruder body, but I don't have it up and printing yet - maybe this weekend. :) The new fan shroud is reasonably well aligned, but not quite perfect yet.

Updated (3/6/2016): Added the idler STL from the MicroExtruder v5 thing for easy access and added a few more details to the summary.

Updated (3/2/2016): Added a new version with a revised hot end securing mechanism (rev2). The side-slot-based mechanism has been iffy since the beginning; the new part secures the Ubis hot end via two M3 x 16mm screws or one M3 x 20mm and one M3 x 16mm. The mounting screws have changed as well - 3 M3 x 10mm screws now. The fit has been tested as of today and it's a huge improvement over the side-slot mechanism - the hotend is rock solid now. I've removed the previous files. The latest .stl doesn't have the built-in supports as I use Simplify3D and these don't slice properly in S3D. I can add the built-in supports if anyone cares. Given the traffic to this model I doubt anyone does, but who knows. :)

Important: The PG35L may not require active cooling, but it's not a bad idea as it contains delrin gears that can fail at high temperatures. I've included my simple fan bracket for a 40mm fan. The heatsink is likely not needed if actively cooled, but it looks fancy.

See the original micro extruder design (and hardware BOM) here:

http://www.thingiverse.com/thing:42112

The hardware kit (3x 624zz ball bearings, M3 and M4 screws and nuts, springs, MK7 drive gear), PG35L motor, and heat sink can be purchased here:

http://www.ultibots.com/micro-extruder-v5-hardware-kit-3mm-drive-gear/
http://www.ultibots.com/pg35l-048-geared-stepper-motor/
http://www.ultibots.com/35mm-heat-sink-tall-fin/

This version of the micro extruder requires an additional 3 M3x10 screws and 3 M3 standard nuts to mount to the Printrbot Simple Metal Frame (others untested). I don't remember the lengths of the original extruder mount screws, but there may be some overlap there.

Sketchup 2015 source files are included.

3D printing settings

I printed the extruder body using PETG with 50% density and 3 perimeters at 0.2mm height with supports in the bearing wells only (though you may be able to get away without it). I recommend PETG or ABS for increased durability and heat tolerance over PLA.

Ubis Hot End

The nozzle height should be just about right with respect to the fan shroud and Z probe, but you'll have to re-calibrate your Z offset.

E3Dv6 Hot End

The bed needs to be raised to prevent the Y frame from crashing into the socket head cap screws beneath it as the E3D v6 is about 12mm shorter than the Ubis; this is accomplished using 4x 5mm spacers (see Thing Files). A modified fan shroud is provided in Thing Files also. Your Marlin firmware Configuration.h will have to be updated to use sensor type 5 for the hot end and you will probably want to reduce the PWM max for the hotend to 150 or lower from the default 255 (PID_MAX and PID_INTEGRAL_DRIVE_MAX) as the 12V heater included with the E3D is significantly stronger than Ubis' heater. You should then do a PID tune:

M303 E0 S245 C8

where the S value is the temperature you most often print at and the C value is the number of cycles it runs. The PID values should then be set using the M301 command.

General

You'll have to change your steps per mm setting to somewhere around 810 for the E axis and save the setting:

M92 E810

M500

810 steps/mm will get you close, but it's best to calibrate extrusion:

http://reprap.org/wiki/Triffid_Hunter's_Calibration_Guide

You may also have to adjust your E axis current pot (or digital pot in the case of F-revision printrboards) to best suit the PG35L. I have mine set around 50%.

And finally you'll have to change your max extrude feed rate to 10mm/s and save the setting:

M203 E10

M500

You may be able to run it faster, but I had issues getting the printrboard to drive the PG35L faster than 10mm/s consistently. It would sit there and make unfriendly noises at me instead of moving.

Advertising


Issue with this design? Report a problem.

Would you like to support Cults?

You like Cults and you want to help us continue the adventure independently? Please note that we are a small team of 3 people, therefore it is very simple to support us to maintain the activity and create future developments. Here are 4 solutions accessible to all:

  • ADVERTISING: Disable your banner blocker (AdBlock, …) and click on our banner ads.

  • AFFILIATION: Make your purchases online by clicking on our affiliate links here Amazon.

  • DONATE: If you want, you can make a donation via Ko-Fi πŸ’œ.

  • WORD OF MOUTH: Invite your friends to come, discover the platform and the magnificent 3D files shared by the community!


Sharing and downloading on Cults3D guarantees that designs remain in makers community hands! And not in the hands of the 3D printing or software giants who own the competing platforms and exploit the designs for their own commercial interests.

Cults3D is an independent, self-financed site that is not accountable to any investor or brand. Almost all of the site's revenues are paid back to the platform's makers. The content published on the site serves only the interests of its authors and not those of 3D printer brands who also wish to control the 3D modeling market.

100% secure payment by credit card, PayPal, Apple Pay, Google Pay, etc.
View all payment options.