SUGGESTED PRINT SETTINGS:
Always go to our Kool Fingers website for the most up-to-date printing instructions. And remember that there are readme files next to 3MF files for common slicer apps. These elevator models have been designed with very specific fit tolerance, to make these pieces fit tightly but not too much that you can't snap them together. Here are some general considerations:
- Print with PLA. But they also work with PETG, ABS, etc.
- They work best printed with 04mm nozzles
- Use a 0.15mm layer print profile
- Specifically, use a 0.2mm first layer height
- and the a 0.15mm height for all subsequent layers
- Top shell layers: 7
- Top shell thickness: 0.7 mm
- Bottom shell layers: 0.5
- Bottom shell thickness: 0.5 mm
- Detect thin walls: ON
- Sparse infill density: 10%
- Sparse infill pattern: Rectilinear
For a Fidget Elevator, many factors influence how difficult it is to snap parts together. Over-extruding makes it hard or impossible to push disc magnets into holder holes. Struts may refuse to be pushed into end pieces when over-extruded. Try not to use infill over 10%. Stick to the basic Rectilinear infill pattern. This is because you want the end pieces to be slightly pliable when you snap things into it.
POST-PRINT PROCESSING:
If your printer and slicer is tuned well, then there is no need for post-print processing, except occasional cleaning of stray strings, and deburring of rugged edges and print defects. But if your prints are over-extruded or under-extruded, you may have additional post-processing to do. In particular, if over-extruding, you may need to use a deburring tool to enlarge holders for disc magnets. You may need to lightly hammer struts into end pieces when assembling an elevator.
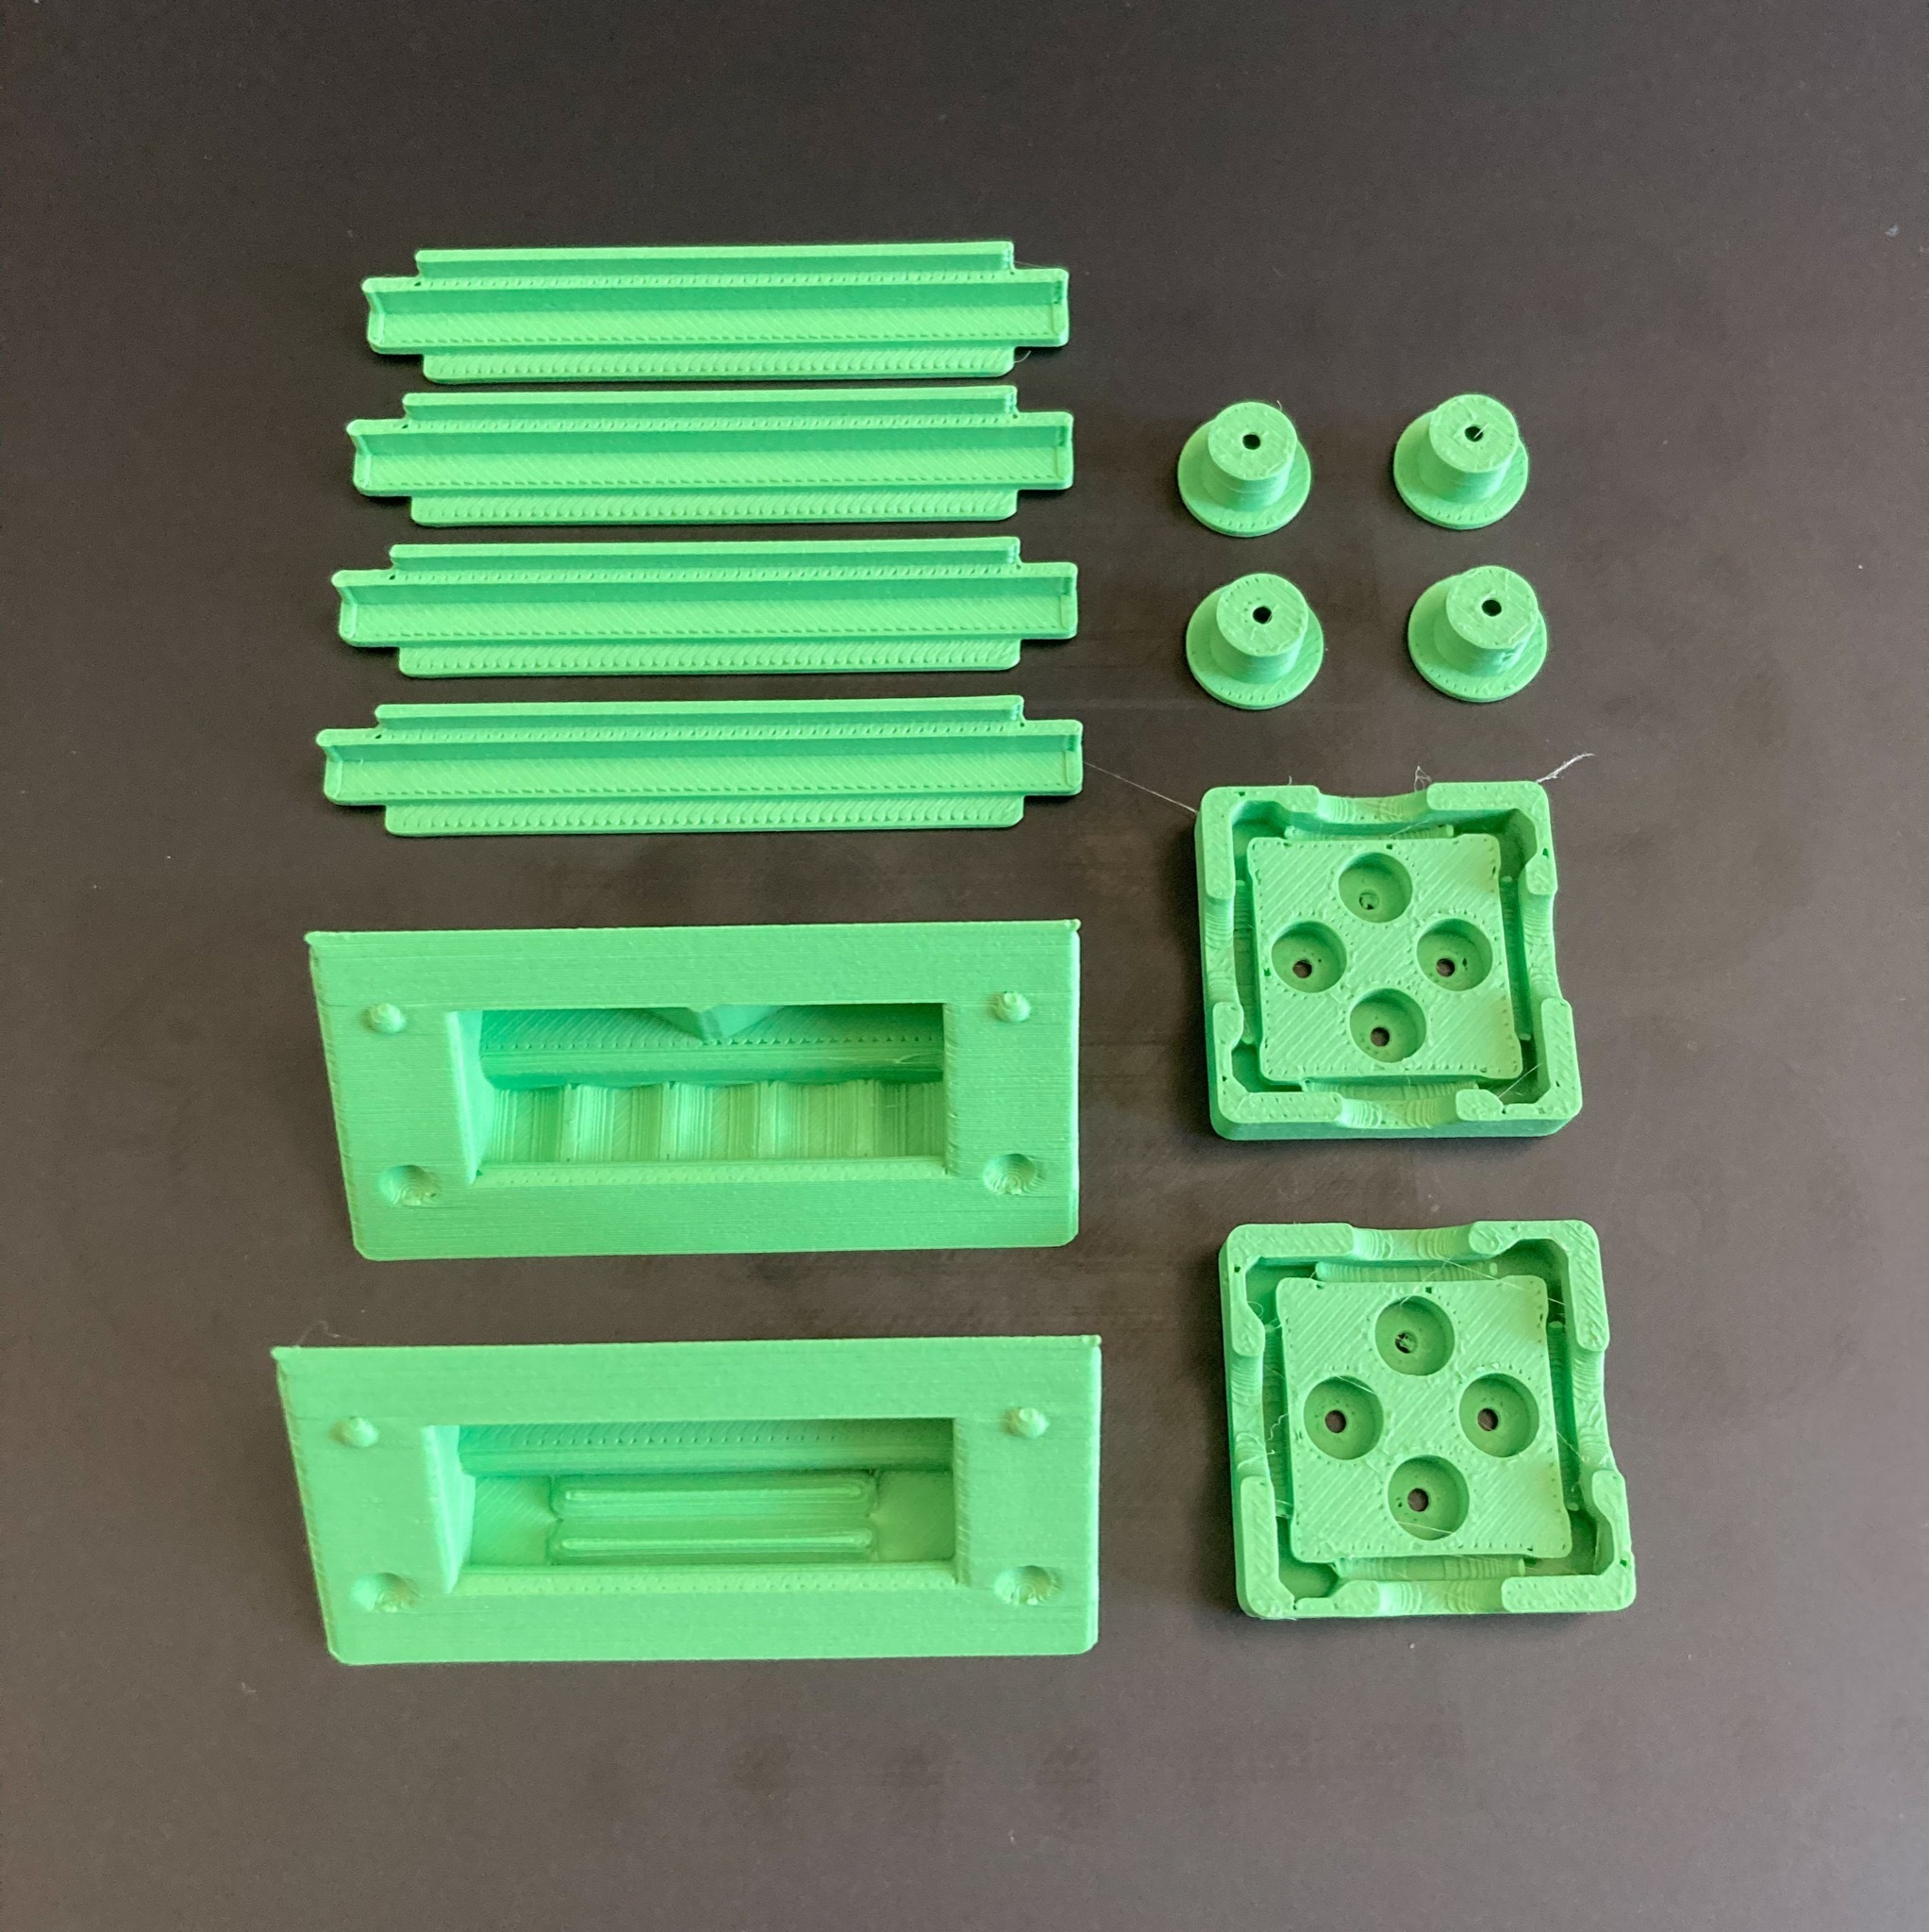
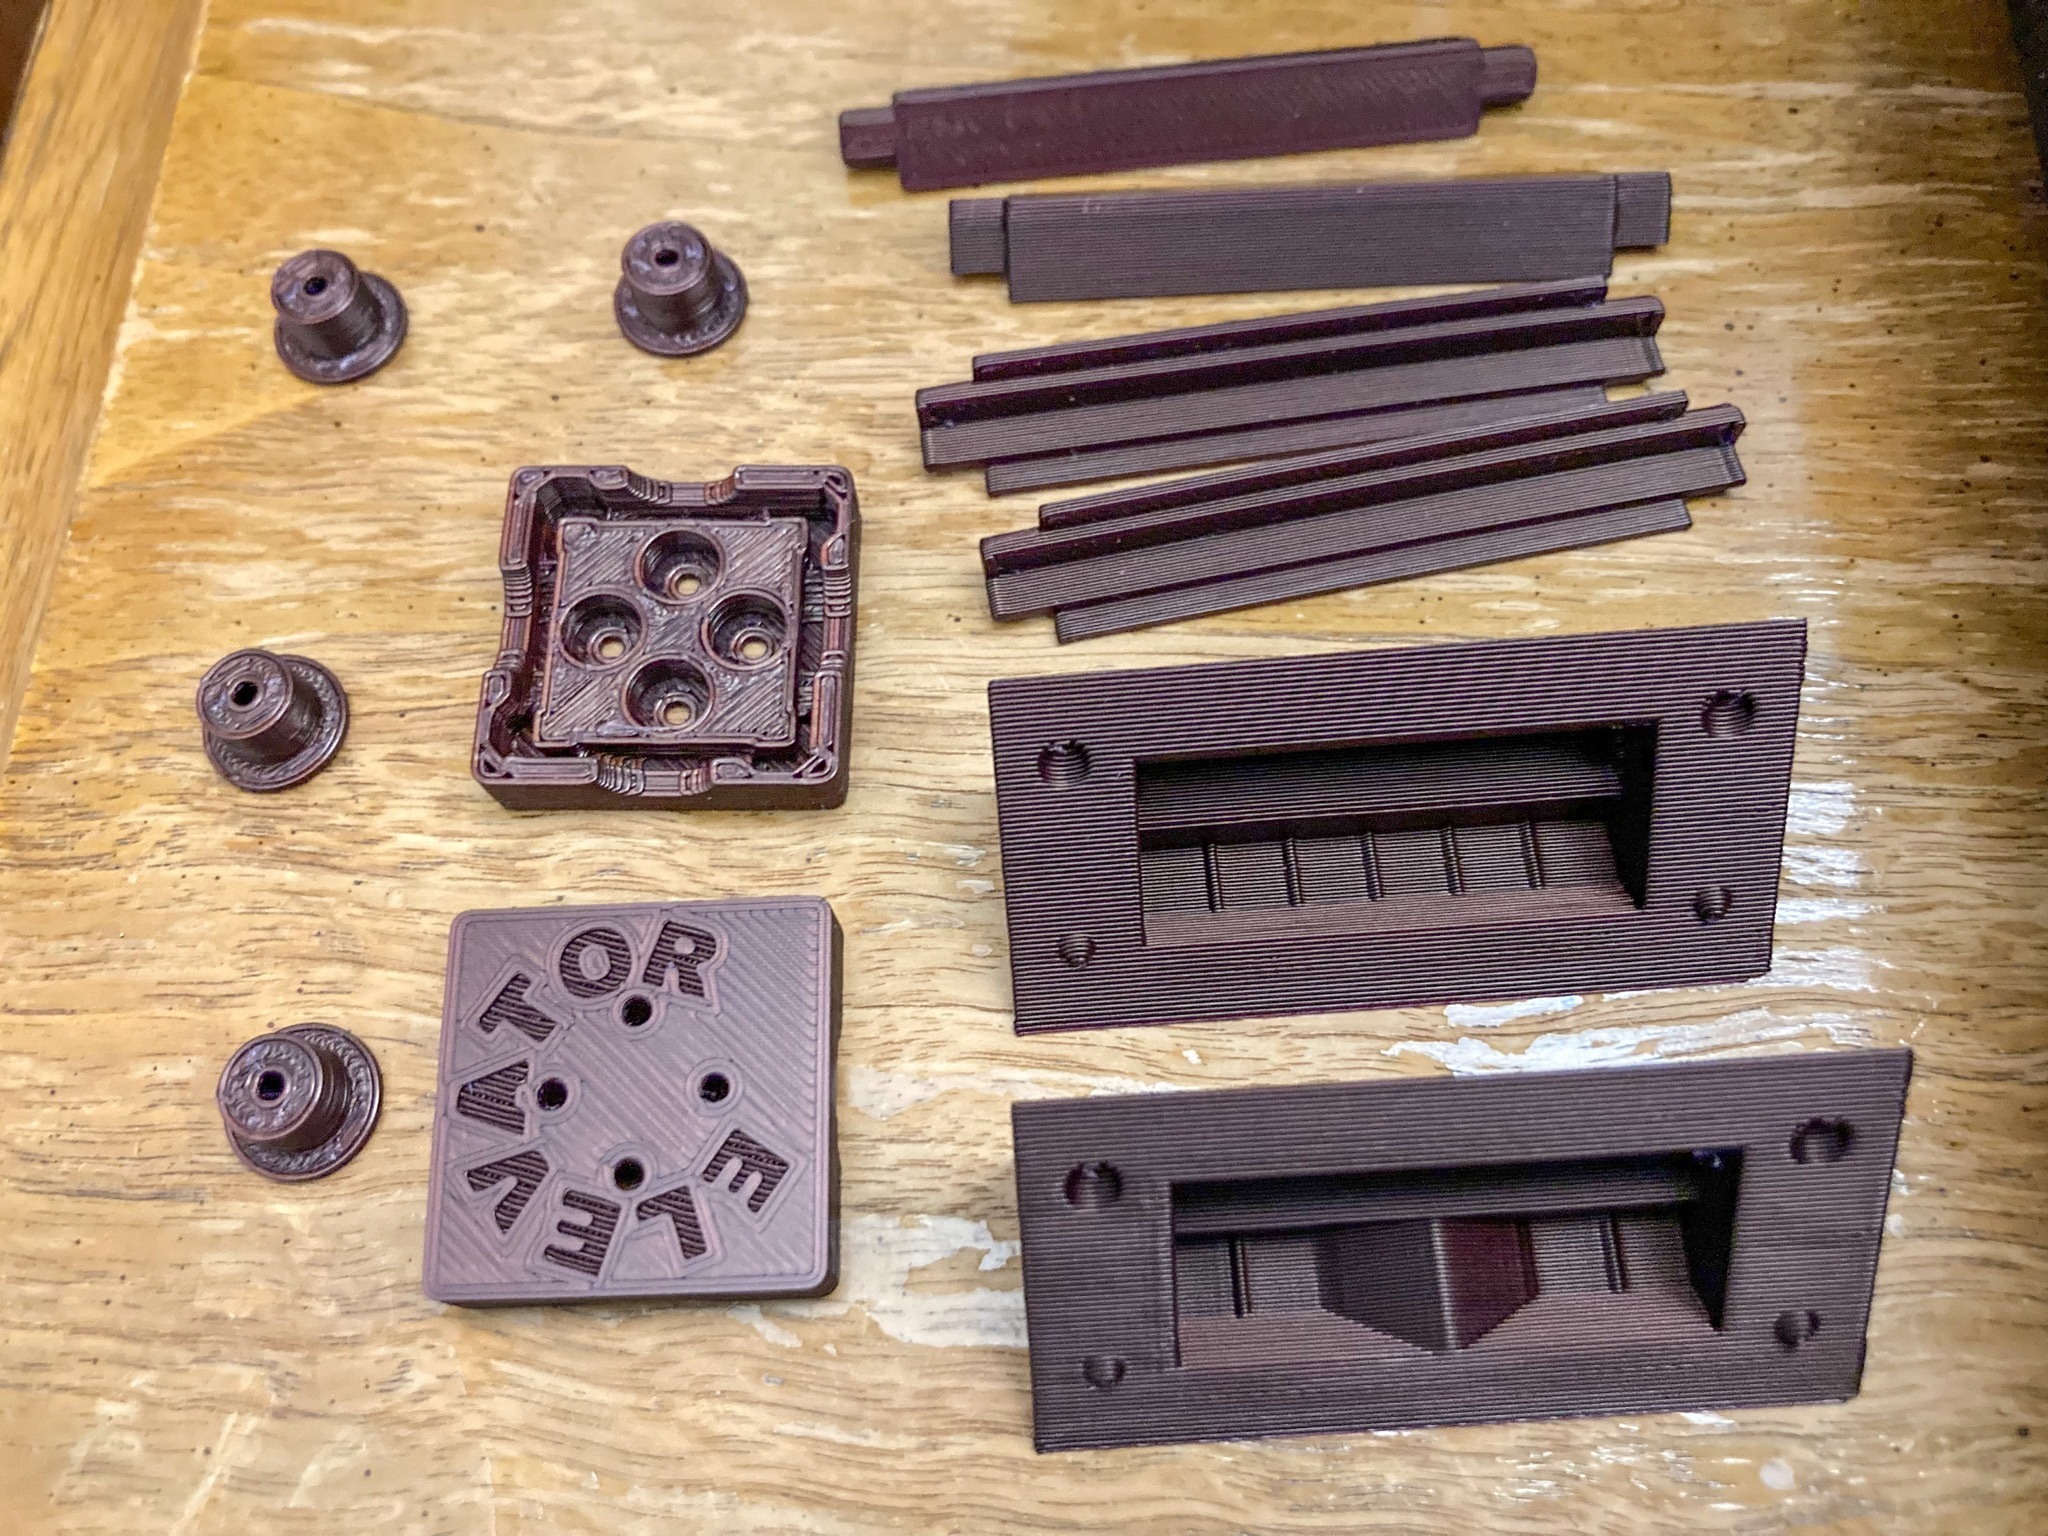
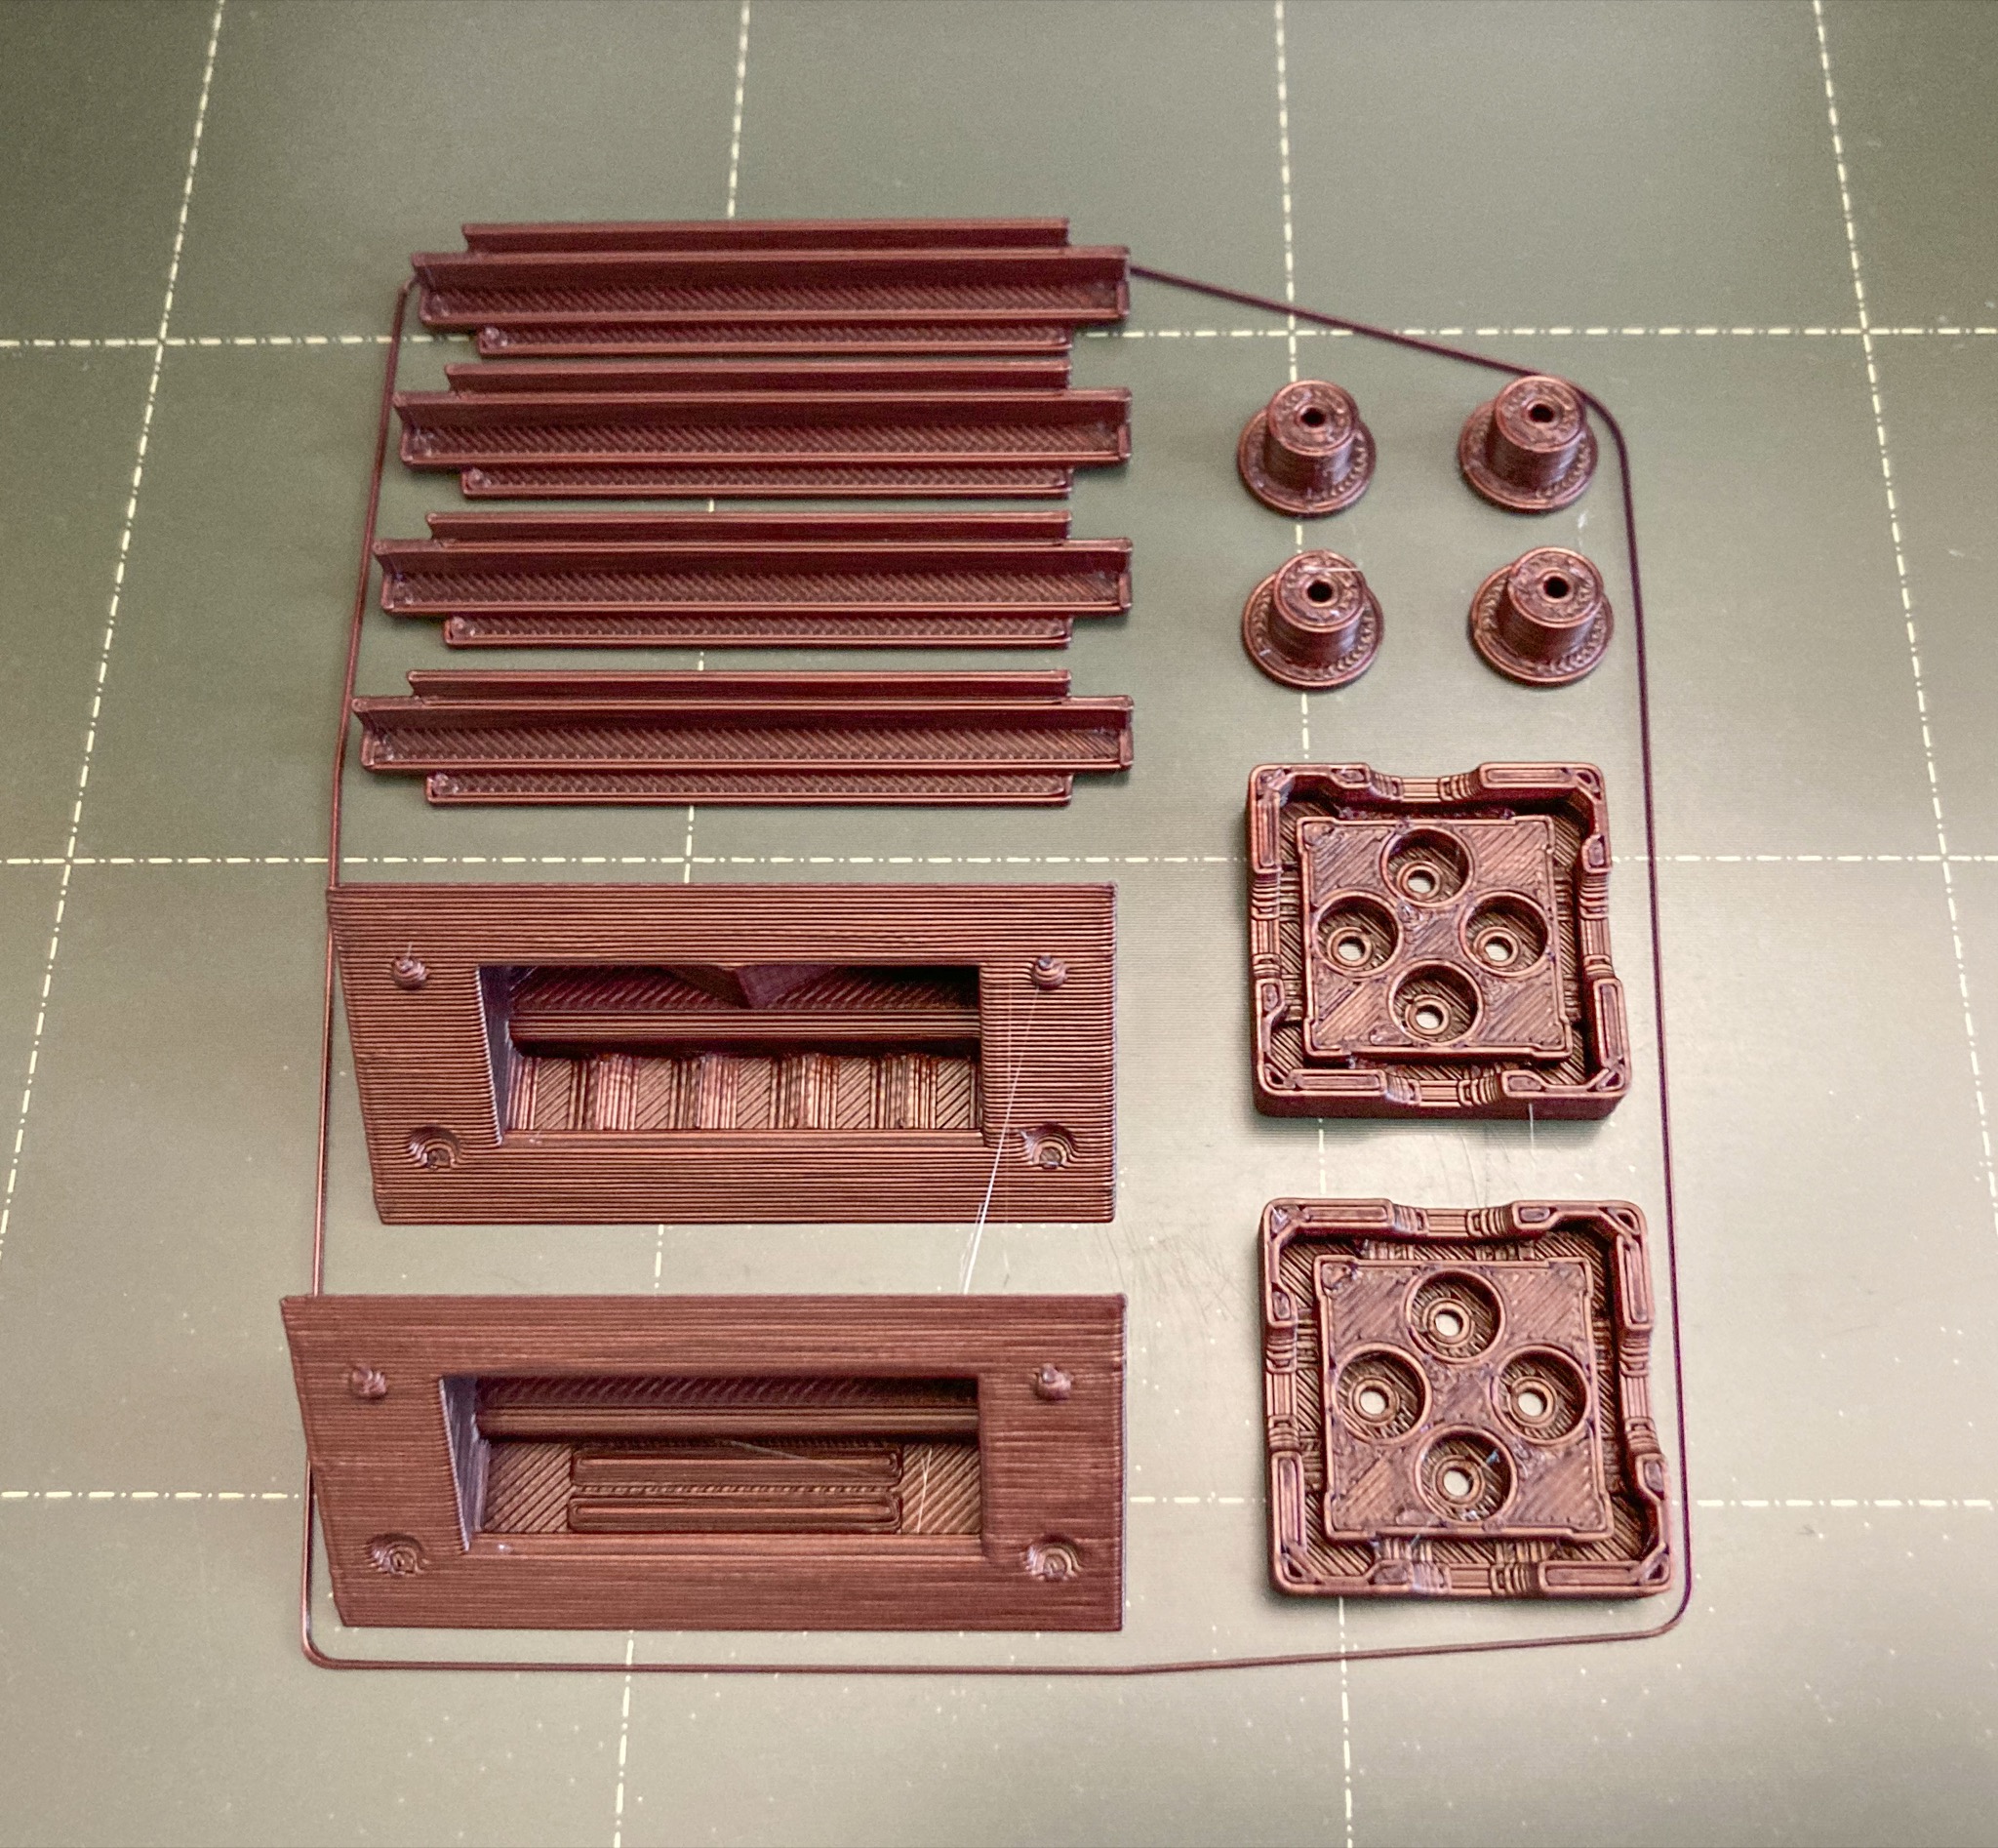
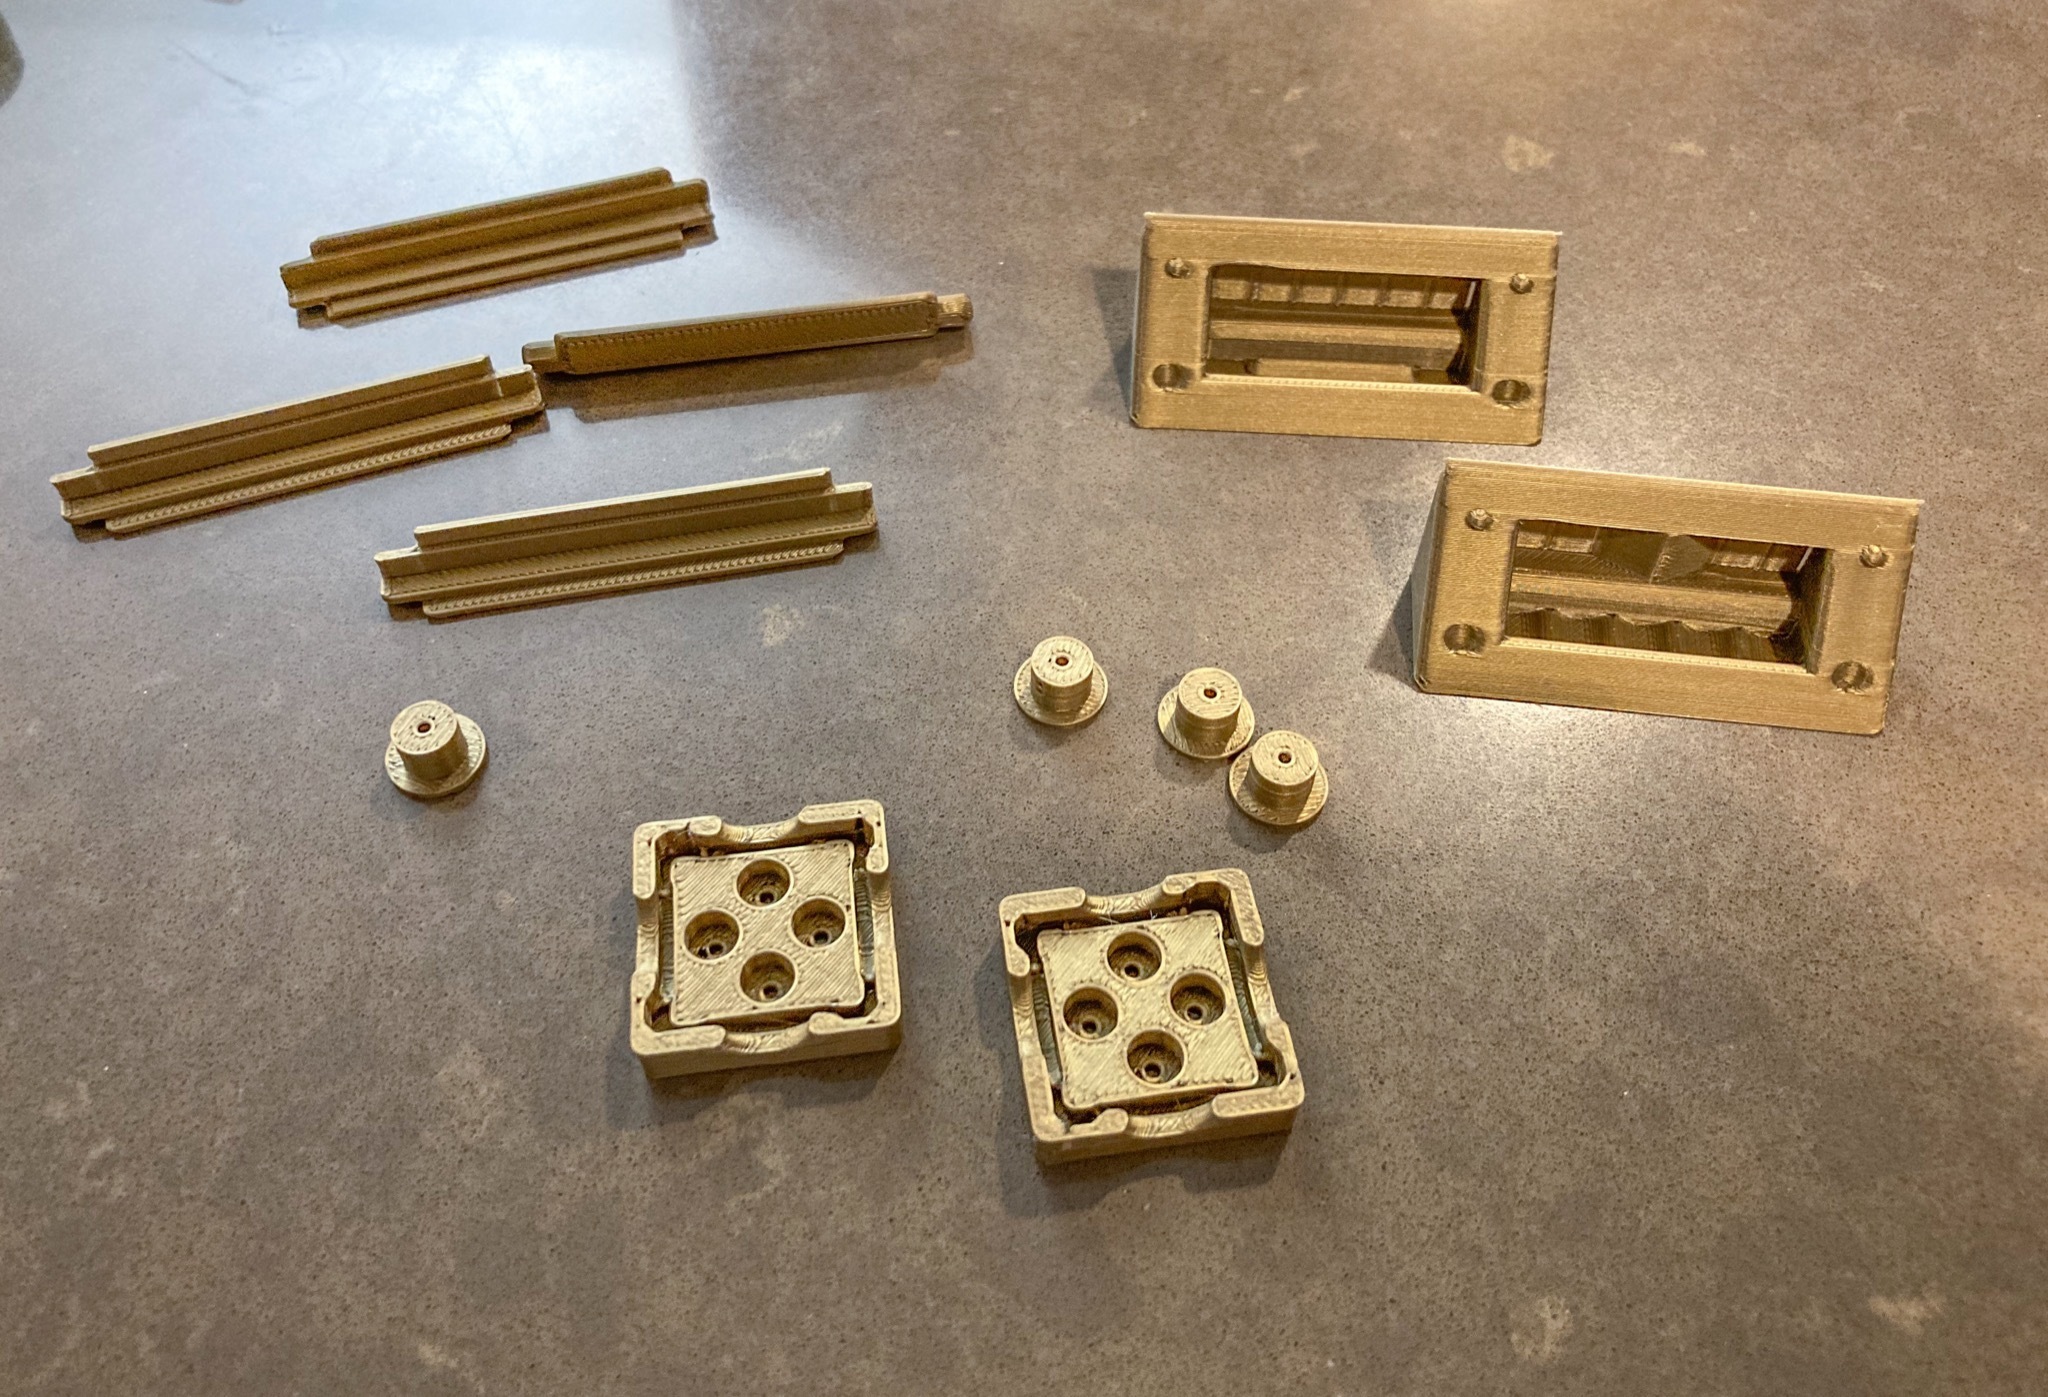
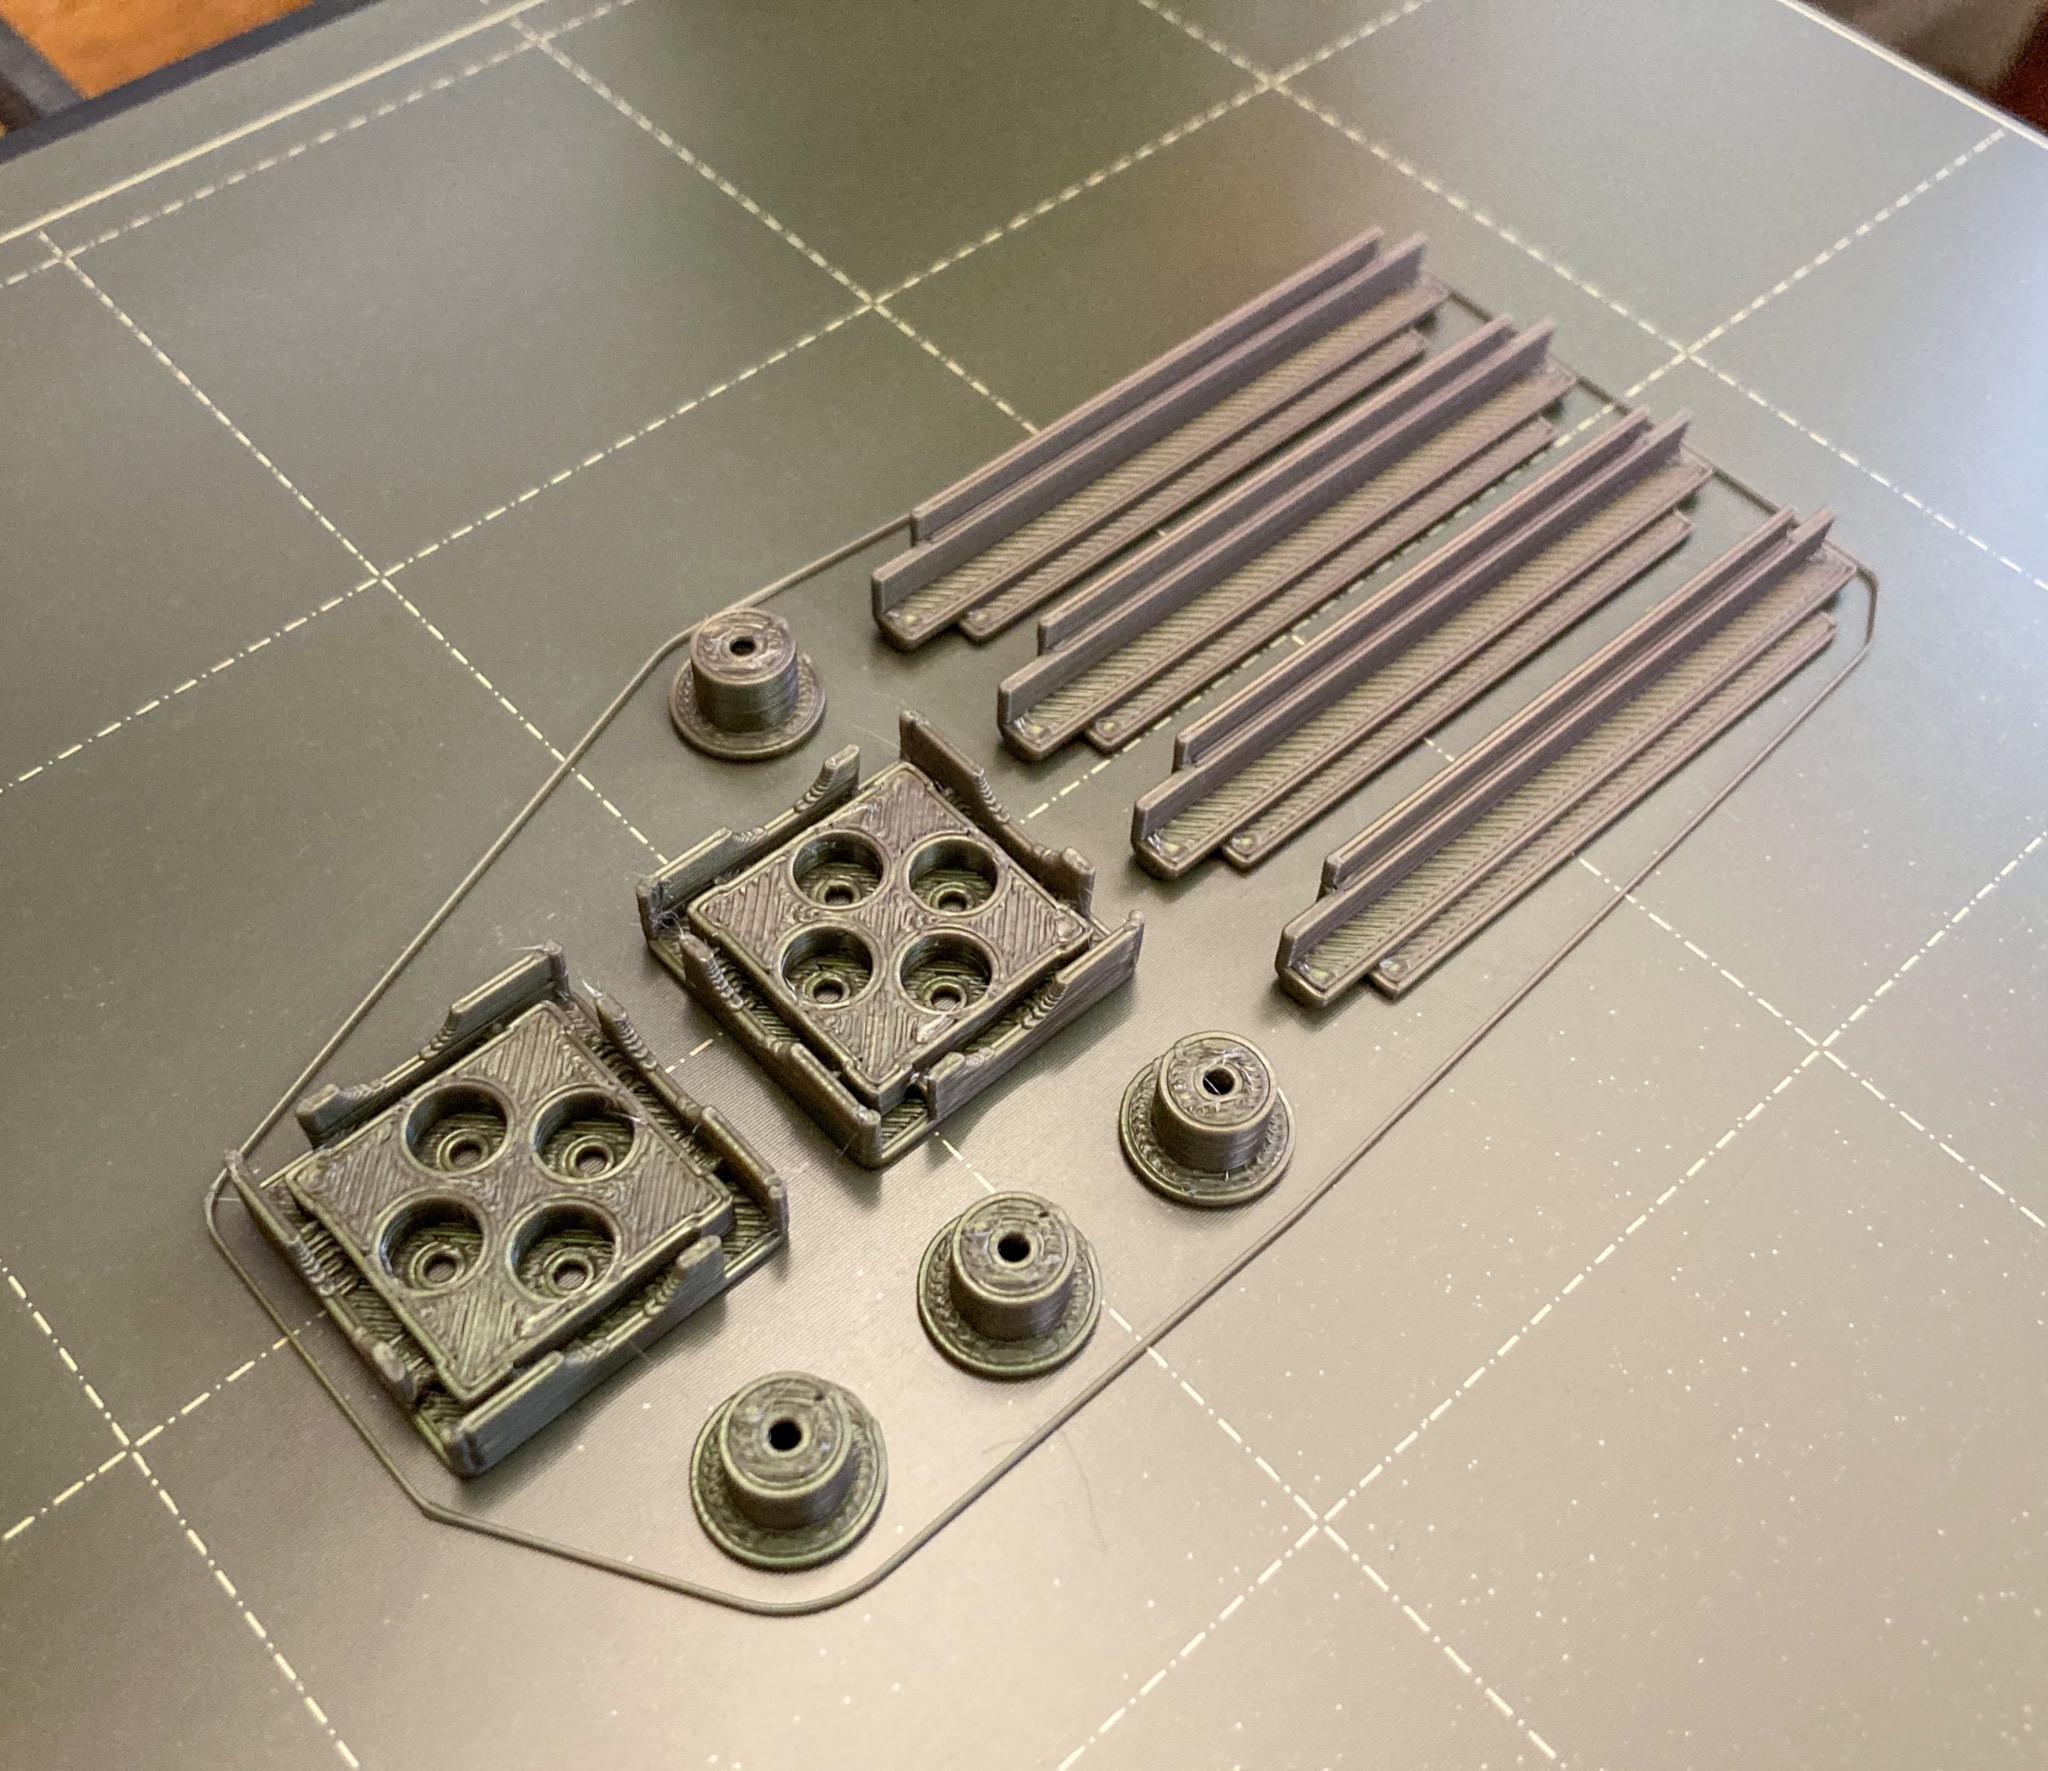
Control pegs should be carefully examined, to make sure that there are no surface irregularities, especially on the brim of a peg. The brim needs to slide freely within the slotted groove, when parts are snapped together.
The two walker-surface inserts need to fit together with no gaps between them. Check for surface irregularities. Struts should print clean, so control pegs can glide free when all parts are snapped together. Deburr edges to make them smooth.
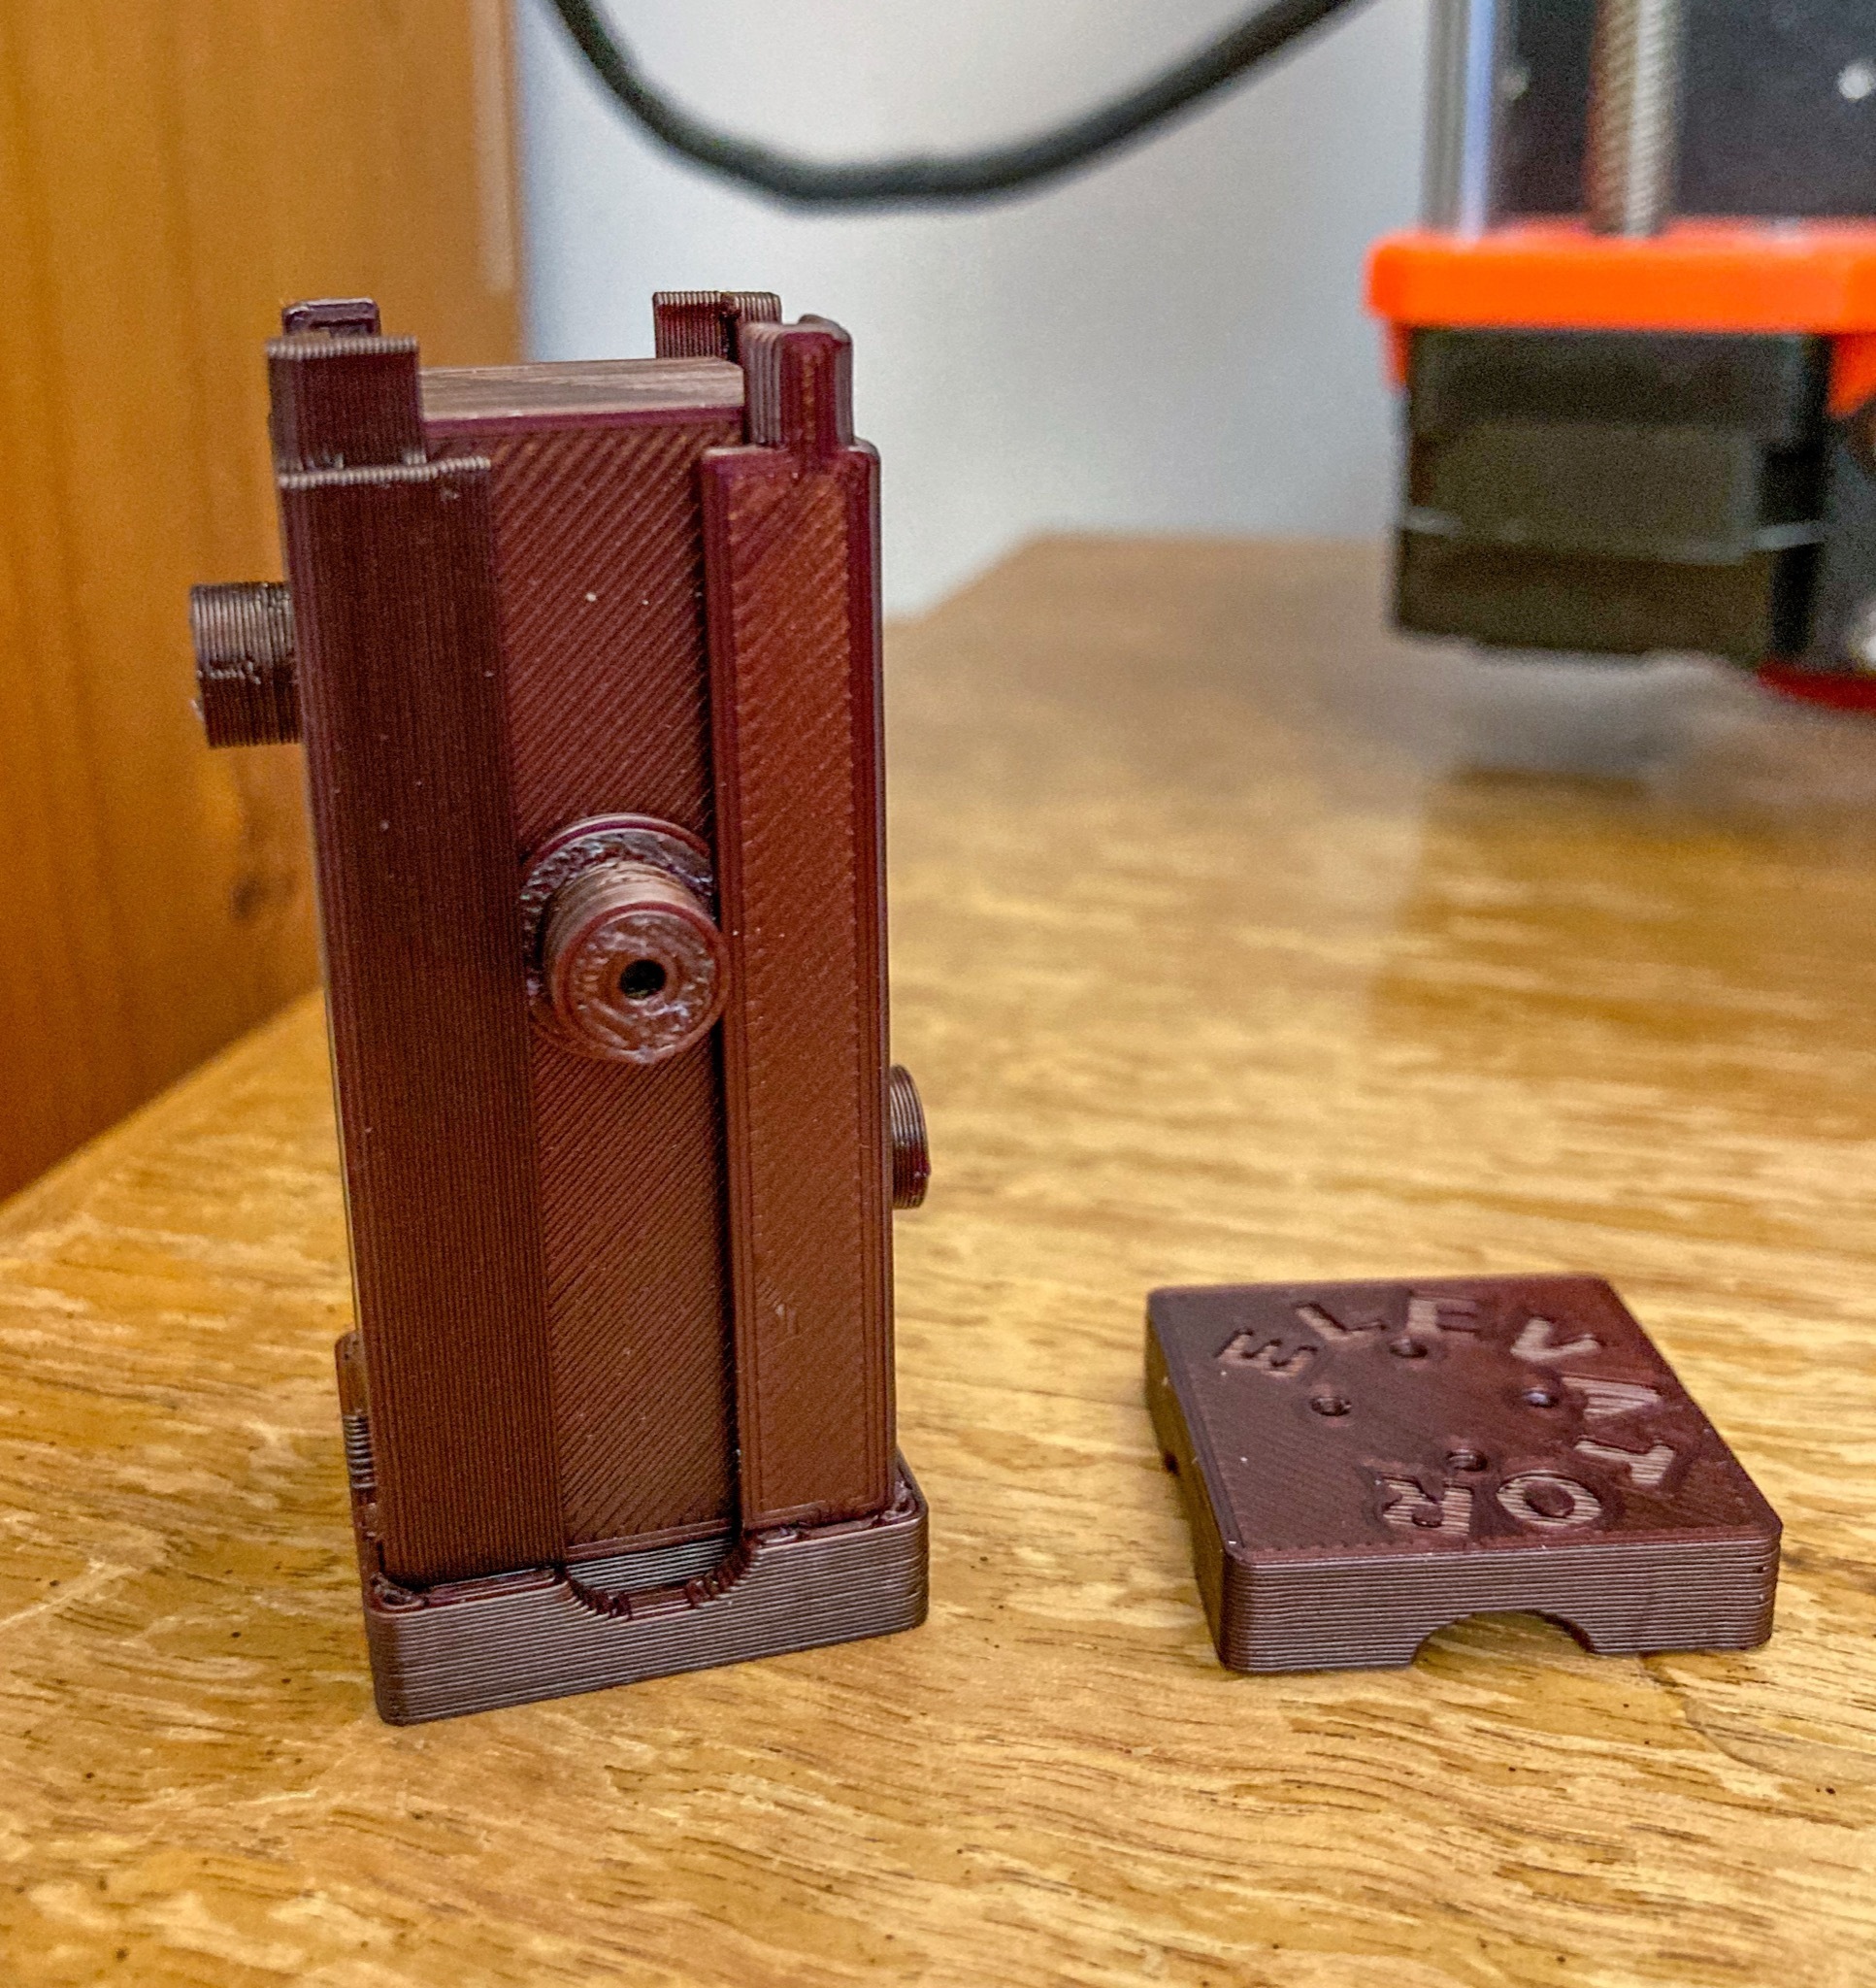
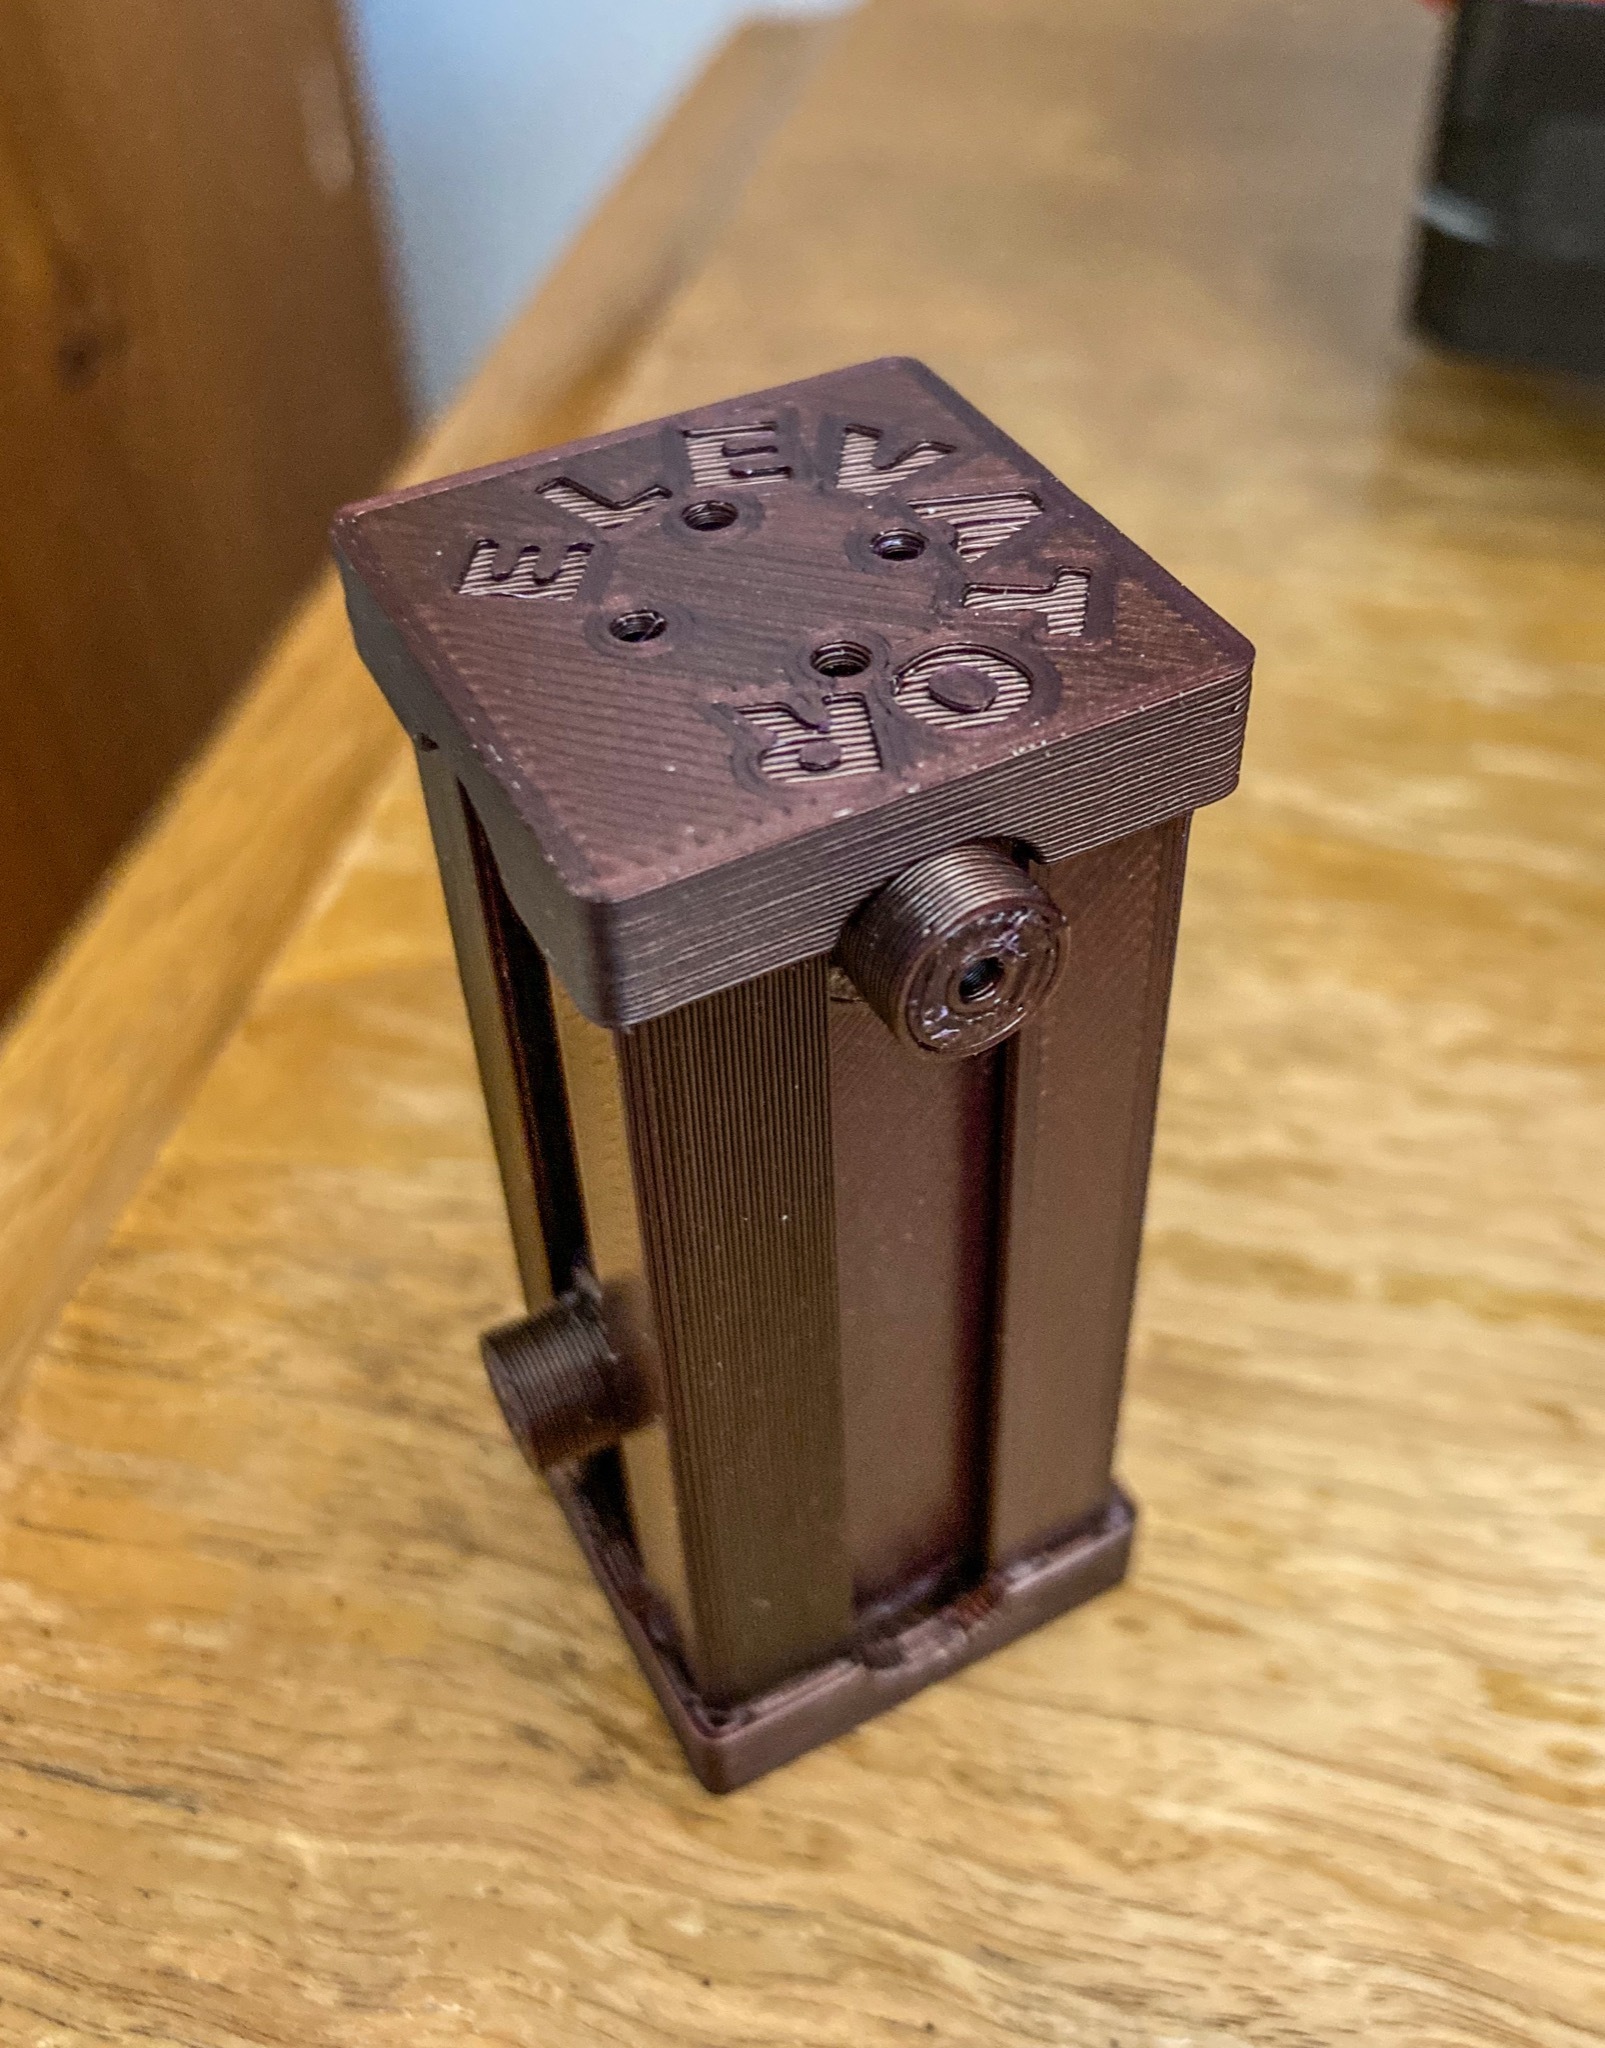
ASSEMBLING AN ELEVATOR:
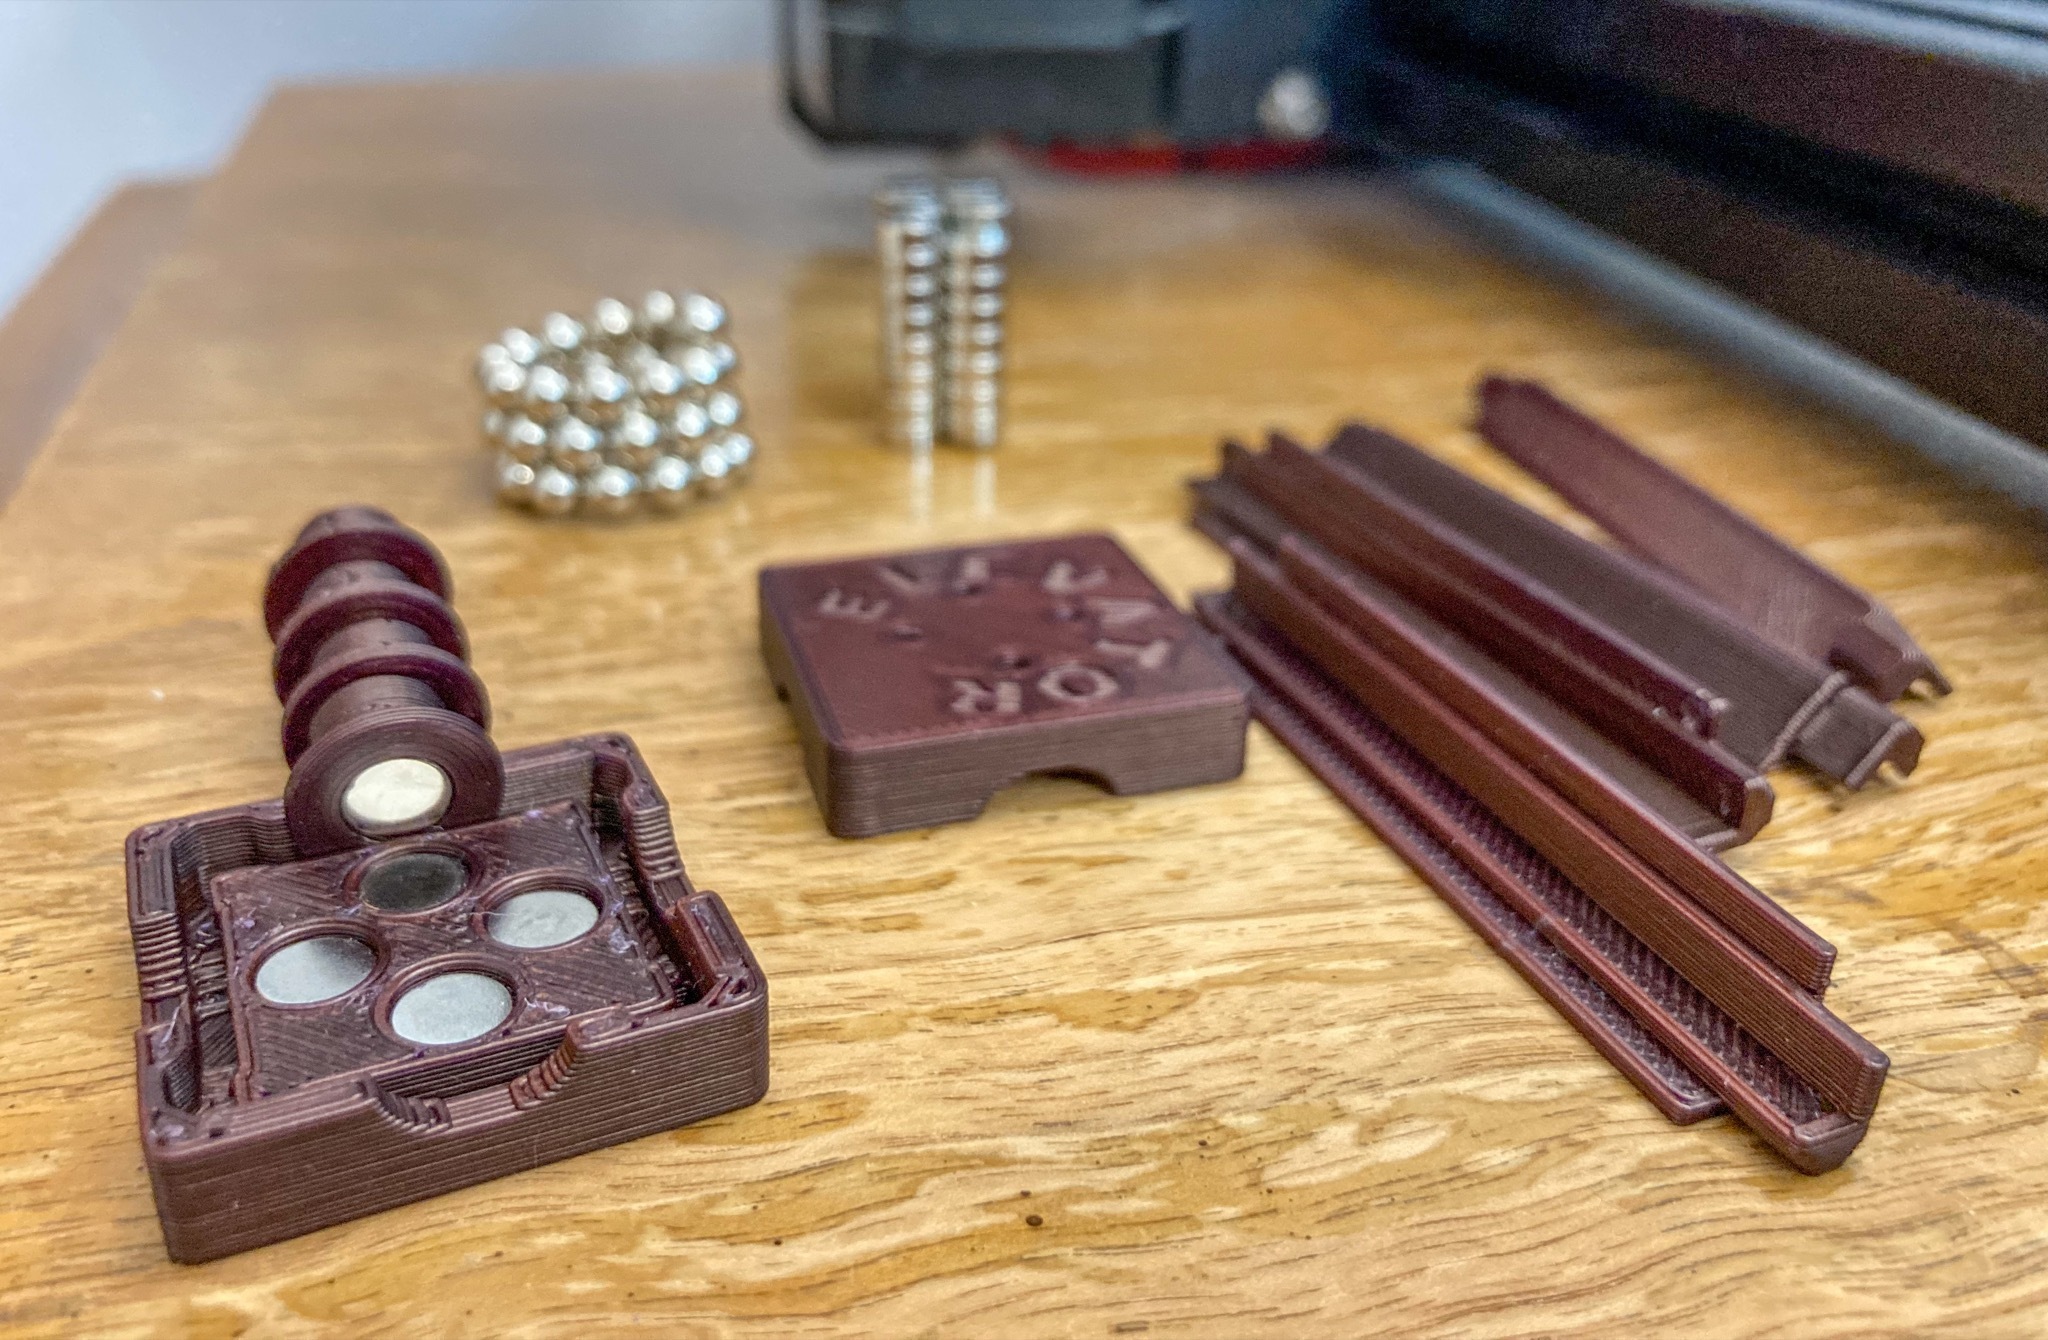
The orientation of disc magnets is important. You must insert disc magnets into control pegs with one particular orientation, say with South pointing up. And then you insert magnets into end pieces with the opposite orientation, say North up. You can flip orientations, but flip them both. The key is to make is so that pegs are attracted to these end magnets in one particular way. See pictures.
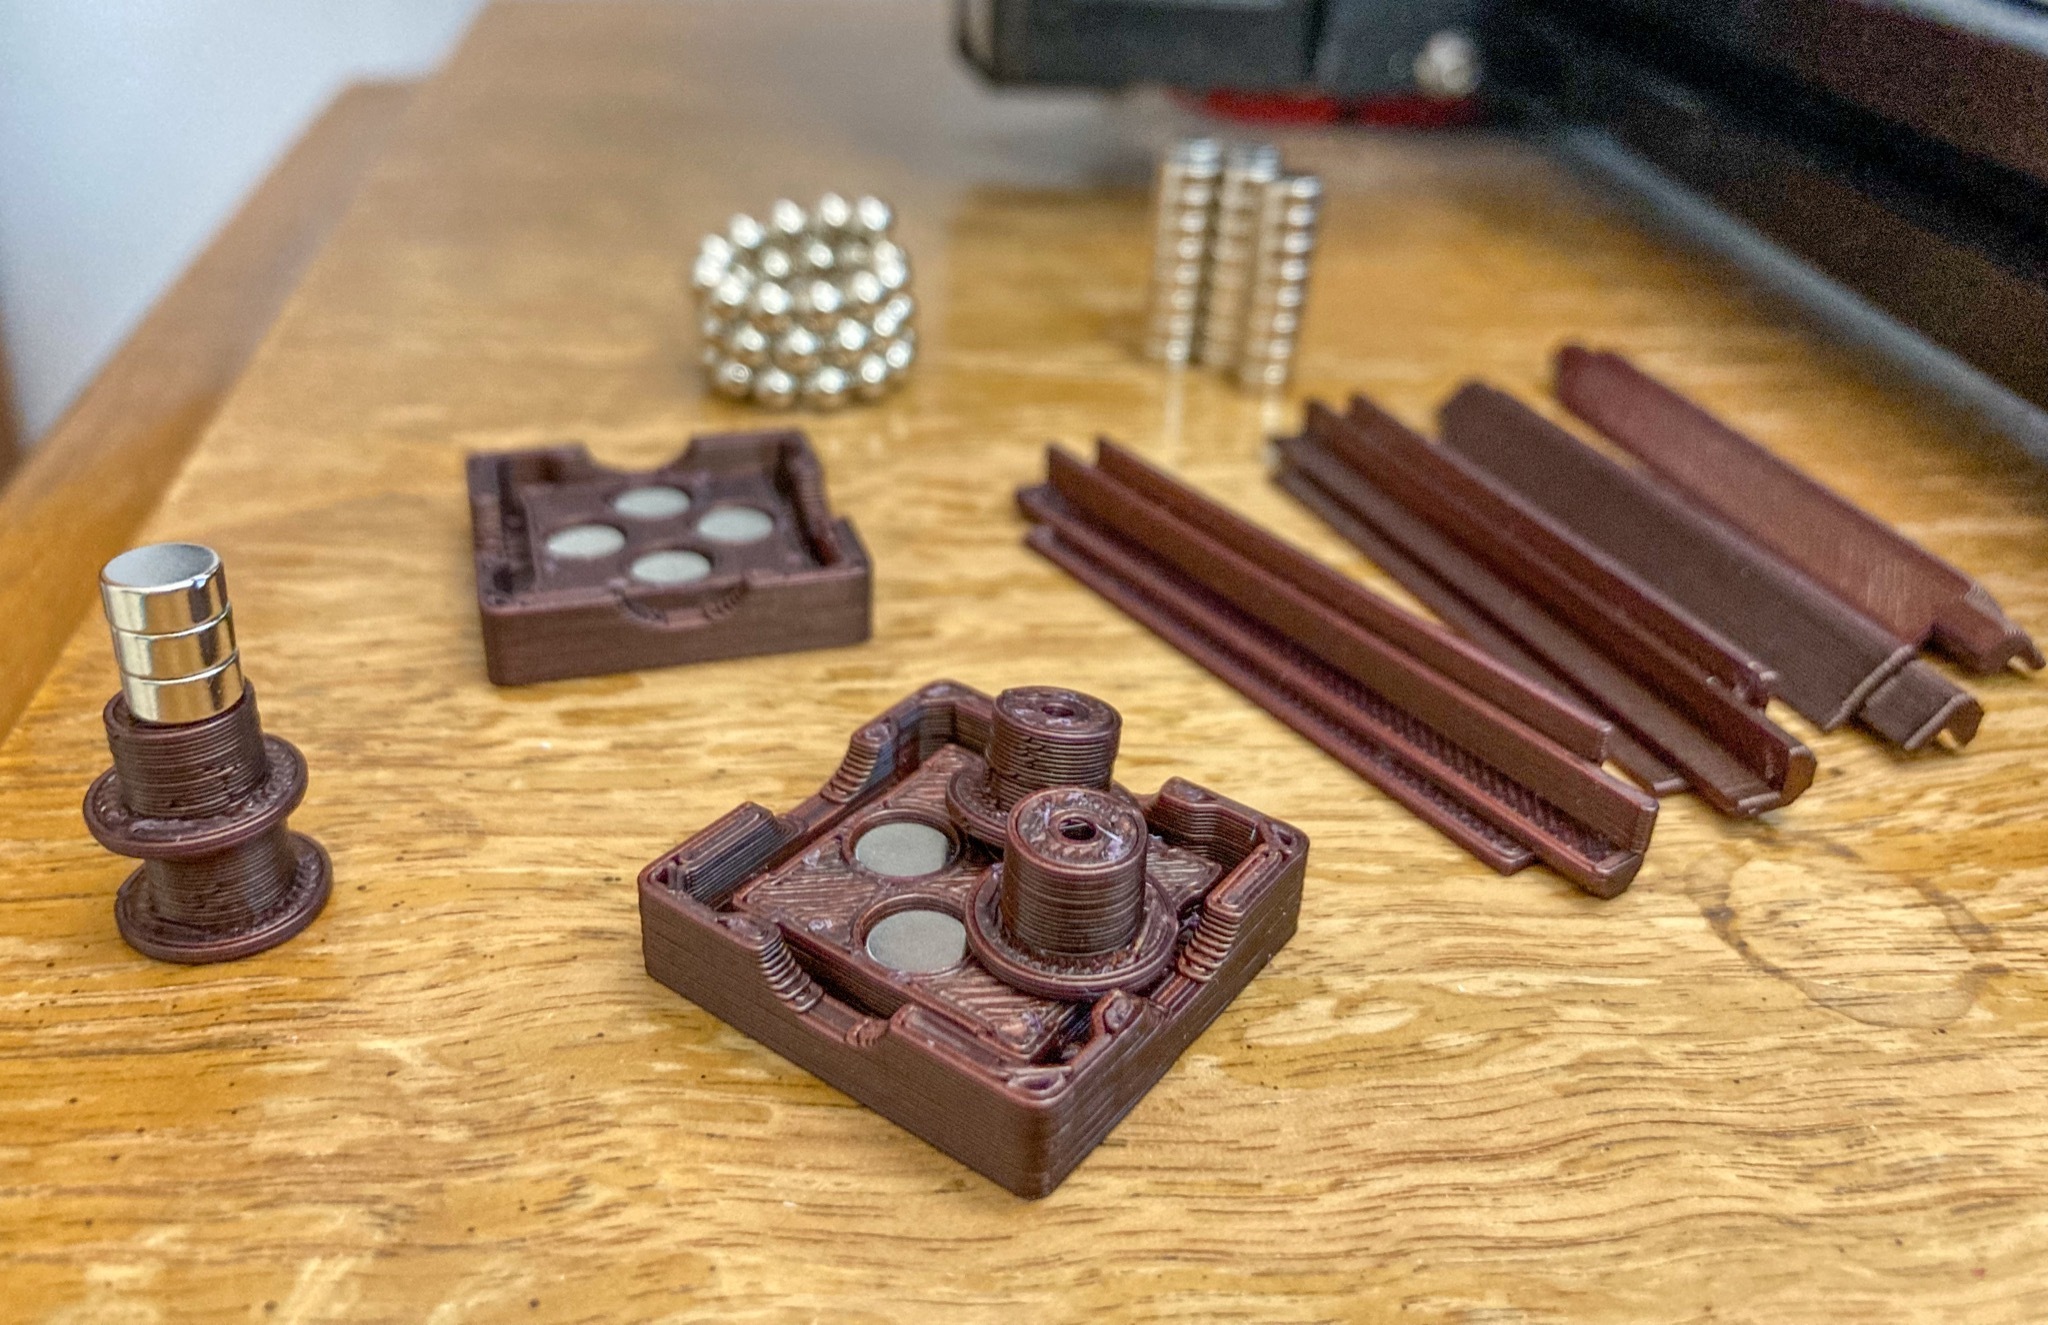
First, push a disc magnet into a control peg, say with South pointing up. Make sure the magnet sits flush. The peg needs to slide freely, so you don't want to add unaccounted height to it with a partially-inserted magnet. Repeat this for 3 more control pegs. If you ever need to remove a magnet from a peg, poke the magnet out using a tiny screw driver through the small hole at the top of the peg.
Insert a disc magnet into each of the four magnet holder wells in an end piece, say with North pointing up. If your print is over-extruded, or if you printed with more than 10% infill, this may be a difficult task. You can deburr a hole slightly, but don't over enlarge a hole, or you will have a hard time trying to keep magnets in place. Loose magnets will want to pop out of a well, and hug one another. Use the blunt end of a pen to push the disc magnet in and flush. Repeat the same for the other end piece.
Confirm that control pegs all have the same magnet orientation. You can just stick one peg to another, and check that they line up the same way. Then confirm that all magnets in end pieces have the right orientation. Pinch a control peg, and stick it to an end-piece magnet - they should mate as is. See pictures. You should be able to drag the peg from one end-piece magnet to another. If a magnet rejects your peg and tries to flip it, then pop this magnet out with a tiny screw driver through the small hole at the bottom of the magnet holder well.
Now is a good time to take the ball magnet, and drop it into one of the two walker-surface inserts. You can keep it in place with a control peg on the outside of the insert. See pictures. Many a times we finish assembling a whole elevator, only to find that we have neglected to put a pet magnet inside. Disassembling an elevator is a difficult to impossible task, unless you severely under-extrude prints. So keep the ball magnet inside the insert, from this point on.
The two end pieces are not identical. They are mirror images of one another. The four struts are identical to one another, but the two ends of each strut are mirror images of each other. Identify ends of struts, and visually match them to slots in the two end pieces. Struts are designed to snap-fit into end pieces, with bumps and grooves. If over-extruded, these pieces will not fit willingly. In that case, line up a strut with a slot on an end piece, then tilt the strut before you try to insert it. Straighten the strut only after it has gotten into the slot.
Insert four struts into one end piece thus (the bottom). But leave the other end piece alone for now (the top). You do not need to fully insert a strut into the bottom at this time. Only make sure that struts stay inserted at least half-way. Do not use your palm directly to push a strut into the bottom. It may pierce your flesh, if you don't have anything between your palm and the end of a strut.
Take the two walker-surface inserts. Recall that there should be a ball magnet inside one insert. Examine where inserts couple to each other. There are bumps and holes for alignment. Orient inserts so bumps and holes align. With the ball magnet captured inside, slide the coupled inserts into the assembled unit in between struts.
Take the other three control pegs, and slide them into their respective gliding tracks. Confirm that all four pegs glide well within their tracks. Confirm that every peg is attracted to the bottom end piece, instead of being pushed away from it. The elevator should be functional at this point. You can walk the pet magnet with a control peg, and pass the pet to another control peg, by parking the first at the bottom.
Take the top end piece, and visually confirm that the four strut ends will fit into slots in it. You may now snap the top piece closed with the assembled unit. You can tape on this end piece to pound it down. Or you may add a sacrificial buffer material on top, and tape the material with a small hammer. Ensure that both top and bottom end pieces are hammered into their final placement.
LICENSING
We encourage you to tinker with elevators. Try making different walking surfaces. Just like with individual CocoSnap clickers, you can coat the inside walking surface with nail polish or equivalent. You can even fill the inside with water and seal off the elevator.
Fidget Walkers Kool Fingers is licensed under Attribution-NonCommercial-ShareAlike 4.0 International. To view a copy of this license, visit http://creativecommons.org/licenses/by-nc-sa/4.0/
Utility patent applications for fidget walkers and related concepts have been filed. Some are early-published and can be found at https://koolfingers.com/patents/. As already covered in our applications, these haptic fidgets are also applicable in a variety of fields including percussion instruments, underwater switches, magnetic locks, tabletop games, and even automated machineries.
Therefore, in addition to "CC BY-NC-SA 4.0", all 3D models published here, their future derivations by third-parties, as well as non-derivative work are also covered by pre-issuance provisional rights, as long as the fidget walker concept applies. While you are free to create and print derivative designs, you must not commercialize them without our agreement.
USEFUL LINKS:
All our 3D-printable models
https://koolfingers.com/3d-prints/
Fidget walkers available on Amazon for purchase:
https://www.amazon.com/koolfingers
Up-to-date printing instructions for printing elevators:
https://koolfingers.com/3d-prints/printing-elevators/
YouTube videos:
https://www.youtube.com/@KoolFingersLLC
Patent applications:
https://koolfingers.com/patents/
KoolFingers.com 2023 ELV-v01
:format(webp)/https://fbi.cults3d.com/uploaders/27678448/illustration-file/c6e5075e-ea96-49e8-9e6c-ad68ff6f90d6/FW-ELV-Fidget-Elevator-01-Product-Display-4-elevators-Bronze-PVB-Copper-Brown-Metallic-Grass-Green-I.jpg)


/https://preview3d-images.cults3d.com/mpfuzja1tikv3n9zasgmiczr421j)
/https://preview3d-images.cults3d.com/v3x40qbhkz7yfrwi0h1owz7i7cez)
/https://preview3d-images.cults3d.com/j93jtotf4jxma078e6xwoamcriz6)
/https://preview3d-images.cults3d.com/p7066sfpnk96ea8368deqdz0u1vn)
/https://preview3d-images.cults3d.com/16dyqxlcq8grnfddh76bcpfp6bsp)
/https://preview3d-images.cults3d.com/65ks35g3cn9viucg85iv3jiqynuz)
/https://preview3d-images.cults3d.com/298d0evter73l7pcl25m2rvbwarl)

