Skip to content

3D-Printed Slip Casting Pump

Advertising
Advertising
?
Creation quality: 5.0/5 (1 vote)
Evaluation of members on the printability, utility, level of detail, etc.

  • 1.4k views
  • 4 likes
  • 7 downloads
  • 1 comment

License
3D design format
STL Folder details Close
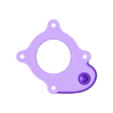
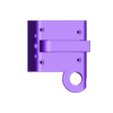
  • Impeller.stl
  • Motor mount.stl
  • Pump handle_mount.stl
  • Pump housing top.stl
  • Pump housing.stl

Learn more about the formats

Publication date 2023-10-22 at 14:07
Design number 1530092

Studiofijf

3D printer file info

3D model description

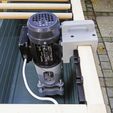
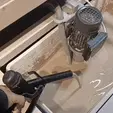
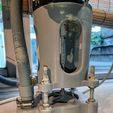
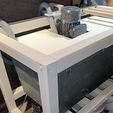
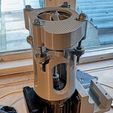
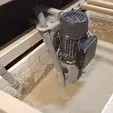
This 3D-Printed Slip Casting Pump was designed to make the slip casting process more efficient and user-friendly. Not only does it eliminate the need for potters to lift weighty buckets over plaster molds, but it also assists in effectively mixing the slip. By ensuring an even mix and consistent pour, this pump is a tool that's set to transform the ceramics community's traditional workflow.

Parts List

The amounts are missing but can be easily counted from the pictures. I had most parts just laying around.
Amazon links are selected based on correct parts, not on amounts.

IMPORTANT: The electric motor is a B35 Foot and Flange. Make sure you can find a ~1500 RPM pump with a B35 Foot in your area first.

Instructions

1. 3D Printing the Parts

  • Use PETG. It's strong and a bit flexible.
  • Set your printer to fill 30% of the inside of the parts for good strength.
  • Some 3D parts have threads inside for attaching the motor. Ensure your 3D printer is set up correctly to print these threads well.

2. Preparing the M8 Rods

  • Cut the M8 rods to fit your bucket so the pump bottom is close to the bucket bottom. Adjust as necessary with the M8 nuts.

3. Fitting the Motor Axle and Decoupler

  • The motor from the parts list has a 10mm axle with a keyway. I had to adjust the coupler hole size using a dremel for the keyway. Depending on the motor you buy you can make your life easier by finding a fitting flex coupler.

4. Reinforcing Pump Mount/Handle

  • The pump mount/handle 3D model is designed with threads. Strategically screw in the M6 x 45mm bolts to reinforce the handle. These bolts are positioned to withstand forces from specific directions. Simply screw them in place and leave them.

5. Assembling, Calibrating, and Mounting

  • Connect the 3D printed parts using the M8 rods, ensuring everything is tight and aligned.
  • The impeller inside the pump should move freely. Adjust using the M8 nuts if necessary. Employ a caliper for precision and to ensure everything is level.
  • Secure the pump hose with a hose clamp.
  • Position the pump so its bottom is close to the bucket bottom.

6. Checking Everything

  • Review your setup to ensure everything is correctly positioned and secure.
  • Monitor the pump closely during its initial uses to check for leaks or other issues.

3D printing settings

1. 3D Printing the Parts

  • Use PETG. It's strong and a bit flexible.
  • Set your printer to fill 30% of the inside of the parts for good strength.
  • Some 3D parts have threads inside for attaching the motor. Ensure your 3D printer is set up correctly to print these threads well.
Advertising


Issue with this design? Report a problem.

Would you like to support Cults?

You like Cults and you want to help us continue the adventure independently? Please note that we are a small team of 3 people, therefore it is very simple to support us to maintain the activity and create future developments. Here are 4 solutions accessible to all:

  • ADVERTISING: Disable your banner blocker (AdBlock, …) and click on our banner ads.

  • AFFILIATION: Make your purchases online by clicking on our affiliate links here Amazon.

  • DONATE: If you want, you can make a donation via Ko-Fi πŸ’œ.

  • WORD OF MOUTH: Invite your friends to come, discover the platform and the magnificent 3D files shared by the community!


Sharing and downloading on Cults3D guarantees that designs remain in makers community hands! And not in the hands of the 3D printing or software giants who own the competing platforms and exploit the designs for their own commercial interests.

Cults3D is an independent, self-financed site that is not accountable to any investor or brand. Almost all of the site's revenues are paid back to the platform's makers. The content published on the site serves only the interests of its authors and not those of 3D printer brands who also wish to control the 3D modeling market.

100% secure payment by credit card, PayPal, Apple Pay, Google Pay, etc.
View all payment options.