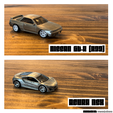
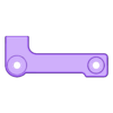
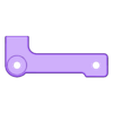
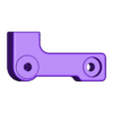
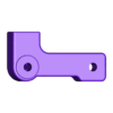
Summary:
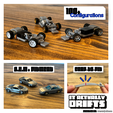
This is my take on providing a “simple “ yet modular design (“one-size-fits-most”) that can be used to convert common 1\64 scale die cast cars into remote control vehicles. This kit provide the necessary parts to configure a drivable frame that not only conforms to the car of your choice but the driving style as well. Additionally & with exceptions, this kit does not require exterior modification of the die cast body which allows users to retain the OEM /out-of-box look. At the moment this is the only printable kit available online that approaches this conversion with a module frame, kits that are available are specific to only one style (make/model) of car which limits creativity & any future release of new cars. The only model that I could locate online that was relatively close to this did not have the model available for download, the model has to be purchased, printed, & shipped (which is daunting given how delicate these parts are & the potential need to reprint these parts at any time or after a bad crash).
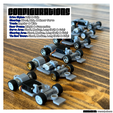
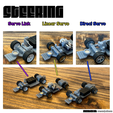
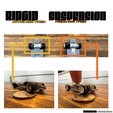
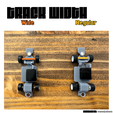
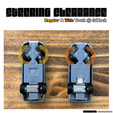
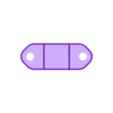
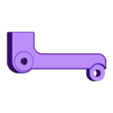
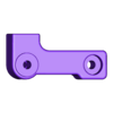
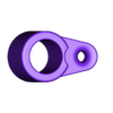
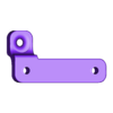
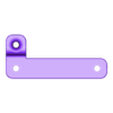
“Snap 64” originates from the design of the frame, while this depends on the material used, in many cases the frame can be “snapped” via the score lines to get the perfect fit for each vehicle. As noted in the pictures, there is a limitless amount of configurations that can be used to fit your specific needs as many of shared components are provided in multiple sizes or styles (drift, grip, short, medium, long, rotation servo, linear servo, so on…). Most importantly, this does indeed DRIFT. While it is challenging & requires the perfect balances between tire compounds, transmitter/ gyro settings, & a well assembled frame – it certainly drifts!
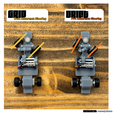
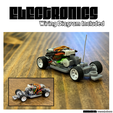
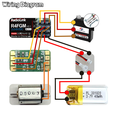
At the moment I will not be able to provide step-by-step assembly instructions but would if this gains popularity. At the moment I believe the pictures as well as the provided BOM is enough to be successfully, additionally I will provide a wiring diagram based on the electronics I used. Please note this does not mean you have to use the electronics I used, the open platform of the build should enable users to use alternative electronics of the same size if they would like. Last, I will provide a list of recommendations to keep In mind during the assembly process for anything that needs to be noted to ease the assembly process of your kit.
This will test your patience, good luck & have fun!
Bill of Materials, Tools, & Consumables:
·Mechanical: 1\64 Scale Wheel & Rim Set (HotWheels, Matchbox, Aftermarket, or Alternative).
·Mechanical: 5.2mm Round Magnets.
·Mechanical: Metal Axle or Alternative (head pin needles for sewing).
·Mechanical: 8x100mm Spot Weld Nickel Strip or Alternative (soda can).
·Electronics: 1.7g Rotational Servo or 1.5g Linear Servo or Alternative.
·Electronics: M10mm Dual Shaft 3-6V DC Motor w/ 1mm Shaft or Alternative.
·Electronics: 3.7v 40 mAh Rechargeable Lipo Battery & Charger or Alternative (preferable with JST 1.25mm connector).
·Electronics: Male & Female 1.25mm JST Connector Plug.
·Electronics: RadioLink R4FGM Receiver w/ Gyro or Alternative (alternative must have gyro to drift).
·Electronics: Radiolink RC4GS Transmitter or Alternative.
· Electronics: DasMikro Das87 1S3A Micro ESC or Alternative.
·Electronics: Servo Wire or ~26G Alternative.
·Electronics: ~26G heat shrink or Alternative.
·Consumables: Thick/ Extra Thick (gap filling) Cyanoacrylate/ Super Glue or Hobby Grade Alternative.
·Consumables: Cyanoacrylate/ Super Glue Accelerator (Spray or Brush-On).
·Consumables: Mechanical Part Lubricant/ Precision Oil Or Alternative.
·Consumables: Precision Tip Applicators – Foam or Non-Foam Tips.
·Consumables: Isopropyl Alcohol 99% or Alternative.
·Consumables: Generic Soldering Material – Solder, Flux, IPA.
·Consumables: Precision Permanent Marker for Marking Cut Lengths.
·Tools: Precision Tweezers & Pliers.
·Tools: Harden Steel & Flush Cut Wire Snips.
·Tools: Horse Hair Brush for Cleaning (used in conjunction with IPA)
· Tools: Precision Drill Bits & Handle (ideally 0.031”for head pins or 0.032” HotWheel Axles).
·Tools: Precision Files – Flat, Square, Round, So on.
·Tools: Sand Paper, 400 through 800grit.
·Tools: Digital Multi-Meter
·Tools: Dremel & Necessary Metal Attachments for Slotting/ Grooving, Material Removal, & 13mm Sanding Band (if widening the wheel well is necessary)
·Tools: Soldering Iron W/ Precision Tips.
·Tools: Digital Caliper (Standardized Common and/ or Precision Cuts)
Assembly Recommendations:
·The best turn radius & wheel clearance will be achieved when the front wheels/rims have the inside 1mm nipple removed – sanding this flat will be super important for the steering wheels to spin straight & balanced.
·While this is model specific, widening the wheel well to a larger diameter was something I had to commonly do to get the best rotation clearance – using the Dremel 13mm sanding band seemed to provide the perfect clearance time-over-time.
·Most die cast cars have (2) standoffs that connect the body to the chassis, in most cases these should be shortened but not removed – shorten each specific to the placement of the magnetic mount/ body fitment.
·Assembly the kit parts first before attaching the chassis/ magnets to the die cast body to ensure the best alignment & wheel clearance.
·The pin caps play an important role in the mobility of the moving parts, it’s important the conical side is facing outwards & is filled will glue to securely attach the cap to each pin.
·When using the suspension rear frame, the rear must be free floating for the suspension to work properly, the rear magnet can be either ignored or attached above the electronics which will mount to the roof of the die cast body.
·Cutting the steel axles that come with most die casts cars will destroy your snip, make sure to use a harden steel/ good pair to cut theses to length.
·Test the cyanoacrylate & accelerator together first, some combinations turn more white than others which may not look all that great (more cosmetic than anything).
·By design each hole in every model is undersized just so slightly so the user can select which pin type to use when assembling the mechanical parts & attaching the wheels – user will need to bore each hole using a precision drill bit for a smooth operation.
·Use sand paper grit situationally, moving parts or part features adjacent to moving parts should be sanded using much finer sand paper to ensure smooth operation.
·I found more supports = better accuracy of the prints, while this requires much more post-sanding & cleaning, the results are much better (functionally & cosmetically).
·Any sanding or filing must be followed by a cleaning w/ IPA to remove any resin dust to avoid build up or early part failure.
·Always cut the pin heads &/or steel axels when detached from the part, cutting when attached may case the resin part to shatter due to impact of cutting.
·Buy more than one battery, in my experience these tiny batteries have a tendency to burn out (lower quality) which is why I use a JST connector in place of hard wiring it into the system.

/https://fbi.cults3d.com/uploaders/30885065/illustration-file/db753574-7a0a-4ac8-b8ca-e229c817b2e1/Page1.png)
