UPDATE
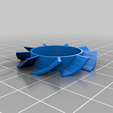
The blades i printed two years ago as a test case but never really used in practice, had to be used today because i broke some other fan. I did find out, that trimming the blades at the part that touches the buildplate when printing, actually improves efficiency. Basically, cut off the small part where the blade touches the heated bed on the first layer.
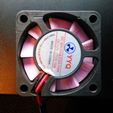
Small filesize. Maximizes blade width. Unlike some other replacement fans, this design replaces the entire blade ring and maximizes efficiency. Other designs have you print blades on a ring that you need to slide over the old one, which results in +/-20% less blade surface width.
I have printed and tested it (early versions were still WIP), and the design now works. Follow these steps:
0/ Read all the steps before doing anything
1/ Download and print the files. Print with 0.8mm walls, supports should not be necessary, depending on your printer and settings. It printed fine on my $150 3D printer with cheapo Hobbyking filament, without supports.
2/ Disassemble your fan, separate the blades from the rest of the motor
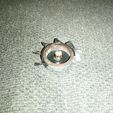
3/ Trim your blades entirely, including the ring, so that you're just left with the flat circle and the magnet sticking out in the middle. Don't throw away the magnetic ring that fits inside.
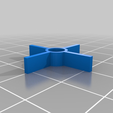
4/ Put the "center spacer" (the cross with the circle in the middle) into the blades you just printed.
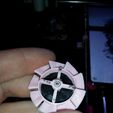
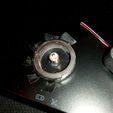
5/ Use the hole of the center spacer to fit the magnet, so when you glue or melt the backside with the magnet to the fanblades, that you have them centered. (see picture) Try fitting everything together before glueing or melting parts together. If you notice the backside sticking out of the motor, you may want to print the model again, but at a slightly decreased Z height (like 5.4 or even 5 instead of 6 mm... keep your layer height in mind) or gently sand the bottom down a bit, or simply use a spacer.
6/ Attach (glue/melt/..) the blades to the backside with the magnet.
7/ Pull out the center spacer and throw it away.
8/ Insert the magnetic ring
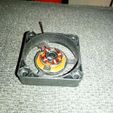
9/ Push the blades back into the rest of the motor. Make sure none of the blades touch the walls, if so, push/pull the fanblades out, trim where needed. This wasn't the case for me, but just to be sure, check it.
10/ Mount the motor.
11/ Success!
https://youtu.be/1YmQFGr22ys
//////////////////////////////////////////////////////////////////////////////////////////////////////////////////////////////////
old info down below:
//////////////////////////////////////////////////////////////////////////////////////////////////////////////////////////////////
EDIT 1: Oops! version updated already, i noticed a part of a boolean was included, which should not have been included, making the ring too thick- it was also mirrored (sad face)
EDIT 2: So i did get around to printing the model, and it was just not tight enough. Probably didn't measure it accurately enough (don't own a fancy schmancy digital caliper yet), so i uploaded a new version, which should be a tighter fit, with the added benefit of the blades being a tad longer too, due to the extra space coming from the smaller ring. I haven't printed this one yet, but it should be better.
experimental and untested! The ring in the middle should be 0.8mm thick, which should make it easier for a 0.4mm nozzle. The idea is to trim the original down to the round flat surface, You'll need to glue (or melt) both together.
I haven't printed or tested it, since i already got my replacement and didn't feel the need to, but i already made the 3D model, so i decided to share it nevertheless. Please leave feedback if you printed it.
LOW POLY & SMALL FILE SIZE (55k)

/https://fbi.cults3d.com/uploaders/31105221/illustration-file/a2ff3c1d-86af-455a-afa1-bf53a5f9b0d7/IMG_20170115_002253.jpg)
