Skip to content

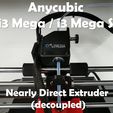
Anycubic i3 Mega / i3 Mega S Direct Extruder v1.0

Advertising
Advertising
?
Creation quality: 5.0/5 (1 vote)
Evaluation of members on the printability, utility, level of detail, etc.

  • 1k views
  • 2 likes
  • 14 downloads
  • 1 collection

License
3D design format
STL Folder details Close
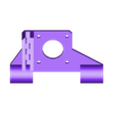
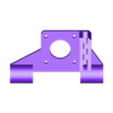
  • Bowden_Holder_Hotend.stl
  • Bowden_and_Cable_Holder.stl
  • Extruder_Holder_Cable_Left.stl
  • Extruder_Holder_Cable_Right.stl
  • Holder_1.stl
  • Holder_2.stl

Learn more about the formats

Publication date 2023-11-09 at 12:47
?
Published to Thingiverse on: 2020-03-26 at 20:55
Design number 1567346

3D printer file info

3D model description

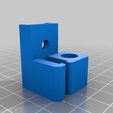
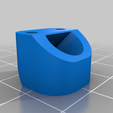
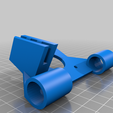
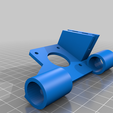
Anycubic i3 Mega / i3 Mega S Direct Extruder


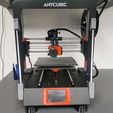
Da ein Direkt Extrude doch eine erhebliche Belastung für die X-Achse darstellt aber auch erhebliche Vorteile biete, habe ich diese Lösung entworfen, welche ziemlich gut funktionier. Folgende Vorteile ergeben sich durch diese Variante:

  • keine zusätzliche Masse durch Extruder, Steppermotor etc., welche ruckartig abgebremst und beschleunigt werden muss (geringeres Ghosting, mehr Laufruhe des Druckers und sauberer Druck)
  • problemloser TPU Retract
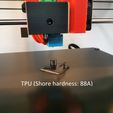
  • geringe Retract Einstellungen (meine Einstellungen = PLA: 2mm bei 40 mm/s TPU (Shore hardness: 88A): 8mm bei 70 mm/s)
  • auch der Brückendruck mit TPU funktioniert problemlos (siehe Bild unten)
  • es kann jeder Extruder und Steppermotor verwendet werden, da die Bauform und das Gewicht egal sind

Folgendes wird zusätzlich für die Installation benötigt:

1 x 360 - 365 mm Präzisionswelle 8mm (Standardwelle der i3 Mega X-Achse)
1 x LM8UU Kugelumlauflager
1 x LM8UU igus drylin RJ4JP-01-08 Lager
2 x 8mm M3 Schrabe
2 x Standard Bowdenanschluss mit M10 Gewinde
Kabel mit 1mm Querschnitt

Installation:

Option 1 mit verbesserten 4-Punkt Z-Aufnahmen:

4-Punkt Z-Aufnahmen drucken und installieren. -> https://www.thingiverse.com/thing:4241801

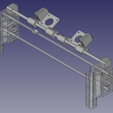
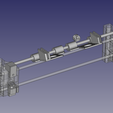
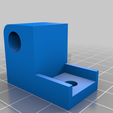
  1. Erxtruderhalter mit linker oder rechten Kabelführung mit den o.g. Lagern ausstatten und auf die Linearwelle stecken.
  2. Wellenhalter auf die Enden der Linearwelle scheiben.
  3. Die Linearwellenhalter an den Z-Aufnahmen mit M4 Schrauben anbringen.
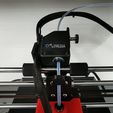
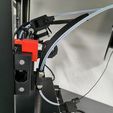
  4. Bowden und Kabelführung anbringen (siehe Bilder). Für die Anbringung am Hotend werden die beiden M3 Shrauben benötigt.
  5. Nun können alle weiteren Teile, wie auf den Bildern zu sehen, installiert werden. Die Original Kabelummantellung ist zu steif für diese Konstruktion und sollte durch einen Geflechtschlauch ersetzt werden. Der Kabel für den Extruder müssen verlängert werden.

Option 2 mit Original Z-Aufnahmen:

Abstandshalter am Holder 1 und 2 entfernen. Anschließend die beiden Holder mit Linearwelle verbinden und zum anzeichnen der Bohrlöcher an den Z-Aufnahmen verwenden. Anschließend Löcher bohren und M4 Gewinde schneiden. Jetzt kann die Installation siehe Option 1 durchgeführt werden.

Advertising


Issue with this design? Report a problem.

Would you like to support Cults?

You like Cults and you want to help us continue the adventure independently? Please note that we are a small team of 3 people, therefore it is very simple to support us to maintain the activity and create future developments. Here are 4 solutions accessible to all:

  • ADVERTISING: Disable your banner blocker (AdBlock, …) and click on our banner ads.

  • AFFILIATION: Make your purchases online by clicking on our affiliate links here Amazon.

  • DONATE: If you want, you can make a donation via Ko-Fi 💜.

  • WORD OF MOUTH: Invite your friends to come, discover the platform and the magnificent 3D files shared by the community!


Sharing and downloading on Cults3D guarantees that designs remain in makers community hands! And not in the hands of the 3D printing or software giants who own the competing platforms and exploit the designs for their own commercial interests.

Cults3D is an independent, self-financed site that is not accountable to any investor or brand. Almost all of the site's revenues are paid back to the platform's makers. The content published on the site serves only the interests of its authors and not those of 3D printer brands who also wish to control the 3D modeling market.

100% secure payment by credit card, PayPal, Apple Pay, Google Pay, etc.
View all payment options.