Skip to content

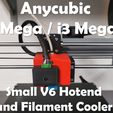
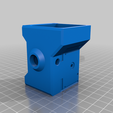
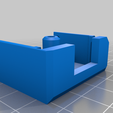
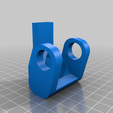
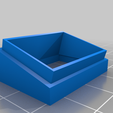
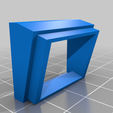
Anycubic i3 Mega /i3 Mega S - Small V6 Hotend and Filament Cooler

Advertising
Advertising
?
Creation quality: 0.0/5 (0 votes)
Evaluation of members on the printability, utility, level of detail, etc.

  • 435 views
  • 4 downloads
  • 1 collection

License
3D design format
STL Folder details Close
  • V6_Cooler.stl
  • V6_Cooler_with_Wing.stl
  • V6_E-Box.stl
  • V6_Filament_Cooler.stl
  • V6_Filament_Cooler.stl
  • V6_Filament_Cooler_1_Angle_15_Degrees.stl
  • V6_Filament_Cooler_Angle_15_Degrees.stl

Learn more about the formats

Publication date 2023-11-09 at 12:47
?
Published to Thingiverse on: 2020-03-08 at 21:30
Design number 1567360

3D printer file info

3D model description

Anycubic i3 Mega /i3 Mega S - Small V6 Hotend and Filament Cooler


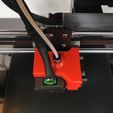
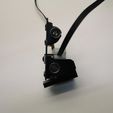
Da die Hotendkühlung des i3 Mega bzw. i3-Mega S ab Werk ziemlich laut, uneffektiv und groß ist, hier eine kleine Lösung. Folgende Vorteile ergeben sich durch diese Kühlvariante:

  • es wird nur ein Lüfter mit geringer Drehzahl (Luftdurchsatz) benötigt, was die Lautstärke in meinen Fall, um das 4-fache verringert hat (40dB -> 20dB/Originallüfter -> Sunon MF40101V2-1000U-A99)
  • Temperatur wird direkt an der Heatbreak (Throat) von >60°C auf <40°C abgesenkt und das trotz geringerer Lautstärke und Luftdurchsatz
  • gleichmäßigere Drucktemperatur, da der Heizblock nicht mehr mitgekühlt wird
  • schnelleres Aufheizen
  • leichter als das Original Hotend
  • mehr Platz zwischen Hotend und Druckerrahmen (oben)
  • gleichmäßige Hotendtemperatur (+/- 0,1 °C)

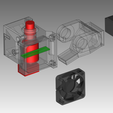
Der Hotendkühler ist mit und ohne Wing verfügbar (grünes Bauteil in der Zeichnung 1 unten). Mit dem Wing verringert sich die Lautstärke, da die Luft weniger verwirbelt.

Folgendes wird für die Installation benötigt:

  • ausgedruckter Heatsinkkühler (Infill 20%; 0.3mm; keine Supports notwendig)
  • ausgedruckter Filamentkühler mit oder ohne zusätzlichen Winkel für unterschiedliche Lüfter (Infill 10%; 0.3mm; keine Supports notwendig)
  • 6 x M3 Schraubenmutter
  • 2 x M3 Schrauben lang vom alten Hotend

Installation:

  1. Der ausgedruckten Kühler muss mit 6 Schraubenmuttern (M3) ausgestattet werden.
  2. Anschließend die Heatsink einführen und mit einer Schraube fixieren.
  3. Originalaufnahme für das Hotend muss geändert werden (siehe Bild "Backplate" unten).
  4. Hotend mit der geänderten Druckeraufnahme verschrauben.
  5. Filamentkühler anbringen.
  6. Alles verkabeln und Elektronikabdeckung anschrauben.
  7. Fertig!
Advertising


Issue with this design? Report a problem.

Would you like to support Cults?

You like Cults and you want to help us continue the adventure independently? Please note that we are a small team of 3 people, therefore it is very simple to support us to maintain the activity and create future developments. Here are 4 solutions accessible to all:

  • ADVERTISING: Disable your banner blocker (AdBlock, …) and click on our banner ads.

  • AFFILIATION: Make your purchases online by clicking on our affiliate links here Amazon.

  • DONATE: If you want, you can make a donation via Ko-Fi 💜.

  • WORD OF MOUTH: Invite your friends to come, discover the platform and the magnificent 3D files shared by the community!


Sharing and downloading on Cults3D guarantees that designs remain in makers community hands! And not in the hands of the 3D printing or software giants who own the competing platforms and exploit the designs for their own commercial interests.

Cults3D is an independent, self-financed site that is not accountable to any investor or brand. Almost all of the site's revenues are paid back to the platform's makers. The content published on the site serves only the interests of its authors and not those of 3D printer brands who also wish to control the 3D modeling market.

100% secure payment by credit card, PayPal, Apple Pay, Google Pay, etc.
View all payment options.