Skip to content

Jujutsu Kaisen | Cursed Tool | Katana of Yuta Okkotsu

Advertising
Advertising
?
Creation quality: 5.0/5 (1 vote)
Evaluation of members on the printability, utility, level of detail, etc.

  • 1.3k views
  • 1 like
  • 6 downloads

License
3D design format
STL Folder details Close
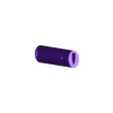
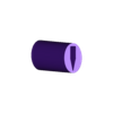
  • Fuchi.stl
  • Habaki.stl
  • Kashira.stl
  • Katana 1.stl
  • Katana 2.stl
  • Katana 3.stl
  • Katana 4.stl
  • Katana 5.stl
  • Katana 6.stl
  • Katana 7.stl
  • Katana.stl
  • Koiguchi.stl
  • Kojiri.stl
  • Kurigata.stl
  • Saya 1.stl
  • Saya 2.stl
  • Saya 3.stl
  • Saya 4.stl
  • Saya 5.stl
  • Saya 6.stl
  • Saya.stl
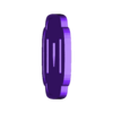
  • Tsuba.stl
  • Tsuka.stl

Learn more about the formats

Last update 2024-01-06 at 00:01
Publication date 2023-11-09 at 02:40
Design number 1566711

3D printer file info

3D model description

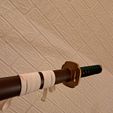
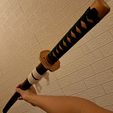
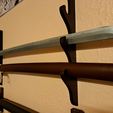
A Katana that Yuta Okkotsu currently possesses.

  • Specifications

Length :
Katana = 100cm / 39 inch

Width :
Katana blade = 0.6 cm

  • Parts

Assemble from top to bottom, or how you like

Katana

  1. Kashira
  2. Tsuka
  3. Fuchi
  4. Tsuka Wrap / Sageo ( Have to get this yourself)
  5. Tsuba
  6. Habaki
  7. Katana

Saya

  1. Koiguchi
  2. Saya
  3. Kurigata ( Attaches along the lower side of the Saya)
  4. Sageo ( Also have to get this yourself)
  5. Kojiri
  • Important Notice

As seen in the Assembly you are going to have to purchase a Katana Sageo from the internet either from eBay or from Amazon or anywhere else. Not relatively hard to tie as there are plenty of videos out there showing how to do so. From my experience about 400m is enough for the wrapping and about 200m should also be enough to for the Saya.

The hole throughout the katana has a width of 0.52mm so a 0.5mm steel rod is ideal for stability to place inside.

  • Helpful Information

Get yourself a Soldering Iron. It is extremely useful as you wont see joined lines if you are printing the parts separately and joining them together as you cover them up with the melted plastic.

You almost wont even have to use any type of filler if you correctly weld enough plastic ontop to cover it up!

3D printing settings

The model is ready to be printed, there's no need to scale it anymore unless you would like it enlarged.

However, Let me know if one of the parts is too tight and I will adjust it as soon as I can.

Printed with FlashForge Creator Pro -
Printed with PLA

Supports optional
Raft / Brim optional

Infill varies depending on your preference but I recommend:
Blade 20 - 25%
Tsuba 20%
Saya 20%
Any of the small parts 20 - 50%

Advertising


Issue with this design? Report a problem.

Would you like to support Cults?

You like Cults and you want to help us continue the adventure independently? Please note that we are a small team of 3 people, therefore it is very simple to support us to maintain the activity and create future developments. Here are 4 solutions accessible to all:

  • ADVERTISING: Disable your banner blocker (AdBlock, …) and click on our banner ads.

  • AFFILIATION: Make your purchases online by clicking on our affiliate links here Amazon.

  • DONATE: If you want, you can make a donation via Ko-Fi πŸ’œ.

  • WORD OF MOUTH: Invite your friends to come, discover the platform and the magnificent 3D files shared by the community!


Sharing and downloading on Cults3D guarantees that designs remain in makers community hands! And not in the hands of the 3D printing or software giants who own the competing platforms and exploit the designs for their own commercial interests.

Cults3D is an independent, self-financed site that is not accountable to any investor or brand. Almost all of the site's revenues are paid back to the platform's makers. The content published on the site serves only the interests of its authors and not those of 3D printer brands who also wish to control the 3D modeling market.

100% secure payment by credit card, PayPal, Apple Pay, Google Pay, etc.
View all payment options.