Skip to content

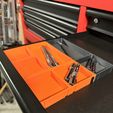
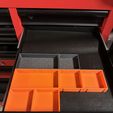
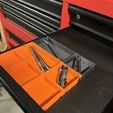
Modular Tray System - Connects together - Different Sizes

Advertising
Advertising
?
Creation quality: 0.0/5 (0 votes)
Evaluation of members on the printability, utility, level of detail, etc.

  • 366 views
  • 1 download

License
3D design format
STL Folder details Close
  • 3x3.stl
  • 3x9.stl
  • 6x6.stl
  • Peg.stl

Learn more about the formats

Publication date 2023-11-10 at 16:20
Design number 1569876

4dmakerlab

3D printer file info

3D model description

Included Trays:

3x3"
6x6"
9x6"

Ensure you produce an adequate number of connection pins for fastening the trays together. I suggest a maximum of two pins per side; exceeding this quantity might complicate disassembly or reconfiguration.

Feel free to expand the system for larger dimensions if you desire.

Materials Needed:

Modular trays
Connection pins 2 per side
Optional: A rubber mallet (for a more secure fit)

Instructions:

Gather your materials: Ensure you have all the modular trays and connection pins you need for your intended configuration.

Orientation: Examine the trays to determine their orientation. They usually have notches or slots that need to align correctly for a secure fit.

Place the trays: Set the trays on a flat surface, such as a table or the floor, with their notches and slots facing each other.

Insert the connection pins: Take your connection pins and start inserting them into the slots provided on one tray, ensuring that they align with the corresponding holes or slots on the adjacent tray.

Press and secure: Gently push the trays together to engage the connection pins. If you encounter resistance, you can use a rubber mallet to tap the trays together until they're firmly connected. Be careful not to apply excessive force to avoid damaging the trays.

Check alignment: Ensure that the trays are properly aligned and level. If you're connecting more trays, repeat the process with the additional trays and connection pins.

Test stability: Once all the trays are connected, test the stability of your assembled modular tray system by lightly tapping or shaking it. If any trays feel loose or unstable, you may need to readjust the connection pins or add more pins for reinforcement.

Reconfiguration: If you wish to rearrange or disassemble the system, carefully remove the connection pins by gently pulling or tapping the trays. Ensure not to use excessive force to avoid damaging the trays or pins.

Scaling up: To create a larger system, repeat the steps with additional trays and pins. Ensure that the pins are evenly distributed for stability.

By following these instructions, you can assemble, disassemble, and reconfigure your modular tray system with ease and reliability.

3D printing settings

0.28mm layer, 2 walls, 15% infill

Advertising


Issue with this design? Report a problem.

Would you like to support Cults?

You like Cults and you want to help us continue the adventure independently? Please note that we are a small team of 3 people, therefore it is very simple to support us to maintain the activity and create future developments. Here are 4 solutions accessible to all:

  • ADVERTISING: Disable your banner blocker (AdBlock, …) and click on our banner ads.

  • AFFILIATION: Make your purchases online by clicking on our affiliate links here Amazon.

  • DONATE: If you want, you can make a donation via Ko-Fi πŸ’œ.

  • WORD OF MOUTH: Invite your friends to come, discover the platform and the magnificent 3D files shared by the community!


Sharing and downloading on Cults3D guarantees that designs remain in makers community hands! And not in the hands of the 3D printing or software giants who own the competing platforms and exploit the designs for their own commercial interests.

Cults3D is an independent, self-financed site that is not accountable to any investor or brand. Almost all of the site's revenues are paid back to the platform's makers. The content published on the site serves only the interests of its authors and not those of 3D printer brands who also wish to control the 3D modeling market.

100% secure payment by credit card, PayPal, Apple Pay, Google Pay, etc.
View all payment options.