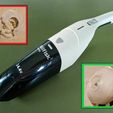
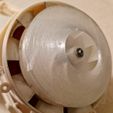
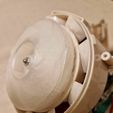
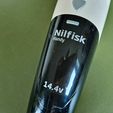
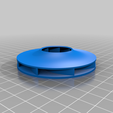
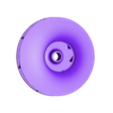
Suction turbine for Nilfisk Handy vacuum cleaner
To disassemble the vacuum cleaner, after removing the different screws you will need to force a little using a flat screwdriver wide enough to remove the black rubberized part which is clipped into the handle, and then allows you to separate the two shells .
Take care when disassembling as the screws are not all exactly the same length.
This turbine is subject to constraints linked to the centrifugal force generated by the high rotational speed of the engine, an ABS print provides the necessary resistance.
Another point is sensitive due to the need to force the turbine onto the axis of rotation of the motor which is in the form of a toothed wheel.
This connection must be robust, you will first have to ensure that the printing widths of your print head are respected.
An adjustment to respect the dimensions to less than 5/100 of a millimeter will save you complications in securing the turbine and the axis.
To do this, use the following template to ensure the correct setting of your printer: https://www.thingiverse.com/thing:5413456
Then I suggest you test the perfect fit by trying to insert the part upside down on the axis.
Be careful to do this only 1 or 2 mm just to check the fit that needs to be constrained.
It may be necessary to force a little and feel resistance, and be careful not to damage the teeth of the part.
Otherwise reprint by modifying the size factors (x,y) on your slicer.
Remove the piece, and attempt to do so in its final position.
If the introduction is not possible from this side it is because you have a elephant's foot effect on the first layer on the board.
Try sanding a little until the teeth appear.
Then moderately heat the toothed metal axle, quickly position the part by properly aligning the teeth as validated in the previous step, and press with force without stopping until complete alignment.
All you have to do is reassemble the vacuum cleaner.
-o-o-o-o-o-o-
Turbine d'aspiration pour Aspirateur Nilfisk Handy
Pour démonter l'aspirateur, après avoir enlevé les différentes vis vous devrez forcer un peu à l'aide d'un tournevis plat et assez large pour retirer la partie caoutchoutée noire qui est clipsée dans le manche, et permet ensuite de séparer les deux coques.
Prenez attention lors du démontage car les vis ne font pas toutes exactement la même longueur.
Cette turbine est soumise à des contraintes liées à la force centrifuge générée par la forte vitesse de rotation du moteur, une impression en ABS apporte la résistance nécessaire.
Un autre point est sensible du fait de la nécessité d'introduire en force la turbine sur l'axe de rotation du moteur qui se présente sous forme d'une roue dentée.
Cette liaison devant être robuste, vous devrez tout d'abord vous assurer du bon respect des largeurs d'impression de votre tête d'impression.
Un ajustement pour un respect des cotes à moins de 5/100 de milimètre vous évitera des complications pour rendre solidaire la turbine et l'axe.
Pour cela utilisez le gabarit suivant pour vous assurer du bon réglage de votre imprimante : https://www.thingiverse.com/thing:5413456
Ensuite je vous suggère de tester le parfait ajustement en tentant à titre d'essai d'introduire la pièce à l'envers sur l'axe.
Attention à ne le faire que sur 1 ou 2 mm seulement juste pour vérifier l'ajustement qui doit être contraint.
Il doit être nécessaire de forcer un peu et de sentir une résistance, et prenez garde à ne pas abimer la denture de la pièce.
Sinon réimprimez en modifiant les facteurs de taille (x,y) sur votre slicer.
Retirer la pièce, et tenter de le faire dans sa position finale.
Si l'introduction n'est pas possible par ce coté c'est que vous avez un effet de patte d'éléphant sur la première couche sur le plateau.
Essayer de poncer un peu jusqu'à ce que les dentures apparaissent.
Ensuite chauffez modérément l'axe denté en métal, positionnez rapidement la pièce en alignant bien les dentures comme validé à l'étape précédente, et appuyer en forçant sans vous arrêter jusqu'à l'alignement complet.
Il vous reste à remonter l'aspirateur.

/https://fbi.cults3d.com/uploaders/15761688/illustration-file/053e31ee-694f-4507-8a71-e7a50a12b46a/869a09d2-7922-4095-8924-717c2ebf86b0.jpg)
