Skip to content

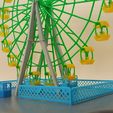
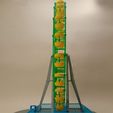
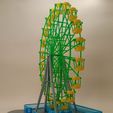
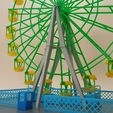
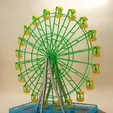
Ferris wheel Pripyat, Soviet standard Ferris wheel, scale model 1:100, movable

Advertising
Advertising
?
Creation quality: 5.0/5 (1 vote)
Evaluation of members on the printability, utility, level of detail, etc.

  • 2.1k views
  • 15 likes
  • 3 downloads
  • 1 collection

License
3D design format
ZIP Folder details Close
  • Pripyat observation wheel (ver 1).zip
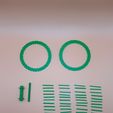
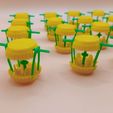
    • Cabin_bottom (20 pcs).stl
    • Cabin_spacer (20 pcs).stl
    • Cabin_suspension (40 pcs).stl
    • Cabin_top (20 pcs).stl
    • Control room.stl
    • Crossbeam (40 pcs).stl
    • Decorative band (2 pcs).stl
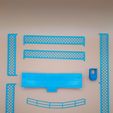
    • Fence_long segment (1 pcs).stl
    • Fence_medium segment (2 pcs).stl
    • Fence_short segment (2 pcs).stl
    • Ground_curved.stl
    • Ground_rectangle.stl
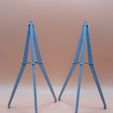
    • Legs (2 pcs).stl
    • Main axis.stl
    • Main bushing.stl
    • Parapet (2 pcs).stl
    • Ramp and steps.stl
    • Wheel 2 mm (2 pcs).stl

Learn more about the formats

Publication date 2023-11-17 at 13:46
Design number 1584049

3D printer file info

3D model description

"Circular review-M" is a model of a Ferris wheel, which was produced in the late USSR at the enterprise "Yeisk Amusement Plant".

This model was intended for installation in small towns.

The most famous specimen is located in the city of Pripyat.
There are still operating attractions on the territory of the post-Soviet space, but over time they are becoming fewer...

The copies could differ slightly among themselves - for example, the wheel in Pripyat had a small decorative rim.

Height - 27.5 meters
Wheel diameter - 24.6 meters
Number of cabins - 20 pieces
Capacity - 80 people
The time of one turn is 6 minutes

The model is made in 1:100 scale and adapted for reproduction on a 3D printer

P.S. I thank everyone who buys my work and likes it - it helps me to develop.

3D printing settings

The model is not critically difficult to assemble, but you will need patience and accuracy.

The size is designed for 3D printers with a table size of 30 * 30 centimeters.
The biggest details:
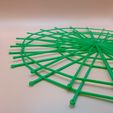
wheel disc - 24.5 cm
stand - tortuous - 29 cm and rectangular - 27 cm
(I suppose it is possible to scale to a smaller size without loss of quality, but I haven't checked yet, unfortunately.)

All details are printed with a layer of 0.2 and a line width of 0.3 (for the base and ramp, as much as possible).

You will also need a piece of filament of the same color as the wheel. Before using, the filament should be straightened (warm it on the switched-on table and achieve sufficient straightness with your hands)
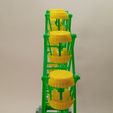
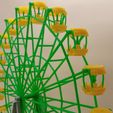
The pieces of filament are inserted vertically into the center of the booth and also across in the roof of the booth - 2 pieces per 1 booth.

Cabin assembly:
Apply small droplets of glue to the ends of the suspensions and insert them into the recesses on the bottom of the cabin. Orient the suspension not strictly vertically, but with a slight deviation to the sides.
measure out a piece of filament, put on a washer (in reality, this is a handle that allows you to rotate the booth) and insert the segment into the lower groove in the center.
next, attach the lid and thread the second piece of filament through all the holes. the central rack should fall into the central groove of the cabin roof. That's it. this should securely link the two halves of the booth.

Wheel assembly:
Glue both halves to the bushing and align the position between them so that the beams of both halves are aligned. And make sure that both halves are parallel.
Next, glue the cross beams. There are 2 beams for each beam.
For ease of positioning, there are thin marks on each beam.
Next, insert the booths. Check that the booth rotates easily. If it gets stuck, then you should slightly expand the hole with a drill or engraver.
When all the booths are checked and delivered, you need to expand the ends with a soldering iron. Quite a bit. It is important that the rotation of the booth remains free.

Final assembly:
Glue the ramp into the groove at the base. Glue the long railing on the opposite side of the steps. From the second copy of the railing, cut off the middle part. You will get 2 short copies of the railing. Glue them on the side of the steps, leaving a passage in front of the steps.
Glue one rack (legs).
Attach the wheel and insert the axle.
Put the second rack.
Check that the gaps on both sides are symmetrical and that the wheel does not touch anything during rotation.
In this position, fix it with glue (I used a thermal gun) the second rack.
Glue the control panel and fences.
(To print fences, set the filling to 10-20% in the settings and disable the printing of the bottom and roof)

That's it! You guys are great! Enjoy)

Advertising


Issue with this design? Report a problem.

Would you like to support Cults?

You like Cults and you want to help us continue the adventure independently? Please note that we are a small team of 3 people, therefore it is very simple to support us to maintain the activity and create future developments. Here are 4 solutions accessible to all:

  • ADVERTISING: Disable your banner blocker (AdBlock, …) and click on our banner ads.

  • AFFILIATION: Make your purchases online by clicking on our affiliate links here Amazon.

  • DONATE: If you want, you can make a donation via Ko-Fi πŸ’œ.

  • WORD OF MOUTH: Invite your friends to come, discover the platform and the magnificent 3D files shared by the community!


Sharing and downloading on Cults3D guarantees that designs remain in makers community hands! And not in the hands of the 3D printing or software giants who own the competing platforms and exploit the designs for their own commercial interests.

Cults3D is an independent, self-financed site that is not accountable to any investor or brand. Almost all of the site's revenues are paid back to the platform's makers. The content published on the site serves only the interests of its authors and not those of 3D printer brands who also wish to control the 3D modeling market.
100% secure payment by credit card, PayPal, Apple Pay, Google Pay, etc.
View all payment options.