Skip to content

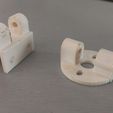
Tricopter yaw motor mount for 10mm or 15mm boom

Advertising
Advertising
?
Creation quality: 0.0/5 (0 votes)
Evaluation of members on the printability, utility, level of detail, etc.

  • 299 views
  • 3 downloads

License
3D design format
Folder details Close
  • bottom-10-3.stl
  • bottom-15-3.stl
  • top-10-3.stl

Learn more about the formats

Publication date 2023-11-22 at 11:40
?
Published to Thingiverse on: 2014-01-16 at 20:24
Design number 1594195

Olex

3D printer file info

3D model description

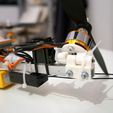
A rear motor mount for a tricopter. Concept based on the RCExplorer tricopter motor mount using Hobbyking steerable landing gear mounts, but with better attachment and motor mount options.

Can be bolted onto 10mm or 15mm wide booms (tested with aluminum, should be fine on wood or carbon as well), and has standard 16-19mm motor mount holes for any motor size. For use with a 3mm axle, carbon rod works perfectly.

3D printing settings

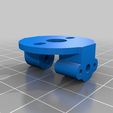
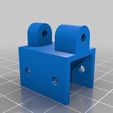
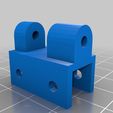
The bottom half comes in two versions, choose 10mm or 15mm according to your tricopter boom size. Top part is the same, never mind the file name :)

  1. Print both parts. You'll want to rotate the bottom half on its end and use support structures, probably.

  2. Use a file to smooth out the contact surfaces of the mount halves. You want them to slide into each other and then rotate freely, but have no horizontal play.

  3. Redrill the holes by hand. Don't use an electric drill, it'll melt horribly and collapse, even if you try and go really slow (trust me). You want your axle to rotate freely in the lower half without moving side-to-side, and to be pressed firmly into the upper half; I used a 3.1mm drill bit for the lower half and a 2.9mm for the upper.

  4. Hold the halves together and install the axle. I used a drop of glue to secure the axle at the end of the upper half where the servo attaches - you don't have to though, if the axle sits in the upper half firmly enough to not vibrate out in flight.

  5. Screw on a servo horn using the tiny screws that are usually provided with the servo and the small holes on the upper half. Take care to place the horn exactly inline with the axle, else you'll put unnecessary strain on your servo.

  6. Attach the servo and bolt the construction on your tricopter. Secure the servo with whatever means appropriate (zip ties work well, see my picture). Bolt the motor on.

  7. Setup the rear servo endpoints in your FC, so that the mount just doesn't arrive in its endpoints, again to avoid unnecessary servo strain. Congratulations - you're done, have fun flying your tri!

Advertising


Issue with this design? Report a problem.

Would you like to support Cults?

You like Cults and you want to help us continue the adventure independently? Please note that we are a small team of 3 people, therefore it is very simple to support us to maintain the activity and create future developments. Here are 4 solutions accessible to all:

  • ADVERTISING: Disable your banner blocker (AdBlock, …) and click on our banner ads.

  • AFFILIATION: Make your purchases online by clicking on our affiliate links here Amazon.

  • DONATE: If you want, you can make a donation via Ko-Fi πŸ’œ.

  • WORD OF MOUTH: Invite your friends to come, discover the platform and the magnificent 3D files shared by the community!


Sharing and downloading on Cults3D guarantees that designs remain in makers community hands! And not in the hands of the 3D printing or software giants who own the competing platforms and exploit the designs for their own commercial interests.

Cults3D is an independent, self-financed site that is not accountable to any investor or brand. Almost all of the site's revenues are paid back to the platform's makers. The content published on the site serves only the interests of its authors and not those of 3D printer brands who also wish to control the 3D modeling market.

100% secure payment by credit card, PayPal, Apple Pay, Google Pay, etc.
View all payment options.