Skip to content

Crayon Maker/Recycler Kit with Sharpener (Parametric)

Advertising
Advertising
?
Creation quality: 0.0/5 (0 votes)
Evaluation of members on the printability, utility, level of detail, etc.

  • 447 views
  • 3 downloads

License
3D design format
Folder details Close
  • CrayonCutter-042.stl
  • CrayonGuide-042.stl
  • CrayonKit-042.scad
  • CrayonMold-042.stl
  • CrayonSharpener-042.stl

Learn more about the formats

Publication date 2023-11-24 at 00:23
?
Published to Thingiverse on: 2012-11-11 at 19:48
Design number 1598670

3D printer file info

3D model description

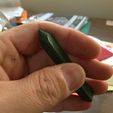
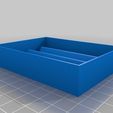
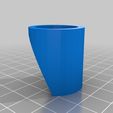
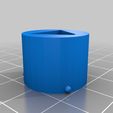
This is a fully parametric kit that will allow you to make triangular crayons (or recycle bits and pieces of old crayons into triangular crayons) and a sharpener. This shape is easier to cast, easy for little fingers to grasp, and easier to stack. It also won't roll off the drawing surface, and promotes a proper pencil grip.

Many aspects of the kit are parametric, such as number of crayons, thickness, length, sharpening angle, etc. You may need to tweak the settings a bit for the best results on your printer.

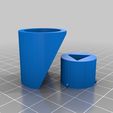
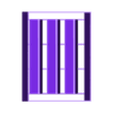
There's an STL for each part using the default settings. You can make just the crayon mold, or both the mold and a sharpener that fits the crayons you specified. Follow the instructions and take a look at the pictures for details.

This is a great project to do with kids -- I've tested it! :)

There are 21 parameters, and the code is fully commented, so tweaking it should be straightforward.

3D printing settings

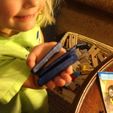
Check out the photos (in order) to see the crayon-making process.

CRAYONS:
1) Choose some values in the "User-defined values" section, render, and print. Make note of the volume of plaster that will be required for the mold. (It will be echoed out below the rendering in OpenSCAD -- about a half cup for the STL.)

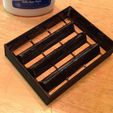
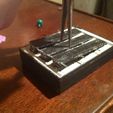
2) Place the mold onto a flat, nonporous surface (like glass) and coat the exposed surfaces with a thin layer of Vaseline, dish soap, or liquid bees wax to act as a release agent. (Photo 01)

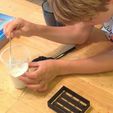
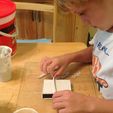
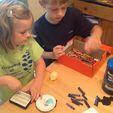
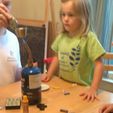
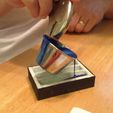
3) Mix some Plaster of Paris (Photo 02), and pour over the printed positive mold to the top. Carefully vibrate the surface to help settle the plaster and release any bubbles. You can often do this by simply "drumming" around it with your hands. Level the top (Photo 03), and allow the plaster to dry completely.

4) Once dry, cut the sprues at the bottom against at the wall. This will leave the wall on outside of the negative mold, which can protect it a bit. Then remove the printed positive mold from the plaster (Photo 04), and coat the inside with dish soap to act as a release agent. (Photo 05)

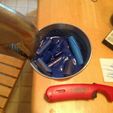
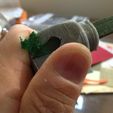
5) Use a metal cup and a pair of vice grips to carefully and slowly melt broken pieces of crayon with a torch or stove burner (Photos 06 and 07), and pour the melted wax into the crayon molds (Photo 08). You can also put various sizes and shapes of crayon pieces into the mold and pour over them to join them together with some melted crayons.

SHARPENER:
6) Print the Sharpener Guide (sharpenerGuide()) and Cutter (cutter()) parts, which are sized to fit the crayons you made. Be sure you use at least a couple of perimeters on the cutter, because you're going to sand it down in the next step to sharpen it.

7) Using a file or sandpaper, clean up the sharpening edge and file or sand down the angled flat surface until the cutting surface is sharp.

8) Snap the guide into position, insert crayon, and carefully turn to sharpen. If it's too tight with the dedents, just flip it around and try it the other way. You can add a little bit of crayon wax as a lubricant if necessary to make it easier to turn.

TOOL CHAIN AND PRINT SETTINGS:
For this I used slic3r 0.9.1, Marlin, and j-head 0.5mm with cheap 3mm "repraper" PLA filament (from China). I print onto glass covered with window tint with a thin coat of ABS juice. The printbed is heated to 90 for the first layer (measures about 80 with the IR thermometer), and 75 for additional layers. I used two perimeters, 15% honeycomb infill, and 0.33mm layer height. Hot end temperature depends on color, but is usually around 185.

Advertising


Issue with this design? Report a problem.

Would you like to support Cults?

You like Cults and you want to help us continue the adventure independently? Please note that we are a small team of 3 people, therefore it is very simple to support us to maintain the activity and create future developments. Here are 4 solutions accessible to all:

  • ADVERTISING: Disable your banner blocker (AdBlock, …) and click on our banner ads.

  • AFFILIATION: Make your purchases online by clicking on our affiliate links here Amazon.

  • DONATE: If you want, you can make a donation via Ko-Fi πŸ’œ.

  • WORD OF MOUTH: Invite your friends to come, discover the platform and the magnificent 3D files shared by the community!


Sharing and downloading on Cults3D guarantees that designs remain in makers community hands! And not in the hands of the 3D printing or software giants who own the competing platforms and exploit the designs for their own commercial interests.

Cults3D is an independent, self-financed site that is not accountable to any investor or brand. Almost all of the site's revenues are paid back to the platform's makers. The content published on the site serves only the interests of its authors and not those of 3D printer brands who also wish to control the 3D modeling market.

100% secure payment by credit card, PayPal, Apple Pay, Google Pay, etc.
View all payment options.