Skip to content

Installing a closed loop stepper motor

Advertising
Advertising
?
Creation quality: 0.0/5 (0 votes)
Evaluation of members on the printability, utility, level of detail, etc.

  • 137 views
  • 1 download
  • 1 collection

License
3D design format
Folder details Close
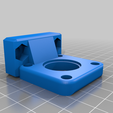
  • Y2_Motorhalter.stl

Learn more about the formats

3D model size X 46 Γ— Y 51.6 Γ— Z 25.1 mm
Publication date 2023-11-24 at 00:22
?
Published to Thingiverse on: 2022-10-02 at 11:19
Design number 1598612

3D printer file info

3D model description

During fast movements (120mm) I had observed a layer offset on the Y-axis.

I had already installed TMC 2209, which were supposed to prevent this.

So the next step was to install a second Y-motor, which unfortunately wasn't the best solution either.

Then larger motors were installed, with the result that the volume increased considerably despite the TMC drivers.

Now, in the final step, closed loop motors were installed at X and Y.

Result: Perfect!

The motors have immense power and corrode step errors independently.

Despite their power and speed, the motors run incredibly quietly and hardly heat up at all.

I have increased the print speed to 150% on a trial basis, no layer offset!

For assembly:

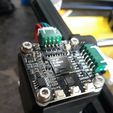
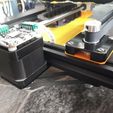
I purchased my motors online (MKS SERVO42C NEMA17), which were already pre-assembled and calibrated.

They were therefore ready for immediate use.

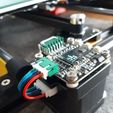
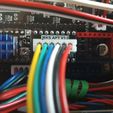
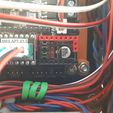
The installed TMC drivers had to be replaced with the supplied adapter board (note the installation direction!) and the jumpers had to be moved accordingly.

In the next step, my printer had to know that the driver had been replaced,

therefore it is necessary to change the Marlin software for the driver modules X+Y from TMC to A4988 and to compile it.

I immediately used this to switch to the latest Marlin version.

If the printer is already running with the A4988, nothing needs to be changed here ;-)

Then the motors run directly without any changes to the board.

However, the basic requirement is that the drivers are plugged in, i.e. interchangeable!

The closed loop motors are not cheap, but worth the money....


With fast movements (120mm) I had observed a layer offset on the Y-axis.

Now I already had TMC 2209 installed, which should actually prevent that.

So in the next step a second Y-motor was installed, unfortunately that wasn't the bringer either.

Then larger motors were installed, with the result that the volume increased significantly despite the TMC drivers.

Now in the last step closed loop motors installed at X and Y.

Result: perfect!

The motors have immense power and correct step errors independently.

In addition, despite the power and speed, the motors run incredibly quietly and are hardly heated.

I've tried increasing the print speed to 150%, no layer offset !, there's probably more to do.

For assembly:

I bought my motors online (MKS SERVO42C NEMA17), they were already pre-assembled and calibrated.

So they could be used immediately.

To do this, the built-in TMC drivers had to be replaced with the supplied adapter board (note the installation direction!) and the jumpers had to be moved accordingly.

In the next step, my printer had to know that the driver was replaced,

it is therefore necessary to convert and compile the Marlin software from TMC to A4988 for driver blocks X+Y.

I used it right away to switch to the current Marlin version.

If the printer is already running with the A4988, nothing needs to be changed here ;-)

Then the motors run directly without any changes to the board.

However, the basic requirement is that the drivers are plugged in, i.e. interchangeable!

The closed loop motors are not cheap but worth the money...

Advertising


Page translated by automatic translation. See the original version.
Issue with this design? Report a problem.

Would you like to support Cults?

You like Cults and you want to help us continue the adventure independently? Please note that we are a small team of 3 people, therefore it is very simple to support us to maintain the activity and create future developments. Here are 4 solutions accessible to all:

  • ADVERTISING: Disable your banner blocker (AdBlock, …) and click on our banner ads.

  • AFFILIATION: Make your purchases online by clicking on our affiliate links here Amazon.

  • DONATE: If you want, you can make a donation via Ko-Fi πŸ’œ.

  • WORD OF MOUTH: Invite your friends to come, discover the platform and the magnificent 3D files shared by the community!


Sharing and downloading on Cults3D guarantees that designs remain in makers community hands! And not in the hands of the 3D printing or software giants who own the competing platforms and exploit the designs for their own commercial interests.

Cults3D is an independent, self-financed site that is not accountable to any investor or brand. Almost all of the site's revenues are paid back to the platform's makers. The content published on the site serves only the interests of its authors and not those of 3D printer brands who also wish to control the 3D modeling market.

100% secure payment by credit card, PayPal, Apple Pay, Google Pay, etc.
View all payment options.