----- U P D A T E: -----
NEW Parkside Performance Battery holder
----- U P D A T E: -----
NEW 2 Button Base for whatever throttle level you want.
I Chose 50 and 100% throttle with a startup curve.
You'll also need a new code. See below.
----- U P D A T E: -----
NEW XT60 Extension for those who don't own a Einhell Battery.
I used these plugs: https://s.click.aliexpress.com/e/_DBb3SAL
----- U P D A T E: -----
Parkside Performance Battery holder coming soon!
——————————————————
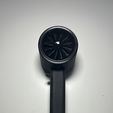
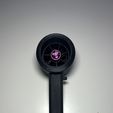
Jetfan V3
Custom built Jet Fan with a 6s EDF Impeller and 2.25KG of thrust.
65A @ 25,2V - 1638W Power.
What you will need:
40A - 50A ESC - depends on what Battery you are using:
https://s.click.aliexpress.com/e/_DlgcZM7 - Only ESCs up to "50A" will fit into the handle!
https://s.click.aliexpress.com/e/_Dkkgu9T
If you’re using a Einhell Battery Choose „40A“ or "45A"- Which will result in 840W of power. (45A is also okay)
If you are using a Lipo Battery, like for drones or other RC things you can choose the „80A“ version,
this will bring you a the maximum power of the fan with 1640W.
if you’re not sure which ESC to buy leave a comment.
——————————————————
6S 70mm EDF:
https://de.aliexpress.com/item/4000394040632.html?spm=a2g0o.order_list.order_list_main.29.79035c5fXDusDa&gatewayAdapt=glo2deu
Choose „70MM KV2300 6S“
——————————————————
Button Switch:
https://s.click.aliexpress.com/e/_DdY7zJZ
——————————————————
ESP8266 Wemos D1 mini:
https://s.click.aliexpress.com/e/_DDGU6qx
——————————————————
Some Cable Shoes to connect the battery, such as these:
https://s.click.aliexpress.com/e/_DBVBqCr
——————————————————
Servo tester:
https://s.click.aliexpress.com/e/_DlTOYrV
——————————————————
Also you will need some cables, a soldering iron, shrink tubing, and of course a Einhell Battery or a Lipo Battery.
——————————————————
How this works:
In this Case the Einhell Battery does not have either enough Voltage and Watt power to run this impeller on Full blast.
i still decided to use it and it has noticeable more power compared to JETFAN V2.
BUT - be Careful. Do NOT use any Tool Batteries to power this thing as I’m not sure what exacly will happen then. Except you have a Data Sheet for it.
With a high Ampere ESC you will pull too much power that your battery can not deliver - but it will try to.
Even though my Battery does not have enough power to run the EDF on full blast, you can limit the Wattage you are pulling from your Battery:
So if you’re not sure what you are doing, please leave a comment and we’ll figure it out.
——————————————————
What I did:
I decided use a 45A ESC for now so that I can even use it in the first place (I don’t have a 6s Lipo laying around unfortunately)
According to the Data Sheet of my Einhell X-Change Battery this Battery can deliver up to 900W.
So by using a 45A ESC (21V x 45A) The EDF will pull 945Watts, which is okay.
you can now decide if you want to use a Servo tester (potentiometer) or a button switch (there are 2 versions, see File name)
If you want to use the Version with the button, you have to program a Wemos D1 mini or any other ESP8266 Microcontroller. But don’t worry, it’s really easy.
The ESP8266 is connected to the ESC and is translating the Signal of the pressed button to a 100% PWM throttle Signal.
I also built in a curve to the throttle so the fan will start up softly everytime the button is pressed.
——————————————————
So here is how to connect everything if you’re using the „Button Version“
:
The Button:
- One Wire goes to GND on The ESP8266
- The other Wire goes to D2
Source Code for 2 Button Version:
——————————————————
To see if the code works properly and everything is wired correctly connect your battery and press the button.
If the Motor starts up with a curve the code is working fine.
——————————————————
Would love to see your makes.

/https://fbi.cults3d.com/uploaders/15169899/illustration-file/6a027c24-f4fb-4a55-aec3-ac088a5e0020/IMG_3365.jpg)


