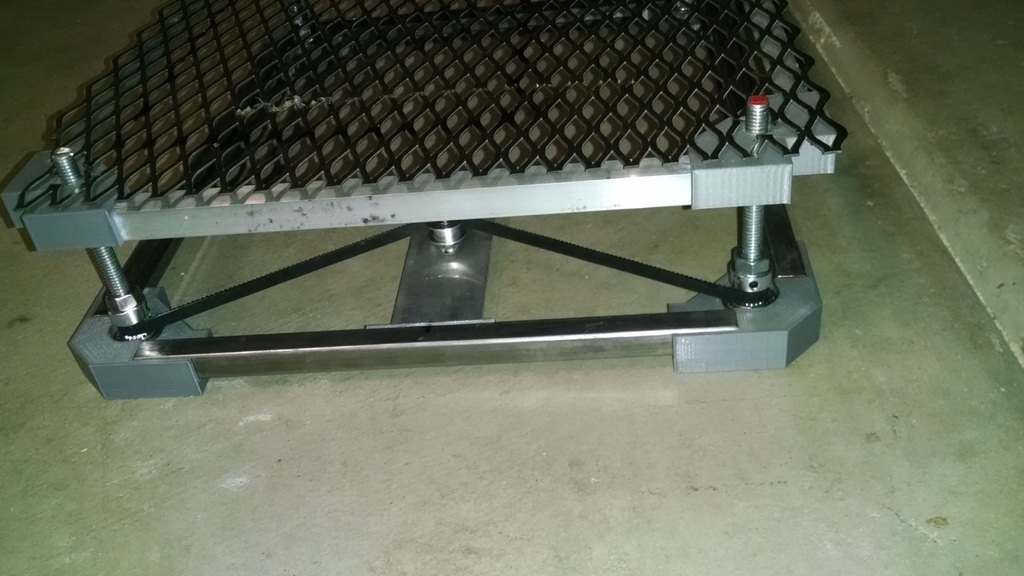
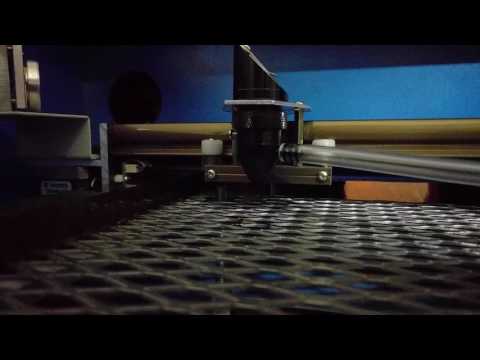
This is my first remix design. I reworked the original in Fusion 360 to give me a more rigid design. The top of the bed cannot bend inward due to the upper frame and nuts holding it to the threaded rod posts. Adjustments are easily done with a screwdriver. Hopefully the pictures/video make sense. Please refer to the original design by brianvanh for more details on exactly how it goes together, but it should be pretty clear from the photos I took as well. Here is a video of the bed in "action" https://youtu.be/lJH4dM1vxqo
In the video, I have not yet updated to the square tubing frame. You may be able to see the "flexing" I experienced with the aluminum angle. Please refer to the pictures for details.
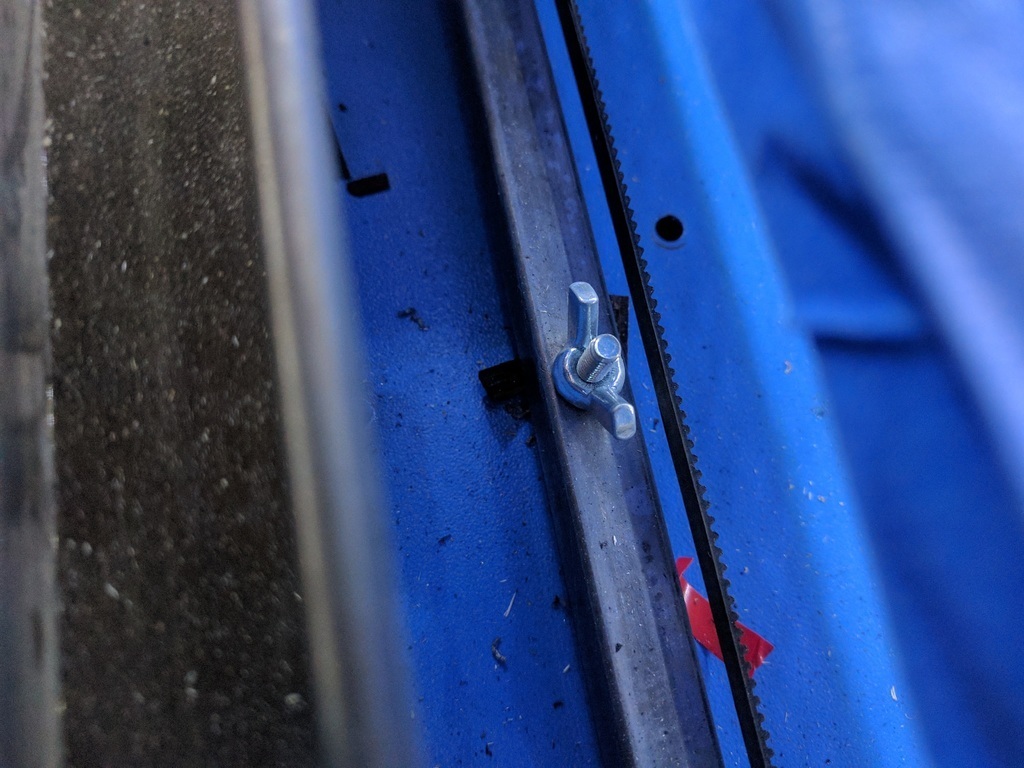
TENSIONER:
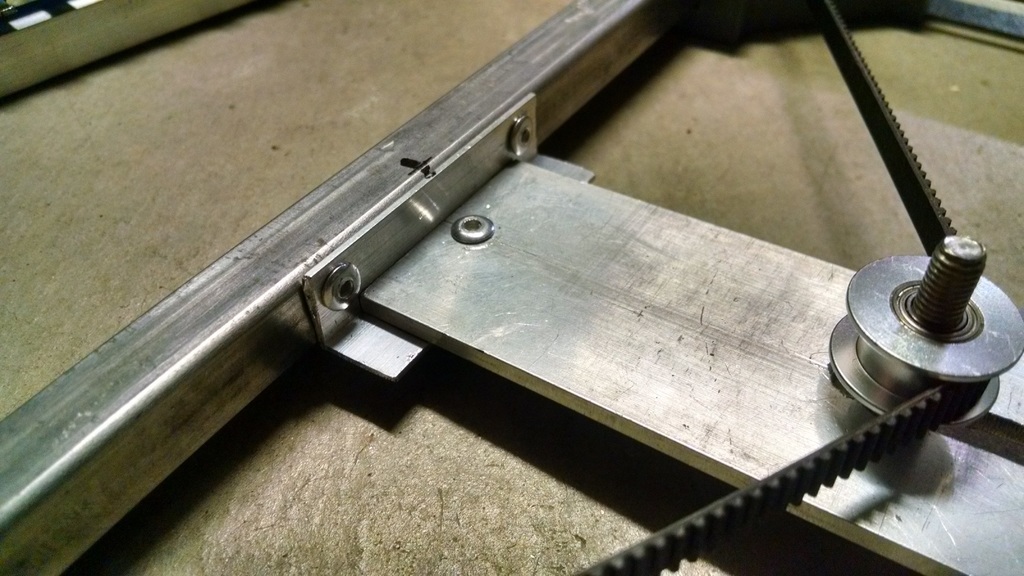
I added a belt tensioner as I had issues with belt tension. You can see in the pictures that the tensioner is a simple pulley bolted into a slot made in a small piece of aluminum flat. The tensioner is riveted to the lower frame. the tensioner pulley can move freely up/down the bolt it is on and will not come off. Here is the kit I bought that had all the little parts I needed for the tensioner (if the link doesn't work, search ebay for "8Pcs-GT2-20T-Bore-8mm-Timing-Pulley-5m-Belt-Tensioner-For-RepRap-3D-Printer"):
http://www.ebay.com/itm/8Pcs-GT2-20T-Bore-8mm-Timing-Pulley-5m-Belt-Tensioner-For-RepRap-3D-Printer-/292098299234?hash=item44026a5562:g:87gAAOSwtZJZAVJG
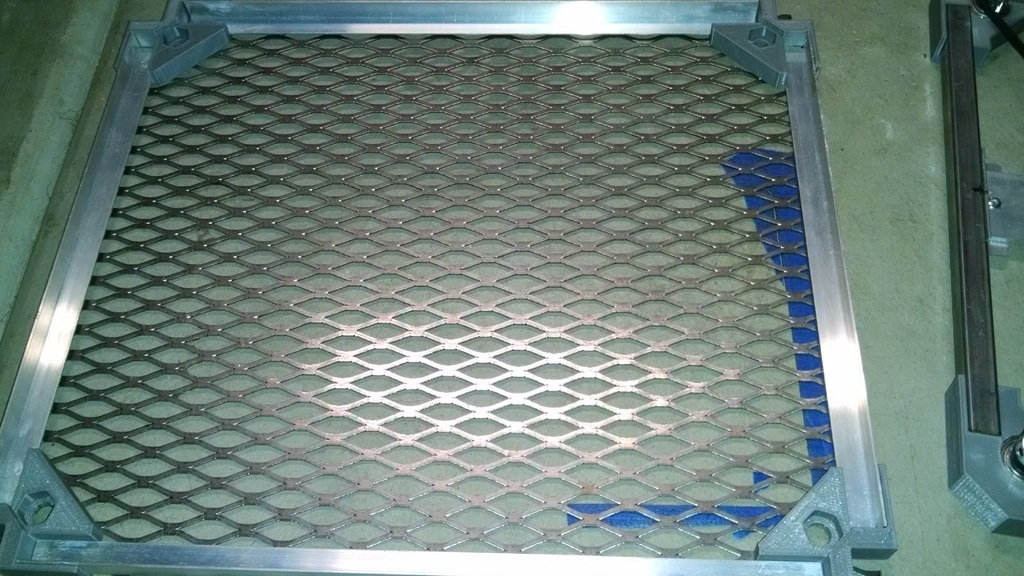
FRAME:
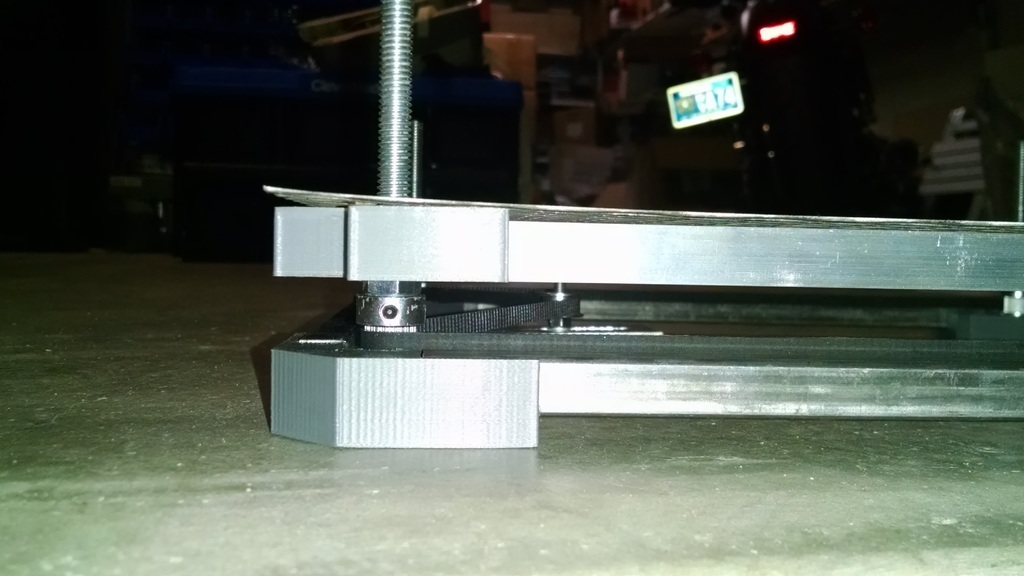
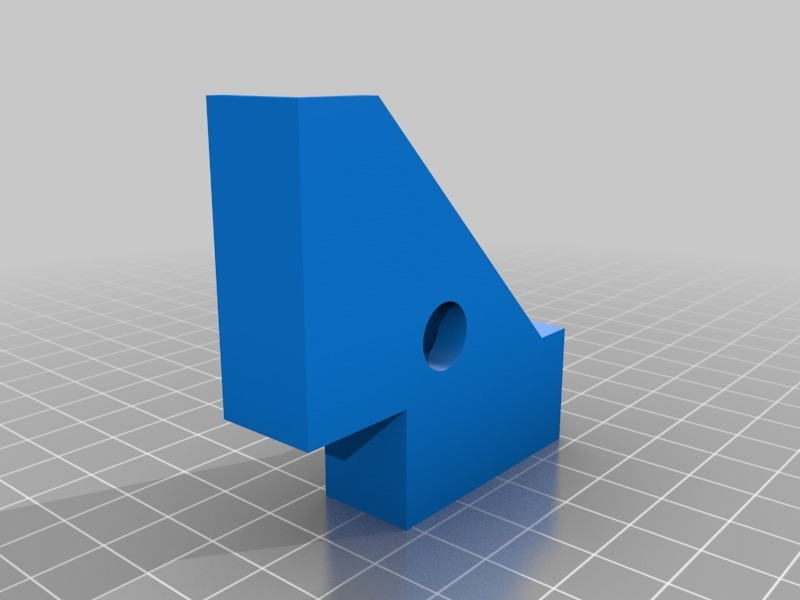
I changed the frame from an aluminum angle to a steel square tube. IMO, this is a must do. The aluminum angle is just a little to flexible for me. With the square tubing, the frame is rock solid (as much as it can be anyway :-). ALSO, in my pictures, the top frame is aluminum angle, but I switched to square tubing to eliminate all flexing and give the top bed a little more weight so it "sits" on the nuts that travel up/down the threaded rods a little better. Too light, and the bed may slip off of the nuts. I did not glue my corner brackets to the nuts because I wanted it to be removable. I have not had any issues.
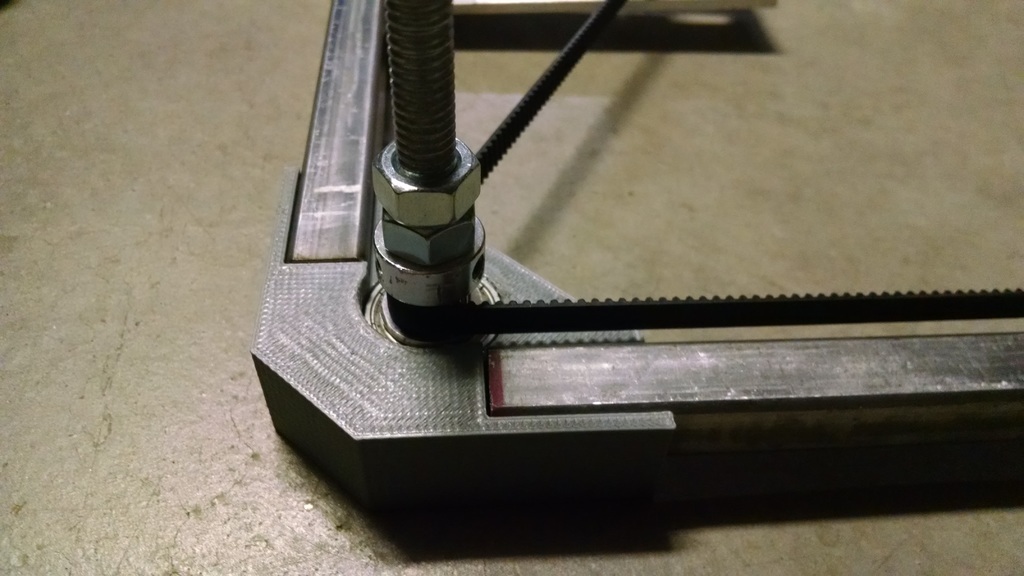
THREADED ROD/BEARING:
Note the route I took to secure the bearings in my design. I needed a way to get the bearings tight on the rod, so I used extra nuts. The nuts do not get in the way of the bed operation. ALSO NOTE: I just used a Dremel and cut a slot in the top of one of the threaded rods and use a screwdriver to adjust the bed height. It is almost too easy!
All of the other dimensions are in the original design. You may have to adjust the length of your square tubing by a tad in order to get the bed to fit right. This bed was a TIGHT fit in my machine, but it works great.
SECURING BED TO MACHINE:
I took the extra time to bolt the bed to my laser. I just marked for one hole in the front and back bottom square tubing pieces and drilled a hole in each. Then I moved the bed without the top to the laser, marked where the holes were to line up on the bottom of the laser and drilled them out. Then I just used two bolts with wing nuts to secure the bed in place. This keeps the bed from moving around and keeps your bed from moving after you aligned your work on the laser bed.
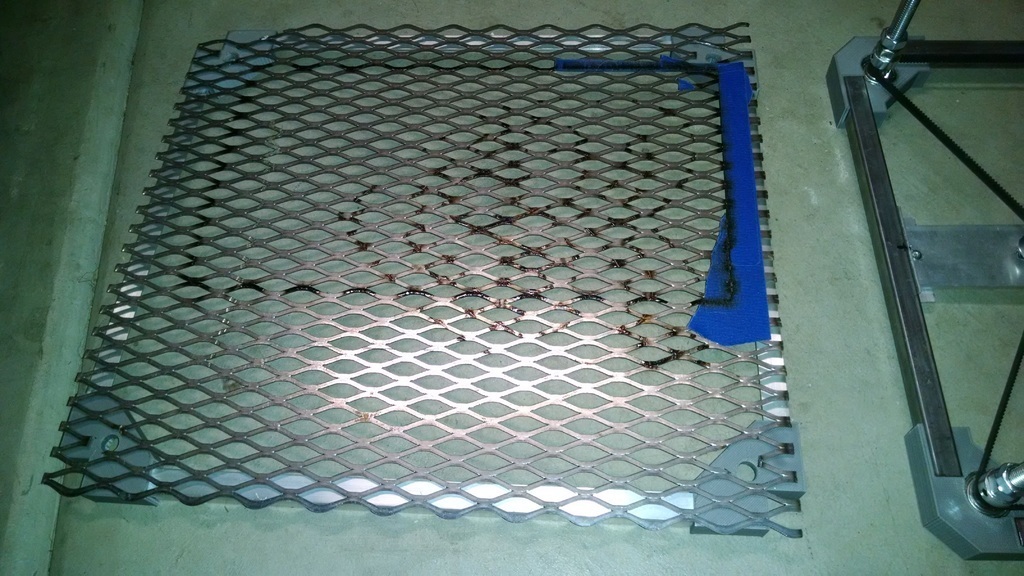
EXPANDED MESH:
I just used some tape to secure the mesh bed to the top square tubing frame. It has not failed and keeps it pretty secure. I did use super glue initially and later had to remove the bed.... Well, I almost broke my corner brackets and bent the mesh bed trying to pry them apart. Hence the tape I use now.
BELT:
OK, I could not find a solid solution to securing the belt together to make one continuous loop. I ended up cutting a small strip of belt and cutting the teeth off of it to make it thinner. Then I grabbed the two ends of my belt that is going in the machine and matched the teeth up with another small piece of belt so the teeth will mesh fine with the pulleys. Once you do that, grab your stripped down piece of belt and apply a small amount of super glue and stick it on the back side of the belt that is going in your machine. Once you do that, then stick it in a vice or something to clamp it down while the glue dries. Don't apply too much pressure as this will make the belt squish out and once it dries, the teeth will not mesh well with the pulleys (don't ask...). Also, don't tension the belt too tight once you have it in your machine. If you use my method of securing your belt together, there will be a small section that is slightly thicker due to the added belt to hold the two ends together. That piece will go over the tensioner pulley and add a bit more tension due to the added thickness of the belt where it is glued together.
FEELING FROGGY?
If regular threaded rod isn't good enough, get yourself some ACME threaded rod or similar and use ACME threaded nuts instead of the nuts I used on the threaded rod. Of course, you will have to modify the STL's...
:format(webp)/https://fbi.cults3d.com/uploaders/31546746/illustration-file/4d3d70c6-8efe-49a1-837b-f9e0e4ec7044/IMG_20170318_201426306.jpg)


/https://preview3d-images.cults3d.com/wuokyi0jqxidd4433jyo7f768j9t)
/https://preview3d-images.cults3d.com/egazqhd3fxxfwoc0pncwmu7yrise)
