Skip to content

Skull V2 - Commercial License

Advertising
Advertising
?
Creation quality: 5.0/5 (1 vote)
Evaluation of members on the printability, utility, level of detail, etc.

  • 623 views
  • 2 likes
  • 3 downloads

License
3D design format
STL Folder details Close
  • Skull-Vase_V2.stl
  • Skull-Vase_V2_TOP-ADDON-with-PROTRUSION.stl
  • Skull-Vase_V2_TOP-ADDON.stl
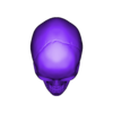
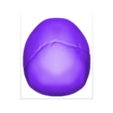
  • Skull-Vase_V2_TOP.stl
  • Skull_V2_FULL_not-for-vase-mode.stl

Learn more about the formats

Publication date 2023-12-11 at 21:36
Design number 1636856

3D printer file info

3D model description

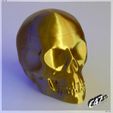
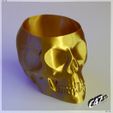
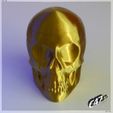
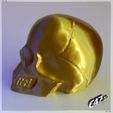
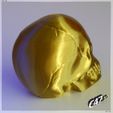
Second version of my Skull that is easly printable in Vase mode
Here you are buying a Commercial License
More about license above 'Print settings' section

Skull V2 for Personal Use only is here for free:
https://cults3d.com/en/creations/skull-vase-v2

Test it before you buy a license
There is no change in the models between this two


  • Halloween decoration
  • pot for a plant
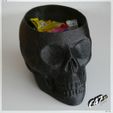
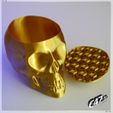
  • bowl for candies (with optional top cover)
  • led lamp
  • tealight cover (use bigger size model and not very hot candles)
  • etc.

Easy and fast print

Original model size is 112x169x106mm (133mm high with top or in Full mode)
Real life skull size should be around 135-145% of this model
I made one print 150% and it look bigger than my head (wich is rather typical size)


Check my Halloween Collection for V1 version and other models
https://cults3d.com/en/design-collections/c47/halloween


Sculpted in Blender 3D
I've made some simplifications to this model like filling up holes and reducing some angles to be printable in Vase mode
So it's not anatomical correct model but it's much closer to it than my first version :)

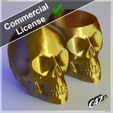
Printed on Voron 0.1 with Devil Design's Silk Gold PLA
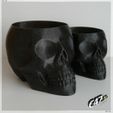
and JG Maker A1 with Devil Design's Galaxy Black PLA


Video:
https://www.instagram.com/p/CxVHUEDtICn/

Video with bigger Skulls
https://www.instagram.com/p/CxaonOItD_R/


With this license you are authorized to:

Print β€” sell and distribute 3D prints of this 3D models and its adapted models for any use, including commercial use, in unlimited quantities;
Adapt β€” remix, transform and create from the digital files of the 3D model. For example you can add text or your logo to the bottom of model

What is not allowed:

No sharing of your 3D prints, nor adaptation of the 3D model without attribution.
No distribution, sale, donation or exchange of the digital files of the 3D model and the digital files of 3D models adapted from it.


If you will need any help with this models just write here or on my Instagram

If you want to sell just few prints or want to sell it for some charity you can write to me too - this refers to every models of mine


3D printing settings

Use Vase mode (spiralize outer contour) for Skull Vase for best looking print
You can also print it in normal mode with few wals, no infill and no top layers if you want to make a stronger print (especially if you want a big print with not so big nozzle)

No supports needed

'FULL' model should be printed only in normal mode with top layers and some infill

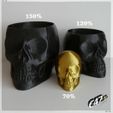
On photos there is a 70% size model printed with 0.4mm nozzle and line width and 0.1mm layer height - I recommend to use highier line width (around 150% size of a nozzle), I just tested if there will be any holes in the print with such small lines
Bigger Skulls, 120% and 150% size printed with 1mm nozzle with 1,2 and 1,3mm line width and 0.5mm layer height


TOP LID SETTINGS
I recommend to print it with no bottom layers - it will use less flament and will be lighter
Other options: 2 walls and some infill (I used 7% gyroid)
Set top layers depending on the layer height (the smaller the layer height the more should be top layers to print better) - I used 6 top layers with 0.1mm layer height and 70% model size

IMPORTANT
TO MAKE A TOP LID you will need to add two TOP models to your slicer
Skull-Vase_V2_TOP
Skull-Vase_V2_TOP-ADDON or Skull-Vase_V2_TOP-ADDON-with-PROTRUSION
Ignore model errors notifications! - models are with a non-printable rectangle to help you line up both models (just put them in the same position)

Skull-Vase_V2_TOP-ADDON-with-PROTRUSION is little thicker in some parts wich should help keeping top and vase parts together
It was not tested but should work better than simple TOP-ADDON
I recommend to try it, In the worst case you will just need to file down or cut off some plastic around

You can also print the 'TOP' model without 'ADDON' and glue in some kind of a hinge or piece of plastic ribbon etc.
Be creative :-)

The reason it is in two parts is that the 'TOP-ADDON' model can be easly modified depenging on the Skull Vase printing settings
The highier line width of Skull Vase the smaller this part should be to fit - you will need to use 'XY size compensation' (PrusaSlicer) or 'Horizontal expansion' (Cura) settings - see how to do it below

With 100% model size and 0.6mm line width (so for example 150% flow with 0.4mm nozzle) you don't need to change anything
But for example with the same size but 1mm line width you will need to set the TOP-ADDON 'XY comp.'/'Horizontal exp.' to -0.2mm (it's (1mm-0.6mm)/2)

Here is how to do it:
PrusaSlicer
Right-click on 'TOP-ADDON' model >>> Add setting >>> Advanced >>> XY Size Compensation

Additional recommended option
Right-click on 'TOP-ADDON' model >>> 'Layers and Perimeters' >>> Set top layers to 0
Be sure to have 'Extra perimeters on overhangs' turned OFF!

Cura
Select 'TOP-ADDON' model >>> Click on 'Per model settings' icon on the left >>> Select settings >>> Select 'Horizontal expansion' and set it

Additional recommended option
Select 'TOP-ADDON' model >>> 'Per model settings' icon >>> Select settings >>> Select 'Top layers' and set it to 0

I recommend to print just a few layers first and test if it fits the Skull Vase
You can even pause the print (if you have printer that will move extruder to rest spot then) and try to put on the Skull Vase upside-down. If it will be too loose cancel the print or add some plastic to sides later (with glue or 3d pen), if parts doesn't fit you should cancel the print and change XY compensation setting or just use a file or sandpaper after the print to file down some plastic

--

Advertising


Issue with this design? Report a problem.

Would you like to support Cults?

You like Cults and you want to help us continue the adventure independently? Please note that we are a small team of 3 people, therefore it is very simple to support us to maintain the activity and create future developments. Here are 4 solutions accessible to all:

  • ADVERTISING: Disable your banner blocker (AdBlock, …) and click on our banner ads.

  • AFFILIATION: Make your purchases online by clicking on our affiliate links here Amazon.

  • DONATE: If you want, you can make a donation via Ko-Fi πŸ’œ.

  • WORD OF MOUTH: Invite your friends to come, discover the platform and the magnificent 3D files shared by the community!


Sharing and downloading on Cults3D guarantees that designs remain in makers community hands! And not in the hands of the 3D printing or software giants who own the competing platforms and exploit the designs for their own commercial interests.

Cults3D is an independent, self-financed site that is not accountable to any investor or brand. Almost all of the site's revenues are paid back to the platform's makers. The content published on the site serves only the interests of its authors and not those of 3D printer brands who also wish to control the 3D modeling market.

100% secure payment by credit card, PayPal, Apple Pay, Google Pay, etc.
View all payment options.