Skip to content

XYZ Davinci 1.0a - creality Ender 3 hot end conversion

Advertising
Advertising
?
Creation quality: 0.0/5 (0 votes)
Evaluation of members on the printability, utility, level of detail, etc.

  • 364 views
  • 1 like
  • 1 download

License
3D design format
Folder details Close
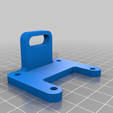
  • Creality_Back_end.stl
  • Creality_Extruder.stl
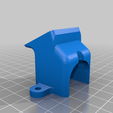
  • Fan_Assembly.stl

Learn more about the formats

Publication date 2023-12-21 at 03:45
?
Published to Thingiverse on: 2020-06-12 at 15:40
Design number 1656914

3D printer file info

3D model description

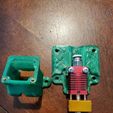
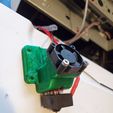
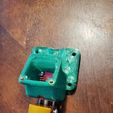
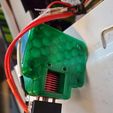
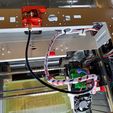
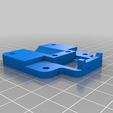
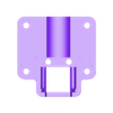
Here is a bolt on conversion for adding a Creality Ender 3 hot end on a Davinci XYZ 1.0 or 1.0a. The motherboard will have to be flashed to Repetier 0.92, I'm not sure if the stock setup will work at all. In my situation I'm running a Ramps 1.4 board because I accidently toasted my main motherboard from cleaning the nozzle with a brass brush, which shorted out the heater element wires. Ooops.

Keep in mind the original printer uses a direct drive system, but I was getting frustrated with clearing jams and taking apart the whole hot end and the stepper motor. I ran the E3Dv6 all metal hot end which had a ton of jams, primarily with plastic sticking to the throat in the heat break. I should of bought a titanium throat with a POLISHED inside. The several I tried didnt work for long.

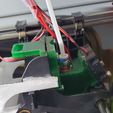
So I converted this over to a Bowden Setup, which in the Davinci 1.0a, the holes were already pre drilled on the frame, so it was a simple bolt on. If you have a 1.0 youll need to make an adapter bracket to move the stepper motor over to. This can be found here - https://www.thingiverse.com/thing:1510425

I did the conversion after E3Dv6 hot end, so the fan used in this design is the 30x30 original E3D fan in my build.

Heres what you need -
Creality Ender 3 hot end
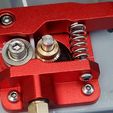
Creality MK-8 aluminum extruder
30x30 fan
PTFE tubing
Misc M3 bolts.

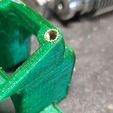
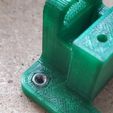
The screw holes are M3, which you can use a long M3 screw and use a nut on the backside, or use a M3 nutsert. I used these (uxcell a16041800ux0824 M3 x 3 mm Female Thread Brass Knurled Threaded Insert Embedment Nuts) on Amazon, which have to be applied with a soldering iron to heat up the brass and you press it into the plastic and its a permanent solution. If you dont have those, I've had success just heating up a soldering tip and pressing in a M3 nut, it holds just fine!

This is a work in progress and I will be updating it per feedback from you guys.
Also I cant figure out why Thingiverse uploads my pictures sideways, its normal on my computer when I upload it.

Advertising


Issue with this design? Report a problem.

Would you like to support Cults?

You like Cults and you want to help us continue the adventure independently? Please note that we are a small team of 3 people, therefore it is very simple to support us to maintain the activity and create future developments. Here are 4 solutions accessible to all:

  • ADVERTISING: Disable your banner blocker (AdBlock, …) and click on our banner ads.

  • AFFILIATION: Make your purchases online by clicking on our affiliate links here Amazon.

  • DONATE: If you want, you can make a donation via Ko-Fi πŸ’œ.

  • WORD OF MOUTH: Invite your friends to come, discover the platform and the magnificent 3D files shared by the community!


Sharing and downloading on Cults3D guarantees that designs remain in makers community hands! And not in the hands of the 3D printing or software giants who own the competing platforms and exploit the designs for their own commercial interests.

Cults3D is an independent, self-financed site that is not accountable to any investor or brand. Almost all of the site's revenues are paid back to the platform's makers. The content published on the site serves only the interests of its authors and not those of 3D printer brands who also wish to control the 3D modeling market.

100% secure payment by credit card, PayPal, Apple Pay, Google Pay, etc.
View all payment options.