3D model description
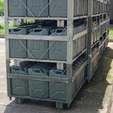
This picture came across my desk and I thought it would be a good model to work up.
The identical version for the 1:16 crowd can be found here
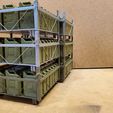
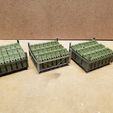
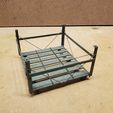
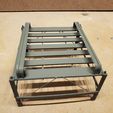
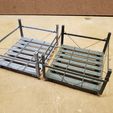
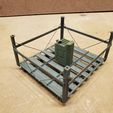
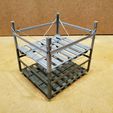
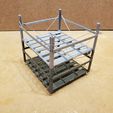
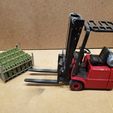
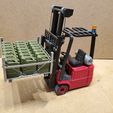
A pallet holds 21 cans (3 rows of 7), is fork transportable and is stackable. (ignore the badly printed cans, it's not the stl)
You'll need a total of 214mm of .06mm diameter steel wire for the diagonal bracing for each pallet.
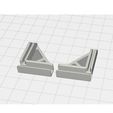
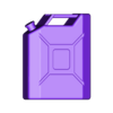
This model includes my version of a 1:14 Jerry Can (shown) and a printable Corner Jig for use during assembly.
Drops in at a total of 18gr of filament per rack.
Dimensions: Width 87mm x Length 96mm x Height 55mm
Rack 'em, pack 'em and stack 'em.
3D printing settings
Pallet Printing Instructions
PLA+ (recommended) on FDM i3 machines.
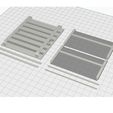
Arrange parts on the build plate as illustrated.
Copy/Mirror the Glue Jig to get a matched pair for an End. They are reusable so you'll only need that one pair.
For each pallet you'll need:
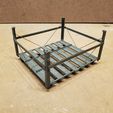
1 Base
2 Ends
2 Crossrails
2 Can Dividers.
Sliced in Cura 5.5.0 with these Settings:
Layer Height: 0.15
Walls: 4
Infill: 20%
Temps: 220/55
Cooling: 25% after the 1st Layer
Adhesion: Skirt
Support:
a. For the Base: Normal, Everywhere, Pattern Cross, Density 15%, Enable Support Brim
b. For the Ends: Normal, Everywhere, Pattern Grid, Density 20%, Enable Support Brim
Assembly
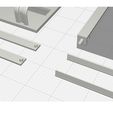
Some steps are illustrated for clarity.
Remove Support from the Ends and the Base. On the Ends, carefully peel it off in one piece. On the Base, use needle-nose pliers to collapse and twist/remove each cross individually from the outside. Take your time.
Drill out the 2 holes in the sides of the legs of each End to 1.5mm
Drill out the 2 holes in the tops of the legs of each End to 2mm
Check the fit of each End's bottom pegs into the top of the other End's upper holes: they should fit easily. Clean up the pegs as needed.
Check the fit of the Crossrail pegs into the holes in the sides of the Ends; they should fit easily and the Crossrail should lay flat against the sides of the Ends. Clean up the pegs as needed.
Test-fit the Base corners into each End's pockets, ensuring that the Base corners fully insert and touch both inner faces of the pocket. Clean up as needed.
Test fit the pair of Glue Jigs over the (dry-assembled) Base and End. The Jigs should slip smoothly onto the assembly with no resistance. File/sand the Jigs as needed. Disassemble the Base and End.
Using CA, glue the 2 Can Dividers down onto the Base in the designated grooves. (CA accelerator from here on in is most helpful)
Put a small drop of CA into each corner pocket of one End, insert the Base into the End until it bottoms in each pocket, then slip the Glue Jigs over the appropriate corners to maintain alignment until the glue dries. Repeat for the other End.
Put the Glue Jigs on one long side. With the assembly on a long side and the Glue Jigs up, apply a drop of CA to the holes in the Ends, then place the Crossrail on top of it, aligning the pegs in the holes and ensuring it is flat against the Ends. After the glue dries, remove the Jigs, and repeat for the other long side.
Cut four (4) lengths of .06mm diameter steel wire to 53mm long and another four (4) lengths to 51mm long.
Arrange the pallet on one long side.
a. Place two (2) 53mm long wires into position in the grooves in the Ends and Base as shown.
b. Apply CA to the 4 positions where the wires land in the grooves.
c. Flip the pallet over and apply CA to where the wires touch the back of the Crossrail.
Repeat Step 12a, b + c for the other long side using the two (2) remaining 53mm long wires.
Arrange the pallet on one short side.
a. Place two (2) 51mm long wires into position in the grooves in the Ends and Base.
b. Apply CA to the 4 positions where the wires land in the grooves.
c. Flip the pallet over and apply CA to where the wires touch the back of the Crossrail.
Repeat Step 14a, b + c for the other short side using the remaining two (2) 51mm long wires.
Jerry Can Print Settings
Arrange on build plate as illustrated.
Layer Height: 0.15
Walls: 2
Infill: 10%
Temps: 220/55
Cooling: 25% after the 1st Layer
Support: Normal, Everywhere, Overhang Angle 75, Pattern Cross, Density 10%
Adhesion: Brim
The cans are hollow and require no support. The specified support is strictly for the handle up top.
If you're planning to print 21 cans in one go, I recommend also using Z-Hop When Retracted and Avoid Printed Parts When Traveling.

/https://fbi.cults3d.com/uploaders/16680056/illustration-file/2ac9496d-0138-4bfc-810d-b62a16ad3728/Stacked-Racks.png)
