Skip to content

WITBOX2 inductive sensor to TOUCH-MI

Advertising
Advertising
?
Creation quality: 0.0/5 (0 votes)
Evaluation of members on the printability, utility, level of detail, etc.

  • 161 views

License
3D design format
Folder details Close
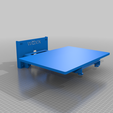
  • touchmi_support_witbox.step
  • touchmi_support_witbox.stl
  • witbox1_centre.stl

Learn more about the formats

Publication date 2023-12-23 at 00:00
?
Published to Thingiverse on: 2023-12-22 at 22:19
Design number 1660860

3D printer file info

3D model description

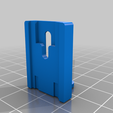
Mon capteur inductif de ma witbox 2 ayant presque rendu l’âme ( imprimante de fin 2016 avec au moins 6000 h) , détection à environ 10 mm du plateau au lieu de qq mm.
le capteur BQ witbox 2 n'étant plus dispo, je voulais au départ mettre un BLtouch comme sur la witbox 1 mais j'aurais dû rajouter 2 fils de plus le long de la nappe.
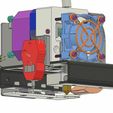
Je me suis rabattu sur le capteur TOUCHMI qui a une connexion 3 fils comme le capteur d'origine avec comme inconvénient que le palpeur se s'active avec un aimant.
Comme j'étais deja sous Marlin 2.091, je n'ai dû modifier que quelques valeurs ds le fichier config.h.

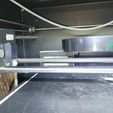
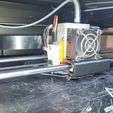
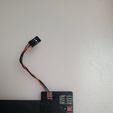
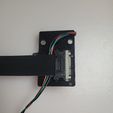
On peut souder les fils sur les pattes du connecteur ou le brancher directement dessus, il faut rajouter un aimant très fin (1mm) comme sur la photo.

L’impression n’est plus que de 210*295 ( au lieu de 297 mm pour ne pas déclencher le TOUCH-MI)

https://youtu.be/XYQ5WNhyFTI


My inductive sensor from my witbox 2 is out of order (printer from the end of 2016 with at least 6000 hours), detection approximately 10 mm from the plate instead of a few mm.
the BQ witbox 2 sensor is no longer available, I initially wanted to put a BLtouch like on the witbox 1 but I would have had to add 2 more wires along the cable.
I fell back on the TOUCHMI sensor which has a 3-wire connection like the original sensor with the disadvantage that the probe is activated with a magnet.
As I was already running Marlin 2.091, I only had to modify a few values in the config.h file.

You can solder the wires on the connector legs or connect it directly to them, you need to add a very thin magnet (1mm) as in the photo.

The print is only 210*295 (instead of 297 mm so as not to trigger TOUCH-MI)

Gcode start for Prusaslicer.

M104 S210
G28 ; home all axes
G29; bltouch niveau auto
M109 S210
G1 X10 Y0 F2000; move X/Y to min endstops
G92 E0 ; zero the extruded length
G1 Z0.3 ; lower
G1 X35 E30 F225 ; purge nozzle with 30mm of filament
G1 Z1
G1 X100 Y20 F2100
G92 E0 ; zero the extruded length again
M117 Printing...

Advertising


Issue with this design? Report a problem.

Would you like to support Cults?

You like Cults and you want to help us continue the adventure independently? Please note that we are a small team of 3 people, therefore it is very simple to support us to maintain the activity and create future developments. Here are 4 solutions accessible to all:

  • ADVERTISING: Disable your banner blocker (AdBlock, …) and click on our banner ads.

  • AFFILIATION: Make your purchases online by clicking on our affiliate links here Amazon.

  • DONATE: If you want, you can make a donation via Ko-Fi 💜.

  • WORD OF MOUTH: Invite your friends to come, discover the platform and the magnificent 3D files shared by the community!


Sharing and downloading on Cults3D guarantees that designs remain in makers community hands! And not in the hands of the 3D printing or software giants who own the competing platforms and exploit the designs for their own commercial interests.

Cults3D is an independent, self-financed site that is not accountable to any investor or brand. Almost all of the site's revenues are paid back to the platform's makers. The content published on the site serves only the interests of its authors and not those of 3D printer brands who also wish to control the 3D modeling market.

100% secure payment by credit card, PayPal, Apple Pay, Google Pay, etc.
View all payment options.